You know those moments when you just need a little something chocolatey – but don’t want to fuss with slicing a big pan of brownies or decorating fancy cupcakes? That’s where brownie cupcakes come in, and oh my goodness, they’re a treat worth making again and again.
These little bites bring together the best of both worlds: the rich, fudgy goodness of a brownie baked into a tidy, handheld cupcake. They’re simple, satisfying, and honestly – just plain fun to make (especially if you’ve got little helpers nearby ready to lick the spoon).
In this post, I’ll walk you through everything you need: the ingredients that give them that perfect texture, step-by-step baking instructions, easy swaps, fun ways to serve them, and how to keep them fresh for later. Whether you’re baking for a weekend treat or a sweet surprise, this guide has you covered.
Why You’ll Love These Brownie Cupcakes
These brownie cupcakes are everything you want in a chocolate treat – rich, fudgy, and so easy to make. They’re the kind of dessert you can whip up on a weeknight or bake ahead for a special occasion.
- Family-Friendly Fun – Kids love helping stir the batter and sprinkle a little extra chocolate on top.
- Quick and Easy – Whether you start with scratch or use brownie mix cupcakes, you’ll have them in the oven fast.
- Perfect for Any Occasion – Dress them up with frosting or keep them simple for a cozy snack.
- Customizable – Try brownie cheesecake cupcakes or a swirl of caramel to make them your own.
There’s nothing better than pulling a warm tray of these from the oven. Let’s gather what you’ll need to get started!
Brownie Cupcakes Ingredients You’ll Need (Plus Optional Add-Ins)
Let’s talk ingredients – the heart of any good recipe. These brownie cupcakes come together with everyday pantry staples, and each one plays a small but mighty role in building that rich, chocolatey flavor we all adore. From creating the fudgy texture to adding those little flavor bursts, every ingredient here has a job to do.
Here’s what you’ll need for one dozen perfectly fudgy brownie cupcakes:
Basic Ingredients
- ½ cup unsalted butter – Melted with chocolate chips for a rich, smooth base that brings everything together.
- 1 cup semisweet chocolate chips – Adds deep chocolate flavor and makes the cupcakes extra decadent.
- 1 cup granulated sugar – Creates structure and that signature crackly top.
- ¼ cup packed brown sugar – Adds a little moisture and a caramel-like undertone.
- 2 large eggs (room temperature) – Help bind everything and create that chewy texture.
- 1 teaspoon pure vanilla extract – Rounds out the flavor with a warm, sweet aroma.
- ¾ cup all-purpose flour – Keeps things sturdy without drying out the crumb.
- 2 tablespoons unsweetened cocoa powder – Boosts chocolate intensity without extra sweetness.
- ¼ teaspoon fine sea salt – Balances all the flavors and keeps things from tasting flat.
- ¼ cup mini chocolate chips – Stirred in at the end for gooey, melty bits throughout each bite.
Optional Add-Ins
Want to make your brownie cupcakes recipes your own? Try these ideas:
- Chopped pecans or walnuts (¼ cup) – For a bit of crunch and a toasty finish.
- Caramel chunks or soft caramels (chopped into quarters) – Pop a piece into the center of each cupcake for a molten surprise.
- A sprinkle of flaky salt – Adds contrast and makes each bite pop with flavor.
Pro Tip: Craving a twist? Add a pinch of cinnamon for a cozy Mexican-inspired vibe, or swap the chocolate chips for a mix of white and dark chocolate to give them a bit of flair. You can even stir in crushed freeze-dried raspberries for a fruity twist!
Now that your ingredients are all set, it’s time to bring them together in the coziest, most chocolatey way possible – let’s bake!
How to Make Brownie Cupcakes Step by Step
Now the fun begins – let’s turn that bowl of rich, glossy batter into a dozen little bites of chocolate heaven. Making brownie cupcakes is delightfully simple, and I’ll walk you through it like we’re baking together in the kitchen, side by side.
Step-by-Step Instructions
1- Preheat and Prep
Set your oven to 350°F (175°C) and line a 12-cup muffin tin with paper cupcake liners. This keeps cleanup easy and makes sure your cupcakes come out cleanly without sticking.
2- Melt Butter and Chocolate
In a microwave-safe bowl, combine the ½ cup unsalted butter and 1 cup semisweet chocolate chips. Microwave in 30-second bursts, stirring after each, until the mixture is melted and smooth. Let it cool slightly – just enough so it won’t scramble the eggs when added.
3- Add Sugars for Texture
Whisk in 1 cup granulated sugar and ¼ cup brown sugar until fully combined. The mixture will look shiny and thick, almost like chocolate syrup. Once it looks thick and glossy like syrup, you’re ready to move on.
4- Incorporate Eggs and Vanilla
Add 2 large eggs, one at a time, mixing thoroughly after each addition so everything stays smooth and blended. Then pour in 1 teaspoon vanilla extract. The batter should become glossy and smooth, and you’ll see it start to thicken slightly.
5- Fold in the Dry Ingredients
Sift ¾ cup all-purpose flour, 2 tablespoons cocoa powder, and ¼ teaspoon salt directly over the wet mix. Gently fold everything together with a spatula – don’t overmix. Folding gently helps the batter stay light, so your cupcakes come out soft and tender.
6- Stir in the Fun
Add ¼ cup mini chocolate chips (and any optional add-ins you like), folding them in just until they’re evenly distributed. This is when your batter really starts to look irresistible.
7- Scoop and Fill
Using a cookie scoop or large spoon, fill each cupcake liner about ⅔ full. The batter will be thick, so use your spoon to nudge it into place if needed.
8- Bake Until Just Set
Place the muffin tin in the center of the oven and bake for 18 to 20 minutes. You’re looking for slightly domed tops with a crackled surface. A toothpick inserted just off-center should come out with moist crumbs, not wet batter.
9- Cool and Rest
Let the cupcakes sit in the pan for about 5 minutes, just to settle, then gently move them to a wire rack to finish cooling. This keeps the bottoms from getting soggy and helps them set up with that bakery-style finish.
Troubleshooting Tip: If your cupcakes sink a bit in the middle, they may have been underbaked or pulled out too quickly. Just pop them back in for 1–2 more minutes and cool them slowly.
Baking these cupcakes is one of those deeply satisfying kitchen wins – easy enough for a weeknight, but special enough to share with guests.
Now that your kitchen smells like chocolate dreams, let’s explore a few ways to customize and elevate your next batch!
Chef Tips and Brownie Cupcake Variations to Try
Once you’ve baked a batch or two of these brownie cupcakes, you’ll start dreaming up all kinds of ways to make them your own. Here’s where the fun begins – these little treats are wonderfully flexible, and I’ve gathered some tried-and-true tips that’ll help you bake them even better (or mix things up when you’re feeling creative).
Tips for Foolproof Brownie Cupcakes
- Don’t Overbake – Keep a close eye at the 18-minute mark. You’re aiming for a soft center with set edges. A toothpick with a few moist crumbs is perfect.
- Use Room-Temperature Eggs –Cold eggs don’t blend as easily and can affect the texture. Set them on the counter for 20 to 30 minutes before you start mixing.
- Fold Gently Once the Flour’s In – Stirring too much at this stage can make the cupcakes turn out heavy. Just mix until the batter looks smooth and no streaks remain.
- Let Them Rest in the Pan – After baking, give them a 5-minute rest before moving to a cooling rack. This helps them firm up just enough to handle without breaking.
Fun & Easy Variations
- Brownie Cupcakes from Mix Boxes – Use your favorite boxed brownie mix. Just divide the batter into liners and bake for 15–18 minutes. Stir in a handful of chocolate chips or swirl in a little cream cheese to make them feel homemade.
- Brownie Cheesecake Cupcakes – Drop a spoonful of sweetened cream cheese into each cupcake and swirl with a toothpick before baking. The creamy layer adds richness and visual flair.
- Chocolate Brownie Cupcakes with a Crunch – Add ¼ cup of crushed chocolate cookies, chopped nuts, or toffee bits to the batter for texture and flavor contrast.
- Fruity Twist – Fold in a handful of dried cherries or raspberries for a tangy burst that pairs beautifully with chocolate.
- Themed Toppings – Dress them up for holidays with colored sprinkles, mini chocolate hearts, or even a marshmallow pressed on top halfway through baking.
These tips turn a simple bake into a personal creation – because let’s be honest, we all love putting our little spin on a classic.
Once they’re out of the oven and cooled, the next step is serving them up in a way that makes them extra memorable!
Serving Ideas for Chocolate Brownie Cupcakes
When you bake a tray of brownie cupcakes, you’re already winning – now let’s make them shine on the plate. Whether you’re planning a casual snack or something a little more dressed-up, these ideas will help you serve them in fun, creative ways.
Ways to Enjoy & Share
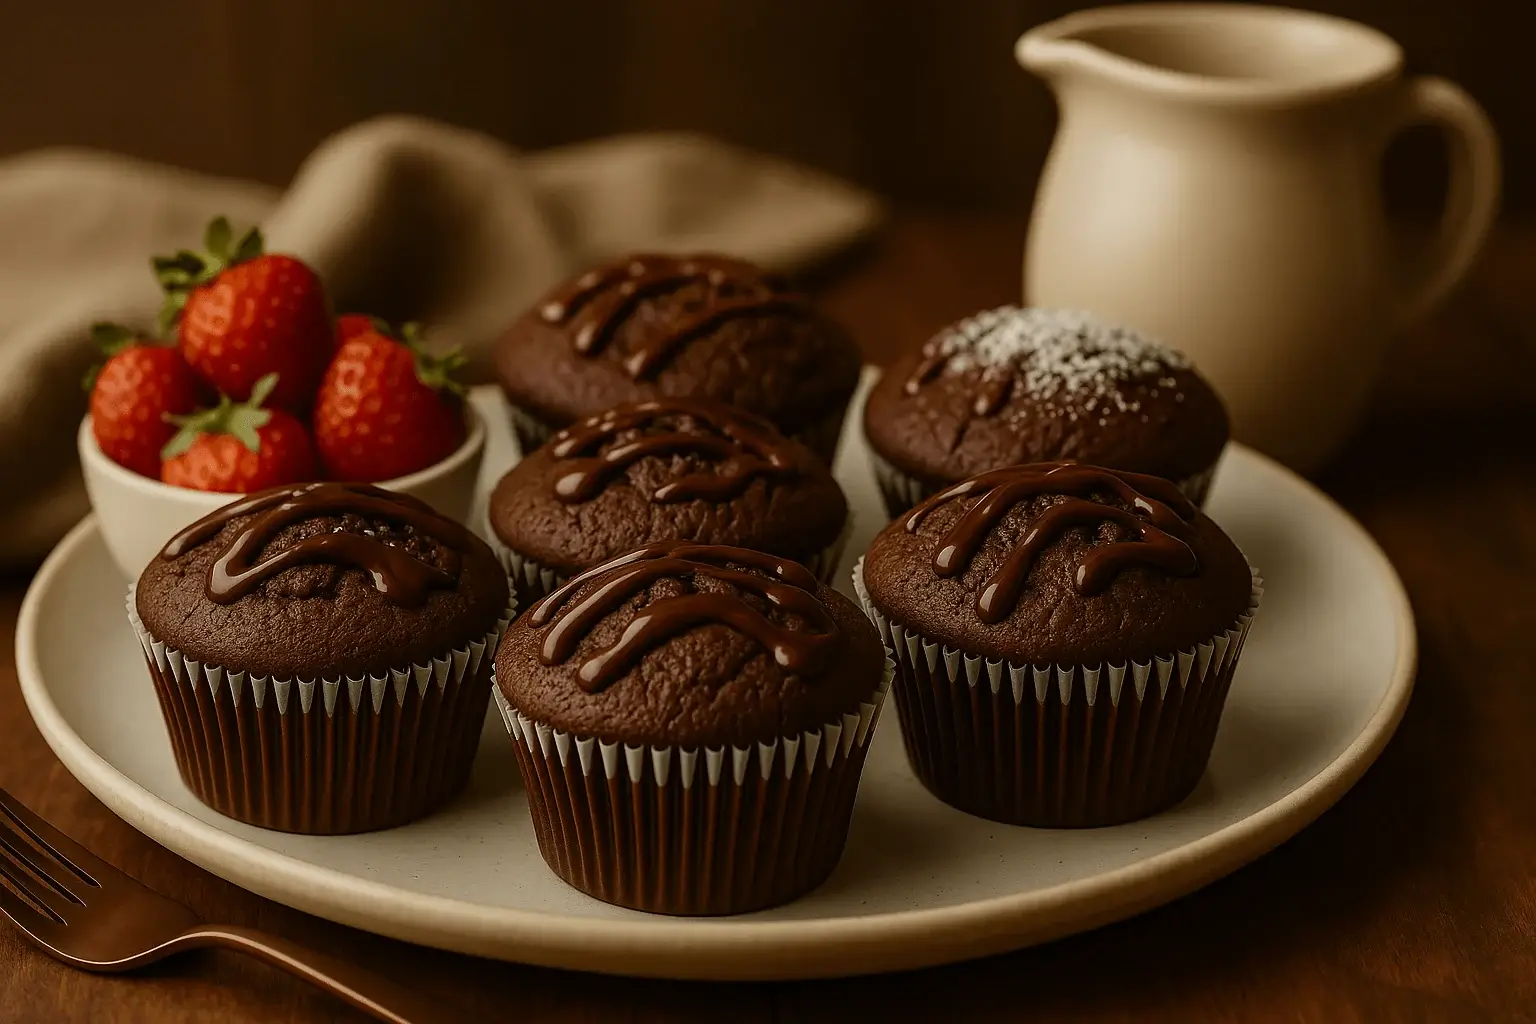
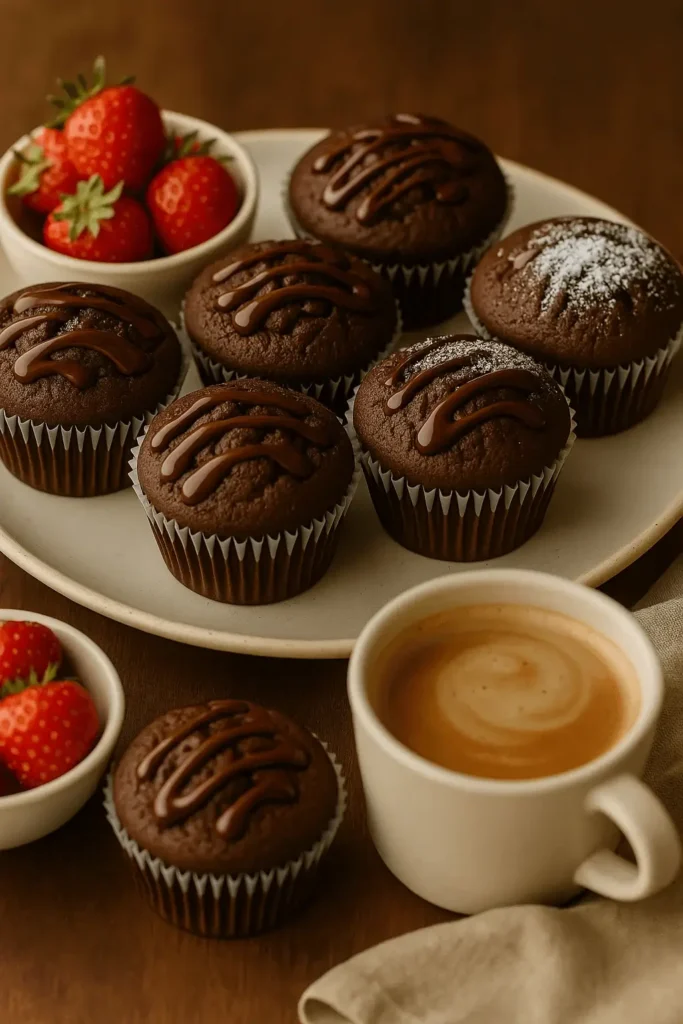
- Afternoon Snack Plate – Pair a warm cupcake with sliced strawberries and a glass of cold milk. Simple and satisfying.
- Birthday Party Treat – Top each cupcake with a swirl of chocolate frosting and a few sprinkles. Add a candle, and you’ve got the perfect party bite.
- Brunch Dessert – Set them on a platter next to fruit kabobs or yogurt parfaits for a sweet brunch bonus.
- After-Dinner Delight – Heat a cupcake for 10 seconds, place it in a bowl, and top with a scoop of vanilla ice cream for a cozy, crowd-pleasing dessert.
- Bake Sale Ready – Wrap each cupcake individually in parchment and twine, then pop them in a basket – they’ll be the first to go.
- Lunchbox Surprise – Tuck one into your kids’ (or your own!) lunchbox for a little pick-me-up during the day.
It’s amazing how something so easy to make can feel so special on the table.
Of course, we all love a fresh batch, but leftovers can be just as wonderful – let me show you how to store them like a pro.
How to Store and Reheat Brownie Cupcakes the Right Way
These brownie cupcakes are perfect for making ahead or saving for later, because let’s be honest, sometimes one just isn’t enough. Keeping them soft and rich is easy with a few simple steps.
How to Store
- At Room Temperature – Once your cupcakes are fully cooled, tuck them into an airtight container and keep them on the counter for up to 3 days. If you’re stacking them, slip a bit of parchment in between to keep those pretty tops intact.
- In the Fridge – If it’s a bit toasty in your kitchen or you want to enjoy them over a few days, pop the cupcakes into the fridge and keep them fresh for up to 5 days. Let them come to room temperature or give them a quick warm-up before serving for the best texture.
Freezing for Later
- Wrap Individually – Once cooled, wrap each cupcake in plastic wrap and place in a zip-top freezer bag. They’ll keep well for up to 2 months.
- Reheating Tips – Thaw at room temperature for about an hour, or microwave for 10–15 seconds to bring back the gooey texture. You can also warm them in a 300°F oven for 4–5 minutes if you prefer a firmer bite.
Whether you’re baking for a party or just stashing a few for yourself, it’s worth taking a little care so every bite feels just as fresh as the day you made them.
More Dessert Recipes You’ll Enjoy
Looking for more fun, flavorful bakes to try after these brownie cupcakes? Here are a few sweet treats you might want to add to your baking list next:
- Chocolate Chip Cupcakes – A classic favorite with gooey chocolate in every bite.
- Gender Reveal Cupcakes – A fun surprise for baby showers or special announcements.
- Mini Cupcakes – Bite-sized treats perfect for parties or gifting.
- Cotton Candy Cake – A colorful, carnival-inspired bake kids will love.
- Vegan Matcha Cake – Lightly earthy and sweet with beautiful green layers.
Fudgy Brownie Cupcakes That Make You Smile
Equipment
- 12-cup muffin tin
- Paper cupcake liners
- Microwave-Safe Bowl
- Mixing bowl
- Whisk and spatula
- Wire cooling rack
Ingredients
- ½ cup unsalted butter
- 1 cup semisweet chocolate chips plus ¼ cup mini chips for folding in
- 1 cup granulated sugar
- ¼ cup packed brown sugar
- 2 large eggs room temperature
- 1 tsp pure vanilla extract
- ¾ cup all-purpose flour
- 2 tbsp unsweetened cocoa powder
- ¼ tsp fine sea salt
Optional Add-Ins:
- ¼ cup chopped pecans or walnuts
- 6 soft caramel squares quartered for centers
- Flaky salt for topping
Instructions
- Preheat oven to 350°F (175°C) and line muffin pan with cupcake liners.
- Melt butter and 1 cup chocolate chips in microwave-safe bowl until smooth; let cool slightly.
- Whisk in sugars until mixture thickens.
- Beat in eggs one at a time, then add vanilla.
- Sift in flour, cocoa powder, and salt. Fold gently with spatula.
- Stir in mini chips and any add-ins.
- Fill each liner about ⅔ full with batter.
- Bake for 18–20 minutes, or until tops are set and a toothpick shows moist crumbs.
- Cool in pan 5 minutes, then transfer to wire rack.
Notes
Key Takeaways
- Brownie cupcakes blend fudgy brownies with easy-to-serve cupcakes.
- Simple ingredients, big chocolate flavor in every bite.
- Great for birthdays, bake sales, or cozy nights in.
- Easy to customize with mix-ins or swirls.
- Store well and reheat beautifully for later enjoyment.
Ready to bake? Let’s wrap up with answers to your most common questions!
Brownie Cupcakes FAQ: Your Top Questions Answered
Can I use a boxed mix to make brownie cupcakes?
Yes, you can! Just prepare the mix as instructed on the box, then divide the batter into a lined muffin tin and bake at 350°F for about 15–18 minutes. For an extra soft texture, try stirring in ¼ cup of plain yogurt or sour cream before baking. It’s a great shortcut when you’re short on time but still want that rich chocolate taste.
Why did my brownie cupcakes sink in the center?
That usually means they were pulled out a bit too soon or cooled too quickly. Be sure to bake until the tops are set and a toothpick inserted off-center comes out with a few moist crumbs. Letting them rest in the pan for 5 minutes before moving them helps lock in structure.
Can I double this recipe for a bigger batch?
Yes, you sure can! Simply use twice the amount of each ingredient and grab two muffin pans. For even baking, rotate the pans halfway through. It’s a great option if you’re baking for a crowd or want to stash a few for later.
How can I tell when brownie cupcakes are ready?
Watch for that shiny, crinkled top, and gently insert a toothpick just off-center. If it comes out with a few sticky crumbs (not wet batter), you’re good to go. Overbaking can dry them out, so check early and keep an eye on them.
Are these okay for nut-free gatherings?
Yes! The base recipe doesn’t include nuts. Just skip any nut-based add-ins, and make sure your chocolate chips are labeled as safe for allergy-sensitive environments if needed.
Can I frost brownie cupcakes?
Of course! They pair wonderfully with chocolate buttercream, a swirl of cream cheese frosting, or a drizzle of ganache. Just let the cupcakes cool completely before adding anything on top so your frosting holds up nicely.
Now that we’ve covered the most common questions, let’s wrap things up with a quick summary of what makes these cupcakes such a joy to bake and share!
Conclusion
There’s just something special about brownie cupcakes – that rich, chocolatey center tucked inside a perfectly portioned bite. They’re fun to bake, easy to customize, and even more fun to share (though no one would blame you for keeping a few just for yourself).
If you gave this recipe a try, I’d love to hear how it turned out for you. Did you add your own twist? Share your thoughts in the comments and leave a quick review – it helps more home bakers find their new favorite treat.
Thanks for baking along with me. Let’s do it again soon!