Sometimes you just want a dessert that feels a little special – something bright, beautiful, and easy to make ahead without turning the oven on. Maybe you’re planning a brunch, a little celebration, or just want to bring a bit of sunshine to the table. That’s exactly where Limoncello Tiramisu comes in.
This lemony twist on a classic favorite is layered with light-as-air cream, soft ladyfingers, and the most refreshing citrus flavor you can imagine. It’s the kind of dessert you make when you want people to smile before they’ve even taken a bite.
In this post, I’ll walk you through every step of the process – from what you need on your counter to how to get those dreamy layers just right. Whether you’re serving it in a big dish or scooping it into pretty cups, this recipe is all about keeping it simple, joyful, and full of flavor.
Let’s get started – because this is one treat you’ll want to make again and again.
Why You’ll Love This Limoncello Tiramisu Recipe

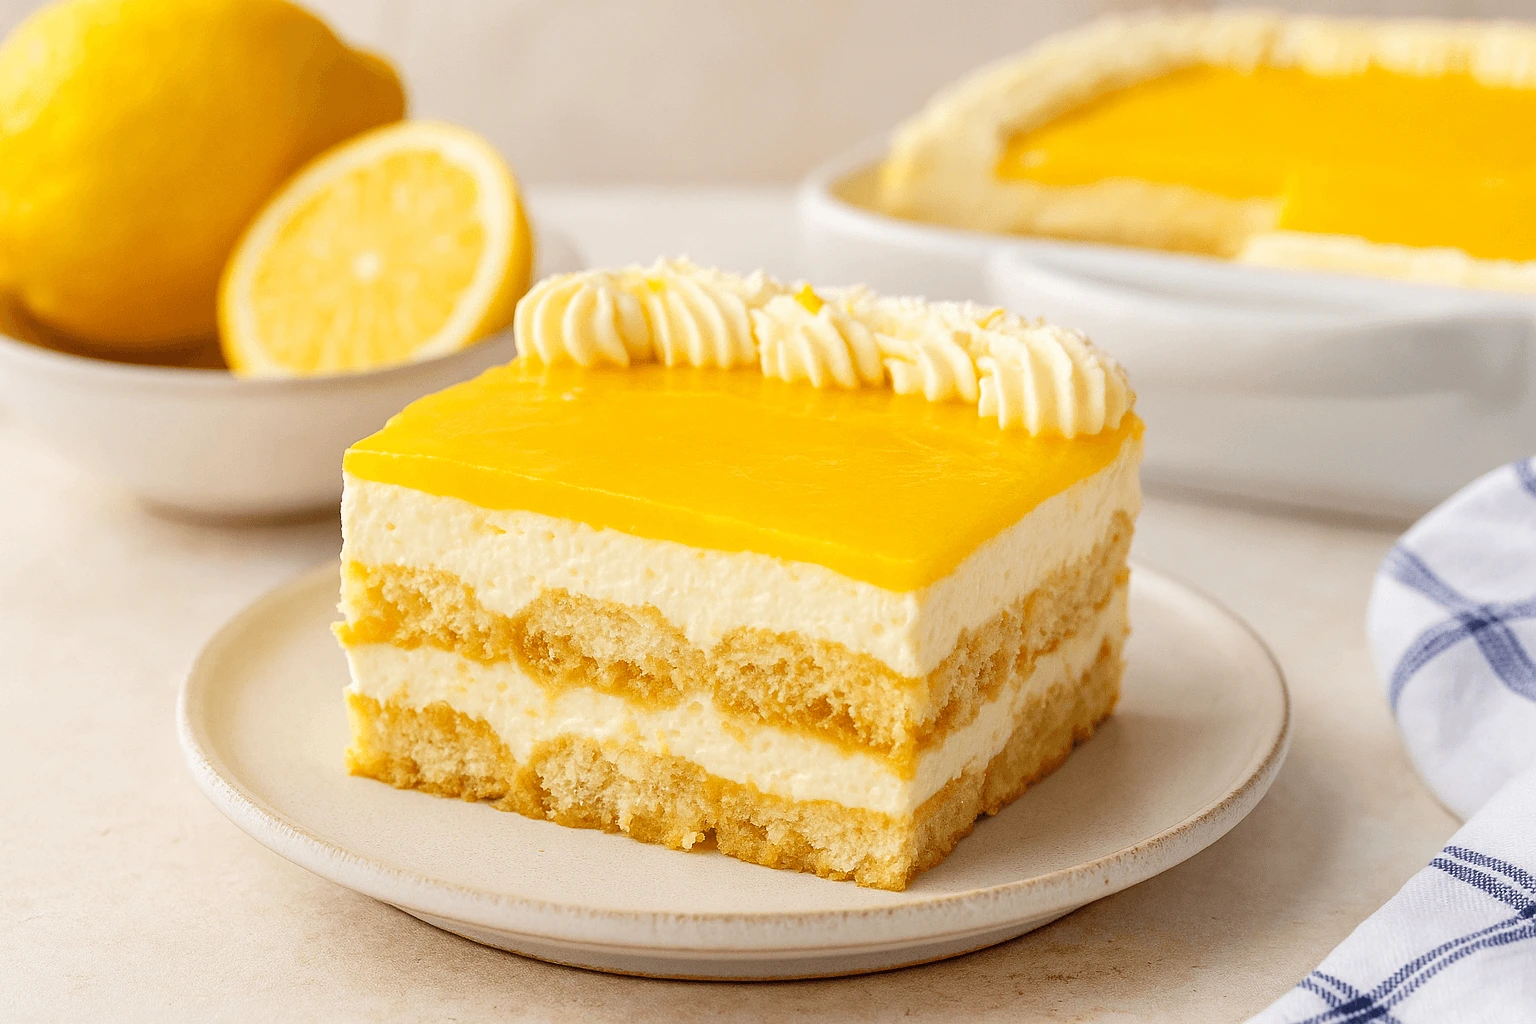
If you enjoy desserts that feel cheerful and effortless, this Limoncello Tiramisu is a wonderful choice. It’s layered with soft ladyfingers dipped in a bright lemon syrup and topped with the creamiest mascarpone filling.
- Family-friendly and alcohol-free so everyone can join in.
- Quick to prepare with no baking – just assemble and chill.
- Customizable with berries, crushed cookies, or extra lemon curd.
- Perfect for any occasion, from birthdays to Sunday dinners.
Every spoonful is a little celebration of fresh citrus and simple joy. Let’s gather your ingredients so you can start layering this sunny dessert!

Limoncello Tiramisu Ingredients and Optional Add-Ins
Let’s talk about what you’ll need to bring this Limoncello Tiramisu to life. Nothing fancy here – just good, dependable ingredients that come together to create a dessert that tastes like sunshine in every bite. I’ll also include a few fun extras if you feel like adding your own twist.
Basic Ingredients:
- Ladyfingers (24 crisp biscuits)
These give us that soft, sponge-like base. When dipped briefly in lemon syrup, they hold their shape while soaking up just enough flavor. - Mascarpone cheese (16 oz)
This is the heart of the cream layer – rich, smooth, and slightly tangy. Let it soften a bit before using so it stirs in smoothly without clumps. - Heavy cream (1 cup, very cold)
We’ll beat this until light and airy to help the filling stay soft and spoonable. - Egg yolks (4 large, pasteurized)
Used for a velvety, rich custard base. Pasteurized yolks keep everything food-safe and creamy. - Granulated sugar (¾ cup total)
Adds sweetness to both the syrup and the filling – just the right amount to balance the lemon’s brightness. - Lemon zest (from 2 lemons)
The zest infuses both the syrup and the filling with pure citrus aroma. It’s the kind of thing you’ll smell across the room. - Fresh lemon juice (⅓ cup)
Adds tang and balances the sweetness. Always go for freshly squeezed – it makes a big difference. - Alcohol-free limoncello syrup (½ cup)
This gives our tiramisu that signature lemony character without any alcohol. It’s fragrant, punchy, and family-friendly. - Lemon curd (¼ cup)
Swirled into the mascarpone for a little extra zing and smooth texture. - Vanilla extract (1 teaspoon)
A background note that brings it all together – warm and familiar. - White chocolate shavings (2 tablespoons)
Sprinkled on top for a pretty finish and creamy-sweet contrast.
Optional Add-Ins:
- Fresh blueberries (½ cup)
Tuck these between the layers for juicy bursts of flavor and color. - Crushed pistachios (2 tablespoons)
Add a light crunch and a pretty green pop on top.
Pro Tip: Want a more Mediterranean feel? Swap the lemon zest with orange, or try layering with crushed amaretti cookies for an Italian touch inspired by some limoncello tiramisu Jamie Oliver versions. It’s an easy way to switch things up and make the dessert your own.
Alright – your ingredients are prepped and ready. Let’s get to layering that citrusy goodness!
How to Make Limoncello Tiramisu Step-by-Step

This part is where all the magic happens – layer by layer. It’s not tricky, but a little attention to detail helps make everything come out just right. Take your time and enjoy the process. Here’s exactly how to make Limoncello Tiramisu from start to finish:
1. Make the citrus syrup
In a small saucepan, combine ½ cup limoncello syrup, ⅓ cup fresh lemon juice, 2 tablespoons sugar, and half the lemon zest. Warm over low heat, stirring until the sugar fully dissolves. The kitchen will smell like lemon candies! Once done, let the syrup cool down completely before using it for dipping.
2. Whisk the yolks and sugar into a custard
Fill a medium saucepan with an inch of water and bring it to a gentle simmer. In a heat-safe bowl that fits snugly over the pan (without touching the water), whisk together the egg yolks and ½ cup sugar. Keep whisking constantly for about 3–4 minutes, until the mixture turns pale, creamy, and thick enough to fall in ribbons. Remove from the heat and let it cool.
Troubleshooting tip: If your custard gets too thick or starts to look grainy, take it off the heat immediately and stir vigorously. It should be smooth and glossy.
3. Prepare the mascarpone base
In a large mixing bowl, stir the mascarpone with a spatula just to loosen it up. Fold in the cooled yolk mixture, vanilla extract, and lemon curd. Stir gently until everything is silky and well combined.
4. Whip the cream
In a separate bowl, use a hand mixer to beat the heavy cream until soft peaks form – when you lift the beaters, the tips should just curl. Don’t overdo it! Gently fold the cream into the mascarpone mixture, one-third at a time, using slow, circular motions to keep it airy.
5. Soak and layer the ladyfingers
One at a time, dip each ladyfinger into the cooled lemon syrup for about 2 seconds per side – just enough to moisten without turning them soggy. Arrange the syrup-dipped ladyfingers snugly across the bottom of a 9×9-inch dish to form the first layer.
6. Add the filling
Spoon half of the mascarpone mixture over the ladyfingers and spread evenly to the edges. If you’re using blueberries, scatter a handful across the top of the cream.
7. Repeat and finish
Add a second layer of dipped ladyfingers, followed by the rest of the mascarpone filling. Smooth the top with a spatula, making sure it’s nice and even.
8. Chill to set
Cover the dish tightly with plastic wrap and refrigerate for at least 4 hours, or overnight for best results. Just before serving, sprinkle the top with the remaining lemon zest and white chocolate shavings for a pretty, polished look.

And there you go – a beautiful, layered Limoncello Tiramisu that looks just as good as it tastes. Each spoonful is creamy, bright, and full of citrus charm.
Now that your masterpiece is chilling in the fridge, let’s talk about how to make it even more special with a few clever tips and creative twists.
Limoncello Tiramisu Tips, Variations, and Serving Ideas
Making Limoncello Tiramisu is pretty straightforward, but a few smart tips can help you get the texture just right and the flavors to shine. Whether you’re making it for the first time or adding your creative twist, these little insights go a long way.
Pro Tips for Perfect Layers:
- Don’t over-soak the ladyfingers. A quick 2-second dip in the lemon syrup is all they need – any longer and they’ll fall apart or turn mushy.
- Use room-temperature mascarpone. Cold mascarpone can clump and resist blending. Let it soften slightly so it folds into the custard beautifully.
- Chill your bowl and beaters. When whipping cream, cold tools help it come together faster and hold soft peaks longer.
- Spread gently. When layering the mascarpone mixture, use a spatula and a light hand. You want those airy peaks to stay fluffy.
Easy Variations to Try:
- Berries between the layers: Add fresh blueberries, raspberries, or sliced strawberries for bursts of color and a fruity bite.
- Citrus twist: Swap lemon juice for orange or even a mix of both for a slightly sweeter spin.
- Texture lovers: Sprinkle crushed amaretti cookies between layers for an extra crunch – this one’s inspired by the limoncello tiramisu Jamie Oliver style.
- Mini desserts: Assemble the tiramisu in individual cups or small mason jars for a cute, party-ready presentation.
- Topping upgrade: Instead of white chocolate, try a dusting of crushed lemon cookies or a swirl of lemon curd on top.
This dessert loves a little creativity, so don’t be shy about making it your own. You might just discover your family’s new favorite version!
Now that you’ve got it prepped and plated, let’s talk about how to serve it up for maximum joy.
Serving Limoncello Tiramisu for Any Occasion

There’s something about a chilled dessert that brings a little pause to the day, and Limoncello Tiramisu is no exception. Whether you’re serving it for a celebration or a slow weekend meal, here are a few ideas to help you present it beautifully.
Lovely Ways to Serve:
- Brunch treat: Serve in small glass tumblers with lemon zest curls and a sprig of mint. It’s light, bright, and just the right touch of indulgence.
- Birthday delight: Instead of cake, layer tiramisu in a clear trifle dish and top with white chocolate curls and edible flowers.
- Weeknight pick-me-up: Spoon into dessert bowls and enjoy with hot tea or your favorite after-dinner coffee.
- Outdoor entertaining: Serve in mini mason jars for picnic-style portions – easy to transport and so cute!
- Holiday twist: Add a sprinkle of crushed pistachios and candied lemon peel on top for an extra festive look.
Limoncello Tiramisu is just as welcome at a fancy table as it is on a cozy weeknight – no special occasion required. Up next, let’s make sure you know exactly how to store and enjoy any leftovers.

How to Store and Serve Leftover Limoncello Tiramisu
Let’s be honest – leftover Limoncello Tiramisu is a treat all on its own. If you’ve got a few slices left (lucky you!), storing them properly keeps everything soft, flavorful, and ready when your sweet tooth strikes again.
How to Store:
- In the fridge: Cover the dish tightly with plastic wrap or transfer leftovers to an airtight container. It’ll stay fresh and delicious for up to 4 days.
- In the freezer: Wrap individual slices with parchment paper and place in a freezer-safe container. Freeze for up to 1 month. Thaw overnight in the fridge before serving.
- Best way to serve again: This dessert is meant to be enjoyed chilled – no reheating needed! Just pull it out, plate it, and maybe add a new sprinkle of zest or berries on top to refresh the look.
Leftovers don’t have to feel like second best. With this dessert, they’re a little gift for future-you.
More Luscious Tiramisu Desserts to Try
If you enjoyed this Limoncello Tiramisu, here are a few more creative twists on the classic you might love making next:
- Tiramisu Latte – A cozy drink that brings the flavors of tiramisu into every sip.
- Matcha Tiramisu – A gentle green tea version with creamy layers and earthy notes.
- Tiramisu Cups – Perfect for parties or small servings with big flavor.
- Pistachio Tiramisu – A nutty, dreamy spin that’s full of richness and crunch.
- Tiramisu Brownies – Fudgy brownie layers meet classic tiramisu cream for a dessert mashup worth repeating.

Limoncello Tiramisu
Equipment
- 9×9 inch baking dish (or glass serving dish)
- Hand mixer or stand mixer
- Heat-safe mixing bowls
- Small saucepan
- Fine zester or grater
- Rubber spatula
- Shallow bowl (for dipping ladyfingers)
- Plastic wrap
Ingredients
Main Ingredients:
- 24 crisp ladyfingers
- 16 oz mascarpone cheese
- 1 cup heavy cream very cold
- 4 large pasteurized egg yolks
- ¾ cup granulated sugar divided use
- Zest from 2 lemons
- ⅓ cup fresh lemon juice
- ½ cup alcohol-free limoncello syrup
- ¼ cup lemon curd
- 1 tsp vanilla extract
- 2 Tbsp white chocolate shavings for topping
Optional Add-Ins:
- ½ cup fresh blueberries between layers
- 2 Tbsp crushed pistachios for garnish
Instructions
- Make syrup: Simmer limoncello syrup, lemon juice, 2 Tbsp sugar, and lemon zest until sugar dissolves. Let cool.
- Prepare custard: Whisk yolks with sugar over simmering water until thick and pale. Cool slightly.
- Make filling: Mix mascarpone with lemon curd and vanilla. Fold in custard.
- Whip cream: Beat cream to soft peaks and gently fold into the mascarpone mixture.
- Assemble layers: Quickly dip ladyfingers in cooled syrup (2 seconds per side). Layer half in the dish, top with half the filling, and add optional blueberries.
- Repeat: Add a second soaked-ladyfinger layer and remaining filling. Smooth the top.
- Chill: Cover and refrigerate at least 4 hours or overnight. Garnish with zest and white chocolate before serving.
Notes
 This recipe uses pasteurized egg yolks for safety and is completely alcohol-free, making it family-friendly. Be sure to chill it long enough to let those lovely layers set.
Key Takeaways
- Limoncello Tiramisu is a no-bake, citrus-forward twist on a classic.
- Layers of lemon-soaked ladyfingers and creamy mascarpone make every bite refreshing.
- It’s easy to prep ahead and perfect for gatherings or everyday desserts.
- Alcohol-free and customizable with fruits, cookies, or curd.
- Chill before serving to let the layers set and the flavors shine.
Now that you’ve got the highlights, let’s tackle a few common questions before you dig in!
Limoncello Tiramisu FAQ: Common Questions Answered
Can I use store-bought non-alcoholic limoncello syrup?
Yes, you can! There are some great alcohol-free versions out there – many Italian brands offer them. Just check the label to make sure it’s marked “0.0% ABV” so it’s safe for all ages.
What if I can only find soft ladyfingers instead of crisp ones?
That’s totally fine. Just dip them really quickly – more like a fast swipe through the syrup – so they don’t fall apart when you layer them.
Is there a way to make this without egg yolks?
You can swap the yolks for the same amount of sweetened condensed milk. It keeps the mascarpone filling rich and smooth, but it’ll be a touch sweeter than the original.
How can I get that bright yellow color on top like in the photos?
A little extra lemon zest goes a long way! For an added sunny glow, sift a tiny pinch of turmeric over the top – it gives a beautiful tint without changing the flavor.
Can I make this gluten-free?
Absolutely – just use gluten-free ladyfingers. Everything else in this limoncello tiramisu recipe stays the same.
Can I use lemon curd on top instead of mixing it in?
Yes! Try dolloping it across the top layer, then swirl it with a toothpick or skewer for a marbled effect. It looks beautiful and adds a little extra zing to every bite.
Conclusion
There’s something so special about a dessert that brings people together, and Limoncello Tiramisu has a way of doing just that. Whether you’re making it for a sunny weekend, a cozy family gathering, or just because lemon sounds good today, this recipe delivers a little brightness in every bite.
If you try it, I’d truly love to hear how it turned out for you. Did you add berries? Make it ahead for a party? Leave a review and share your experience – it always means so much, and it helps others in the kitchen too.
Happy layering, and thank you for letting this sweet little treat be part of your table.