You know what I love most about baking? It’s those cozy afternoons when the house fills with warm smells, the kind that make everyone wander into the kitchen asking, “What’s in the oven?” This date nut bread recipe has been one of those go-to favorites in my kitchen for years – it’s simple, smells amazing, and tastes even better the next day (if there’s any left!). Whether you’re making it for brunch, a little afternoon treat, or something to share with friends, this loaf never lets you down.
In this post, I’ll walk you through everything – from choosing the right dates to those little mixing tricks that make all the difference. Let’s jump in – because something cozy and delicious is about to come out of your oven.
Why This Date Nut Bread Recipe Belongs in Your Baking Rotation
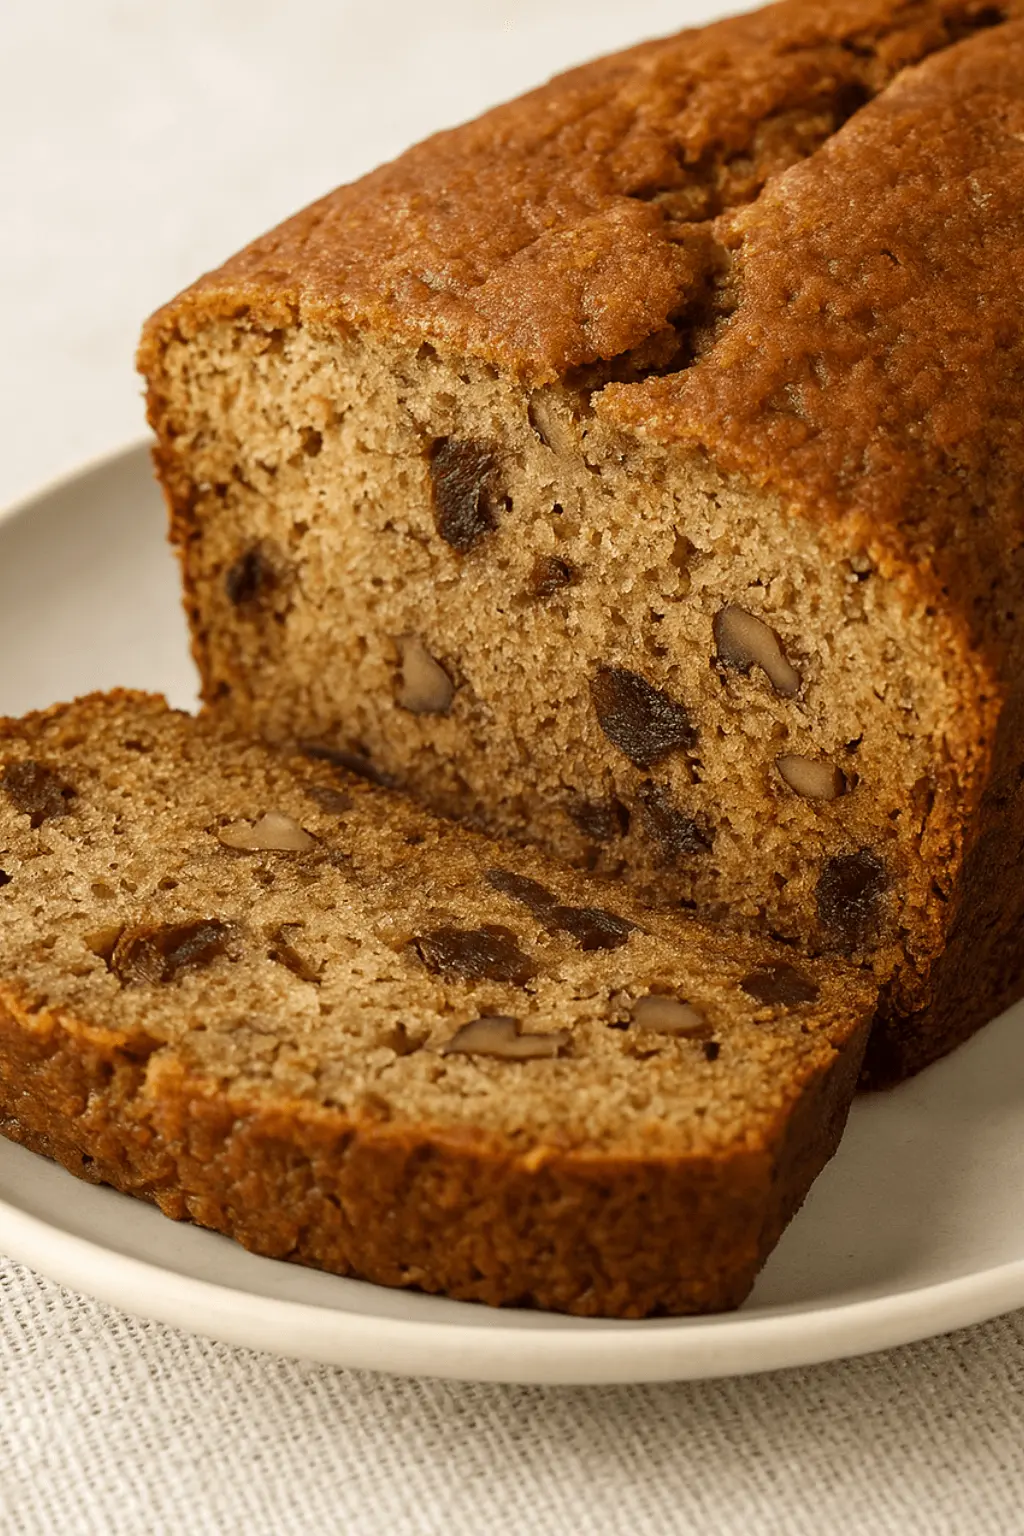
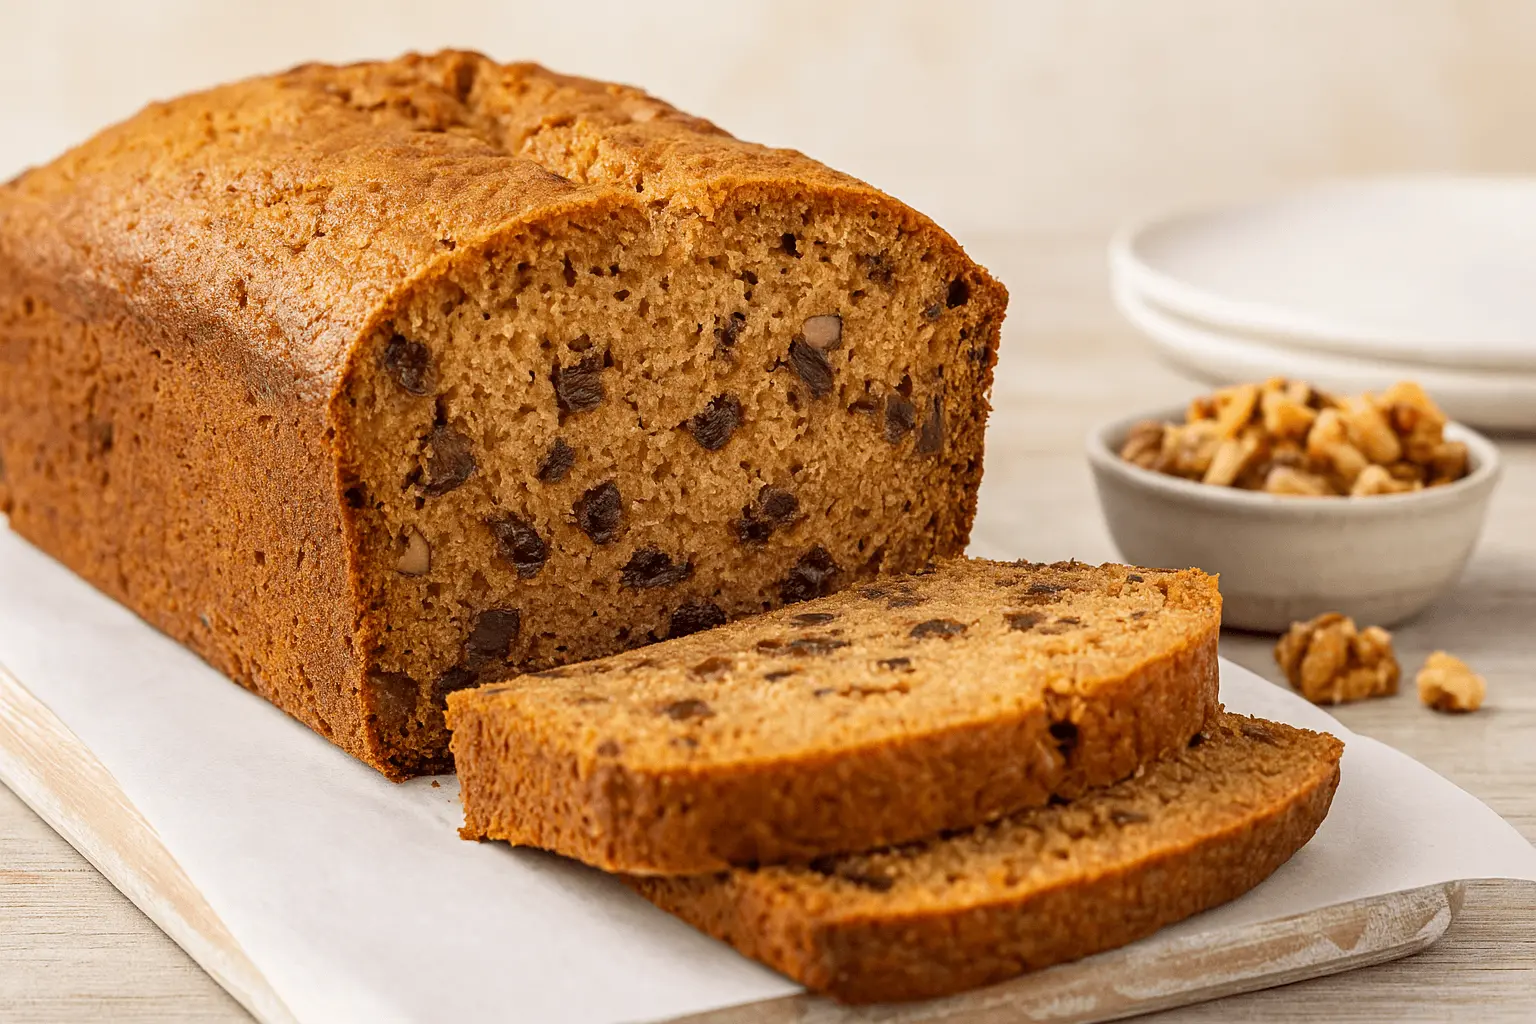
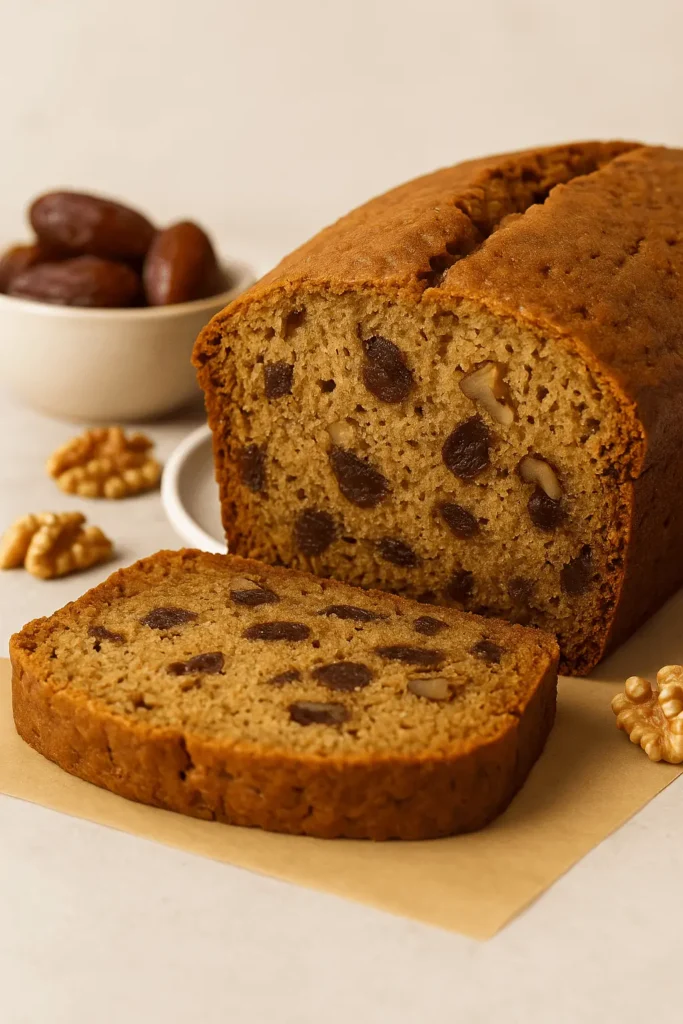
This date nut bread recipe is the kind you’ll come back to whenever you want something simple, cozy, and a little nostalgic. It’s family friendly and easy enough to whip up on a weekend morning without any fuss. The dates make every slice moist and rich, while toasted walnuts add just the right crunch.
- Quick to prepare: One bowl, no fancy tools.
- Perfect for any occasion: Breakfast, afternoon snack, or a thoughtful homemade gift.
- Customizable: Try banana, chocolate chips, or a sprinkle of warm spices.
- Stays fresh: You’ll love how it keeps its soft texture for days.
There’s something comforting about baking this loaf and sharing it with people you care about. Let’s gather what you’ll need to get started!
Date Nut Bread Ingredients You’ll Need (Plus Tasty Add-Ins)
Let’s get everything ready before we start mixing. This date nut bread recipe keeps things simple with a handful of easy-to-find ingredients. You probably have most of these in your pantry already. And don’t worry – I’ll walk you through what each one does so you know exactly why it matters. Think of it like baking with a friend by your side.
Basic Ingredients
- Chopped dates – 1 ½ cups
These are the stars of the show! They bring a rich, caramel-like sweetness and help make the bread soft and tender. - Boiling water – 1 cup
Softens the dates, releasing their flavor and giving the batter a moist, pourable texture. - Baking soda – 1 teaspoon
Helps the dates break down in hot water and gives the bread a nice lift. - All-purpose flour – 2 cups
This gives the loaf structure and just the right amount of density. - Baking powder – 1 teaspoon
Works alongside the baking soda to help the loaf rise tall and even. - Salt – ½ teaspoon
A small amount, but it sharpens all the other flavors – don’t skip it. - Ground cinnamon – 1 teaspoon
Adds that warm, cozy spice that makes your kitchen smell amazing. - Light brown sugar – ¾ cup (packed)
Deepens the sweetness with notes of molasses, pairing beautifully with the dates. - Eggs – 2 large
They bring the batter together and help the loaf hold its shape once baked. - Neutral oil – ½ cup
Keeps the bread moist without overpowering the flavor. Canola, vegetable, or sunflower oil all work well. - Vanilla extract – 2 teaspoons
Adds that lovely aroma and rounds out the sweetness. - Chopped walnuts – ¾ cup
For that signature nutty crunch. Lightly toast them first for extra flavor.
Optional Add-Ins
- Mashed ripe banana – 1 medium banana
Turns this into a delicious banana date nut bread with extra richness. - Mini chocolate chips – ½ cup
Great if you want to add a touch of sweetness for dessert lovers.
Pro Tip:
Want to give your loaf a little international flair? Swap the cinnamon for a pinch of cardamom and add chopped pistachios for a Middle Eastern twist. Or try using orange zest and dried cranberries for a festive holiday version.
With these ingredients lined up, we’re ready to get baking – just one bowl and a few simple steps away from something truly special.
How to Make This Easy and Moist Date Nut Bread Recipe
Time to bring everything together! This process is straightforward, and once you’ve made it once, you’ll probably memorize it. The texture is soft and just slightly sticky from the dates, and you’ll know it’s done when your whole kitchen smells like you’ve been baking all day.
Step-by-Step Instructions
1- Soften the dates.
In a medium bowl, combine the chopped dates with baking soda. Carefully pour in the boiling water and stir gently. Let this sit for about 10 minutes – it’ll turn into a sweet, thick mixture that gives the bread its signature texture.
2- Preheat and prep.
Heat your oven to 350°F (175°C). Grease a 9×5-inch loaf pan and line it with a parchment paper sling if you want easy removal. Set it aside.
3- Mix the dry ingredients.
In a large mixing bowl, whisk together the flour, baking powder, salt, and cinnamon until everything is evenly combined.
4- Add the wet ingredients.
Create a little well in the center, then add the brown sugar, eggs, oil, and vanilla right into that space. Pour in the cooled date mixture (liquid included) and stir gently with a spatula or wooden spoon until just combined. Don’t worry if it looks a bit lumpy – it’s supposed to.
5- Fold in the nuts.
Sprinkle in the chopped walnuts and gently fold them in until evenly spread through the batter. If you’re adding banana or chocolate chips, mix them in now too. Be careful not to overmix – just a few turns until everything looks evenly blended.
6- Pour and smooth.
Scrape the batter into the prepared loaf pan. Use a spatula to even out the top, especially the corners (they tend to bake slower if left low).
7- Bake.
Place the pan on the center rack and bake for 55 to 60 minutes. You’ll know it’s ready when a toothpick poked into the center comes out with just a few moist crumbs (not wet batter).
8- Cool the loaf.
Give the bread about 10 minutes to rest in the pan, then gently move it to a wire rack so it can cool down all the way. The loaf will firm up as it cools, so resist slicing too soon.
9- Slice and enjoy.
Once it’s cooled to just warm (or room temp), slice with a serrated knife and serve however you like – plain, toasted, or with a little butter on top.
If your family is anything like mine, it might not even make it to the second day – but if it does, it stays soft and flavorful, slice after slice.

Now that your loaf is cooling, let’s look at a few clever tips and fun ways to make this recipe your own.
Tried-and-True Tips for the Best Date and Nut Bread + Simple Variations
Once you’ve nailed the basic date nut bread recipe, it’s fun to play around with little tweaks to make it your own. Whether you’re aiming for more texture, a flavor twist, or just want to avoid common mistakes, these tips and variations will come in handy.
Helpful Tips from My Kitchen to Yours:
- Don’t overmix the batter. Stir just until everything comes together. Overworking the batter can make the loaf tough instead of soft and tender.
- Toast your walnuts. A quick toast in a dry skillet or oven brings out their flavor and adds a delicious nuttiness.
- Measure flour carefully. Spoon it into the measuring cup and level it off – scooping directly can pack it down and throw off the balance.
- Check for doneness early. All ovens bake a little differently. Start checking your loaf around 50 minutes with a toothpick or cake tester.
Fun Variations to Try:
- Banana date nut bread: Replace ½ cup of chopped dates with 1 ripe mashed banana. Adds even more richness and flavor.
- Spice it up: Swap cinnamon for pumpkin pie spice or add a pinch of ground ginger for a warm, cozy vibe.
- No nuts? No problem. Leave them out or substitute with seeds like sunflower or pumpkin for a similar crunch.
- Add a citrus twist: Fold in 1 tablespoon of orange zest for a bright pop of flavor that pairs beautifully with the dates.
- Chocolate lovers’ version: Add ½ cup mini chocolate chips for a lightly sweet dessert-style loaf.
A good recipe should grow with you, and this one does just that. Let your mood (or your pantry!) guide you each time.
Ready to slice and serve? Let’s talk about how to enjoy your fresh-baked loaf!
Serving Ideas for Date Nut Bread Your Family Will Love
This date and nut bread is one of those treats that works morning, noon, or night. It’s naturally sweet, warmly spiced, and pairs beautifully with so many spreads and sides. Here are a few ways to make the most of every slice:
- Toasted with butter or cream cheese: A classic pairing that brings out the cozy flavor and makes it extra satisfying.
- With a hot drink: Serve warm alongside coffee, tea, or a frothy latte for a comforting mid-day break.
- Brunch table favorite: Slice it thick and place it beside fresh fruit, yogurt, and eggs for a lovely brunch spread.
- Pack it up: Great for lunchboxes or road trips – it travels well and doesn’t need refrigeration right away.
- After-dinner treat: Warm it slightly and add a scoop of vanilla ice cream or a drizzle of maple syrup.
Whether you’re sharing it or saving it all for your crew, this loaf fits in just about anywhere.
And if you’re lucky enough to have leftovers (or baked an extra!), here’s how to keep every slice just as tasty.
How to Store and Reheat Date Nut Bread Without Losing Texture
You’ve baked the loaf, shared a few slices, and now you’ve got a little left. Good news – this date nut bread recipe stores beautifully and tastes just as lovely the next day.
How to Store:
- At room temperature: Wrap the cooled loaf in parchment, then store in a tightly sealed container. Keeps well on the counter for 2–3 days.
- In the fridge: For a longer window, wrap it tightly and refrigerate. Best enjoyed within 5–6 days.
- Freezer-friendly: Wrap individual slices or the whole loaf in plastic wrap and then foil. Tuck it into a freezer-safe bag and keep it stored for up to 2 months. Thaw in the fridge or at room temp overnight.
Reheating Tips:
- To reheat slices: Warm in a toaster or toaster oven for a few minutes until the edges are just slightly crisp.
- For a soft, fresh-baked feel: Wrap a slice in foil and warm in a 300°F oven for 10–12 minutes.
There’s something so satisfying about baking a loaf and still enjoying it days later.
More Baked Goodies You May Enjoy
If you loved this date nut bread recipe, here are a few other cozy, kitchen-tested recipes to try next:
- Amish Cinnamon Bread Recipe – sweet, cinnamon-swirled, and perfect for sharing
- Pineapple Bread Recipe – moist and fruity with a tropical twist
- Chocolate Sourdough Bread – a rich and hearty loaf with a deep cocoa flavor
- Sourdough Discard Bagels – chewy, homemade bagels that use up your sourdough starter
Perfectly Moist Date Nut Bread Recipe You’ll Love
Equipment
- Mixing bowls (medium and large)
- Measuring cups and spoons
- 9×5-inch loaf pan
- Parchment paper (optional)
- Spatula or wooden spoon
- Wire cooling rack
- Serrated knife
Ingredients
- 1 ½ cups chopped pitted dates
- 1 cup boiling water
- 1 tsp baking soda
- 2 cups all-purpose flour
- 1 tsp baking powder
- ½ tsp salt
- 1 tsp ground cinnamon
- ¾ cup light brown sugar packed
- 2 large eggs
- ½ cup neutral oil like canola or vegetable
- 2 tsp vanilla extract
- ¾ cup chopped walnuts toasted
Optional Ingredients:
- 1 ripe banana mashed (for banana date nut bread variation)
- ½ cup mini chocolate chips for a sweeter twist
Instructions
- In a medium bowl, pour boiling water over chopped dates and stir in baking soda. Let sit for 10 minutes.
- Preheat oven to 350°F (175°C). Grease a 9×5-inch loaf pan and line with parchment paper if desired.
- In a large bowl, whisk together flour, baking powder, salt, and cinnamon.
- Add brown sugar, eggs, oil, vanilla, and the date mixture (including liquid) to the dry mix. Stir until just combined.
- Fold in toasted walnuts and any optional add-ins.
- Pour batter into prepared pan and smooth the top.
- Bake 55–60 minutes, or until a toothpick inserted in the center comes out with a few moist crumbs.
- Cool in pan for 10 minutes, then transfer to a wire rack to cool completely.
- Slice with a serrated knife and serve.
Notes
Key Takeaways
- One-bowl recipe with simple ingredients
- Soft, moist texture from dates and oil
- Toasted walnuts add a delicious crunch
- Customizable with banana, spices, or chocolate chips
- Great for breakfast, snacks, or gifting
- Stores and freezes well for later
Got questions? Let’s go over a few helpful answers in the FAQ section!
Date Nut Bread Recipe FAQ: Common Questions Answered Simply
Is it okay to cut back on the sugar in this date nut bread recipe?
Yes, absolutely! Since the dates already bring plenty of natural sweetness, you can reduce the brown sugar to ½ cup. The flavor will be a little more subtle, but the loaf will still turn out soft and delicious.
Can I use butter instead of oil?
Definitely. Melted butter works well and gives the bread a richer taste. Use the same amount – ½ cup melted and cooled. Just keep in mind it may change the texture slightly and won’t keep quite as long.
Why does my loaf sink in the middle sometimes?
That usually happens from underbaking or stirring too much. Make sure to bake until a toothpick comes out with a few moist crumbs, and stir the batter just enough to combine everything – don’t overdo it.
Can I bake this date and nut bread recipe in a Bundt pan instead of a loaf pan?
Absolutely! A 6-cup Bundt pan works great. Just remember to grease it well and start checking for doneness around 40–45 minutes. It’s a pretty way to present the loaf, especially for gifting.
Do I need to use Medjool dates?
Nope! As long as the dates are soft and pitted, they’ll do the trick. If your dates feel a little dry, give them an extra five minutes to soak so they soften up properly.
How do I make canned date nut bread safely?
Use clean, empty 14-oz cans. Grease and flour them well, then fill about two-thirds full. Place the cans on a baking sheet and bake for around 45 minutes. Give them a few minutes to cool down, then gently ease the bread out.
Got another question? Feel free to share it in the comments – I’d love to help! Up next, let’s bring everything together with a warm closing thought.
Conclusion
There’s just something special about a loaf that’s made with love, and this date nut bread recipe brings all the cozy, from the first warm slice to the last little crumb. Whether you made it for a quiet morning, a sweet afternoon break, or to share with someone you care about, I hope it brought a little extra joy to your kitchen.
If you gave it a try, I’d love to hear how it turned out for you! Leave a quick review below and let me know if you added your own twist – I always enjoy seeing how these recipes come to life in your homes.