You know those recipes that just feel like home the moment you start cooking them? That’s exactly how I feel about this calabacitas recipe. It’s one of those comforting, go-to dishes that fills the kitchen with warmth and brings everyone to the table without needing to call them twice.
Sometimes you’re just staring into the fridge thinking, What can I make with what I’ve got? That’s where this dish comes in. It’s simple, flexible, and full of flavor – the kind of thing you can pull together with a few fresh veggies and pantry staples, but still feel proud serving.
In this post, I’ll walk you through every step of making this colorful, cheesy skillet meal. We’ll talk ingredients, easy techniques, tasty variations, and even what to do with leftovers (if you’re lucky enough to have any). Let’s get cooking – I can’t wait for you to try it!
Why You’ll Love This Easy Calabacitas Recipe
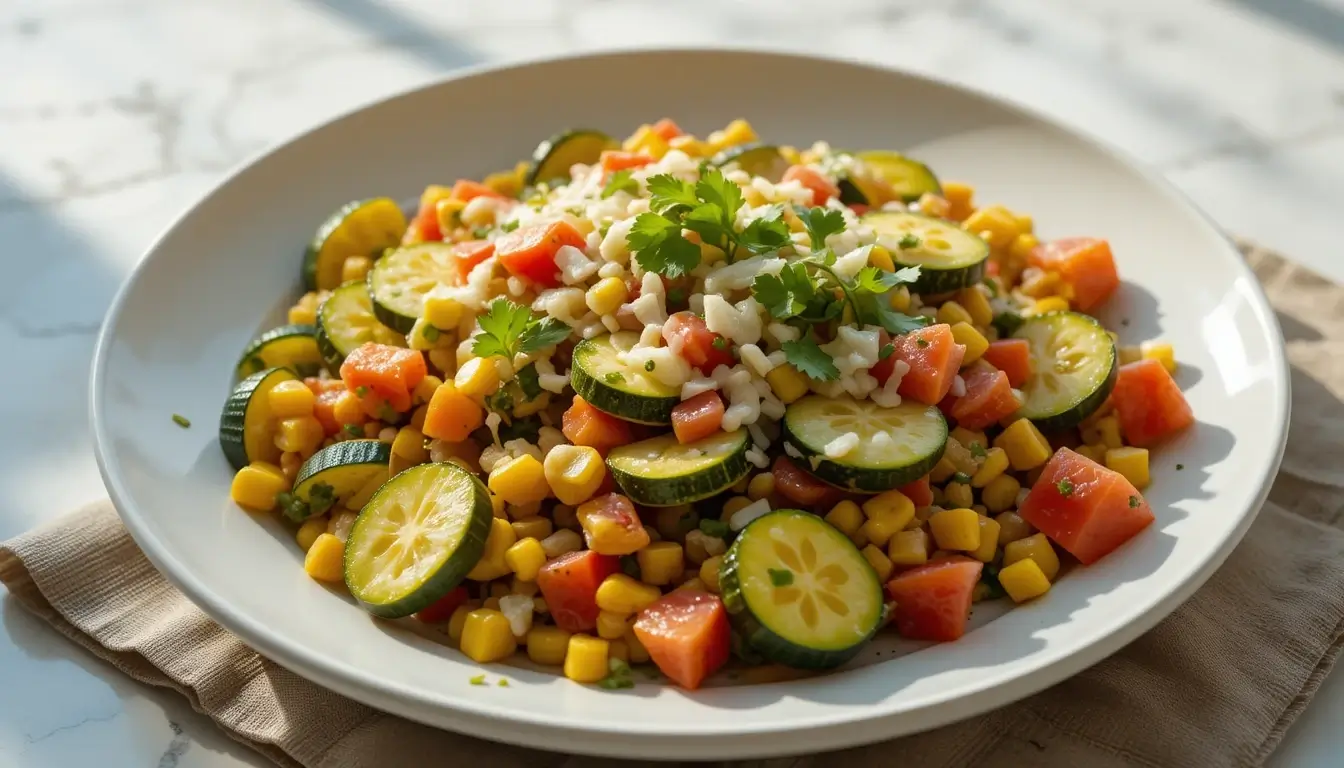
This calabacitas recipe is one of those dishes you’ll keep coming back to because it’s so dependable and comforting. It’s quick enough for a busy weeknight, yet special enough to share with company. The blend of tender zucchini, sweet corn, juicy tomatoes, and melty cheese feels like a warm hug in every bite.
- Family friendly: Mild, balanced flavors that everyone at the table can enjoy.
- Customizable: Tuck it into tacos, serve over rice, or enjoy it straight from the skillet.
- Easy to prepare: Simple steps and common ingredients mean less time fussing.
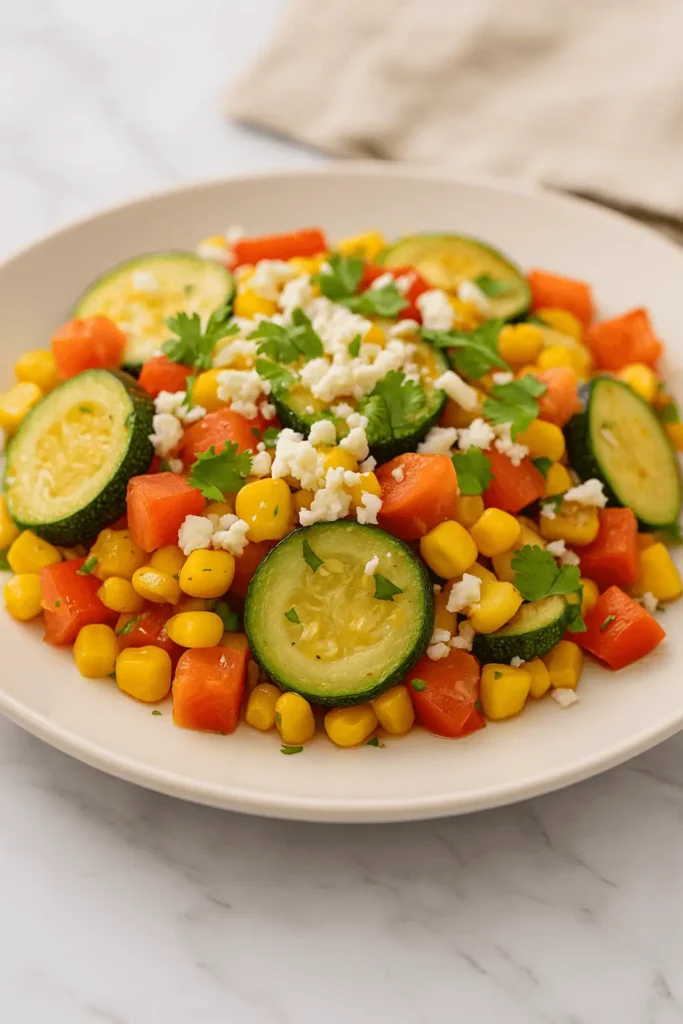
- Bright and colorful: It looks as inviting as it tastes, perfect for any occasion.
Once you see how versatile and satisfying this recipe is, you’ll want to make it part of your regular meal rotation. Let’s gather everything you need to get started!
Simple Ingredients for a Flavorful Calabacitas Dish
Before we fire up the skillet, let’s make sure your ingredients are ready to go. What I love about this calabacitas recipe is that it’s super flexible – the basics are simple, and there’s plenty of room for little extras if you’re in the mood to mix it up. Think of it like building your favorite veggie combo with a cozy, cheesy twist.
Basic Ingredients (for 4 servings):
- 3 medium zucchini, diced – This is the heart of the dish. It cooks quickly and soaks up all the wonderful seasoning while staying tender with a bit of bite.
- 1 medium onion, finely chopped – Adds a savory base flavor and soft sweetness once sautéed.
- 3 garlic cloves, minced – Just the right amount to give the dish a warm, inviting aroma without overpowering.
- 1 bell pepper, diced – Use red, yellow, or orange for a pop of color and a touch of sweetness.
- 2 Roma tomatoes, diced – Fresh and juicy, they melt right into the mix and bring everything together.
- 2 cups corn kernels – Add little bursts of sweetness and texture in every bite. Whether you’ve got fresh, frozen, or canned corn on hand, any of them will do the trick in this recipe.
- 1 (4 oz) can diced green chiles – Brings a mellow heat and that classic calabacitas a la mexicana flair.
- 1 tsp ground cumin – Earthy and comforting, it rounds out the flavors beautifully.
- ½ tsp dried oregano (Mexican oregano, if available) – A subtle herbal note that complements the cumin perfectly.
- 1 tsp salt & ½ tsp ground black pepper – Basic seasoning that brings everything to life.
- 1½ cups shredded Monterey Jack or queso Oaxaca – Melts like a dream and adds that creamy, comforting finish.
- 2 Tbsp fresh cilantro, chopped – A fresh and vibrant way to finish the dish.
- Lime wedges, for serving – A squeeze at the end brightens everything up.
Optional Add-Ins
- ½ cup cooked black beans – Great if you want to make it a little heartier.
- ½ cup hominy or calabacitas con elote style – Adds a more rustic, corn-rich texture.
- A pinch of crushed red pepper flakes – For those who like a bit more heat.
- Shredded queso fresco or quesillo – For a cheesier finish or an extra layer of richness.
Pro Tip: Want to give this dish a global twist? Swap cumin and oregano for a pinch of smoked paprika and a dash of thyme for a Mediterranean feel – or go with curry powder and fresh ginger for something with a warm, spiced edge.
Now that we’ve got everything prepped, let’s jump into the fun part – bringing it all together in the pan!
How to Make Calabacitas Step-by-Step
This calabacitas recipe comes together with ease, and it fills your kitchen with the kind of smells that make everyone peek around the corner asking, “What’s cooking?” Grab a skillet, and let’s get started step-by-step.
Step-by-Step Instructions
1- Sauté the base flavors (3–4 minutes):
Warm about a tablespoon of oil in a large skillet over medium heat. Add the chopped onion and bell pepper. Stir occasionally until the onion turns soft and translucent and the pepper begins to soften – it should smell sweet and savory right about now.
2- Add garlic and spices (1 minute):
Stir in the minced garlic, cumin, and oregano. Keep the heat steady and stir continuously for about a minute until everything smells deeply aromatic and warm – this step builds the base of your flavor.
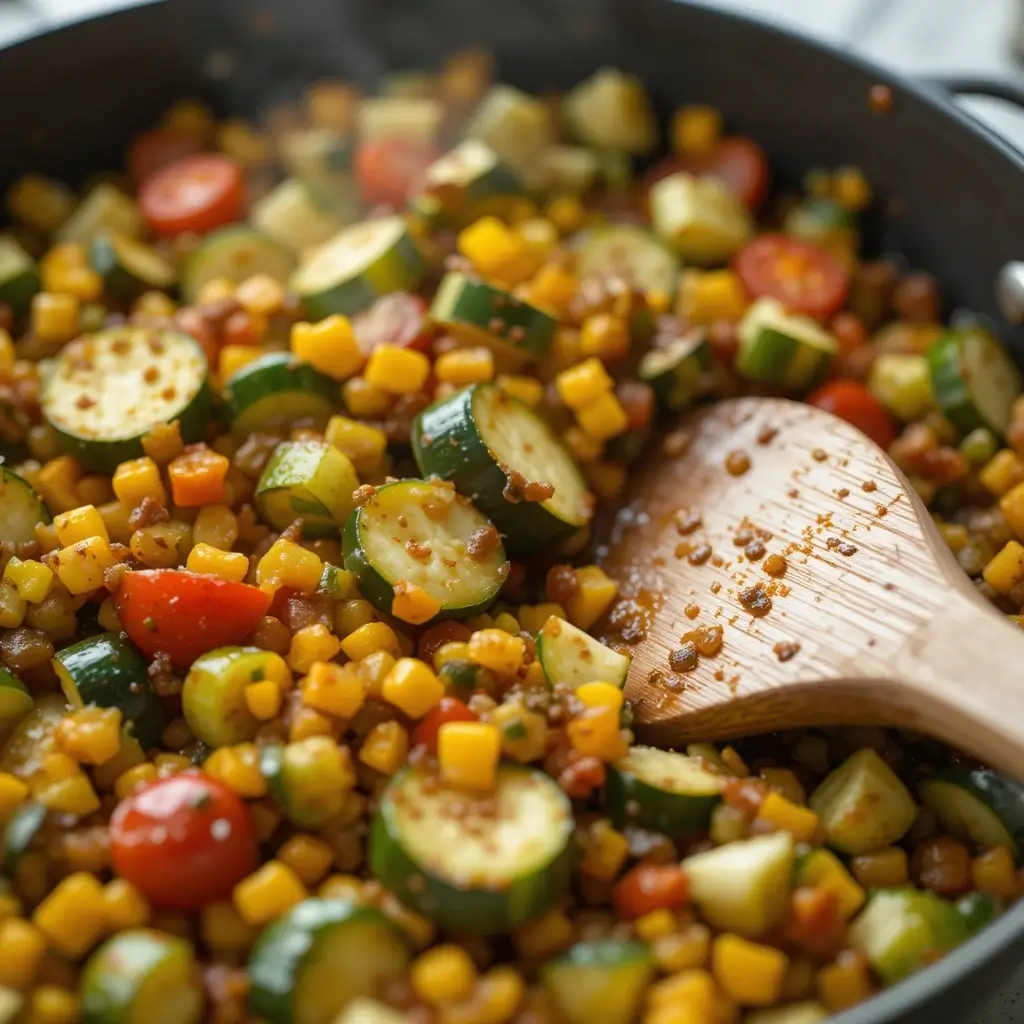
3- Cook the zucchini and chiles (5–6 minutes):
Toss in the diced zucchini and canned green chiles. Let them cook uncovered, stirring every so often, until the zucchini starts to soften but still holds its shape. You’ll want the edges just barely golden and a little tender when poked with a fork.
4- Mix in the corn and tomatoes (3–4 minutes):
Add the corn kernels and diced tomatoes. Season everything with salt and black pepper. Let it all simmer gently until the tomatoes begin to break down and the mixture becomes juicy and colorful. If the pan starts drying out, feel free to splash in a tablespoon of water.
5- Add the cheese and steam (2 minutes):
Lower the heat and sprinkle the shredded cheese evenly over the top. Cover the skillet and let it sit for about two minutes until the cheese melts completely and wraps around the veggies like a soft blanket.
6- Finish and garnish:
Turn off the heat. Sprinkle fresh cilantro across the top, and squeeze in a bit of lime juice if you like a citrusy lift. Give everything a gentle stir to bring the flavors together.
Little Troubleshooting Tips
- Too watery? Just let it simmer uncovered for a minute or two before adding the cheese.
- Zucchini too soft? Next time, cut it slightly thicker or cook it a bit less before adding corn and tomatoes.
- Need more flavor? A splash of hot sauce or a dash of chili powder will kick it up nicely.
There’s something so satisfying about stirring that last bit of cheese into the pan, watching it melt and mingle with the bright veggies. Up next, I’ll show you a few ways to put this dish on the table so it feels fresh every time.
Calabacitas Recipe Tips and Delicious Variations
Once you’ve mastered the basics of this calabacitas recipe, there are so many ways to make it your own. Whether you’re keeping it classic or getting creative with add-ins, this dish welcomes your personal touch. Think of this section as your kitchen-side companion, giving you a few extra nudges to make every batch a little more special.
Helpful Tips to Get It Just Right:
- Don’t overcook the zucchini: You want it tender but still holding its shape. Cook just until it’s slightly golden on the edges.
- Dice evenly: Try to keep your veggies about the same size so everything cooks at the same pace.
- Let the cheese melt gently: Cover the skillet on low heat to melt the cheese evenly without scorching it.
- Taste as you go: The flavors of cumin, oregano, and green chiles shine best when balanced, so adjust the seasoning to suit your taste.
Fun and Easy Variations:
- Calabacitas rellenas twist: Hollow out bell peppers, stuff them with the veggie mix, top with cheese, and bake at 375°F for about 20 minutes.
- Add protein: Stir in cooked black beans or grilled chicken pieces if you’re serving it as a main dish.
- Spice it up: Swap the canned green chiles for diced jalapeños or a pinch of chipotle powder if you enjoy a little kick.
- Make it creamy: Add a spoonful of crema or a drizzle of crema-style yogurt just before serving.
- Calabacitas con queso upgrade: Use a blend of cheeses like queso Oaxaca and queso fresco for extra richness.
Cooking should feel like freedom with flavor, not like following a strict rulebook. Now that you’ve got all the creative options, let’s talk about how to serve this dish in the most delicious ways.
Tasty Ways to Serve Your Calabacitas

One of my favorite things about this calabacitas recipe is how versatile it is. You can dress it up for company or keep it casual for a weeknight dinner. However you serve it, it’s going to be colorful, comforting, and full of cozy flavor.
Easy and Delicious Ways to Serve:
- Taco night star: Spoon it into warm corn tortillas, top with sliced avocado and a sprinkle of queso fresco.
- Burrito bowl base: Layer calabacitas over rice with black beans, salsa, and chopped lettuce for a build-your-own bowl night.
- Stuffed baked potatoes: Scoop out a baked potato, fill it with calabacitas, and top with melty cheese and cilantro.
- Tostadas or nachos: Use it as a hearty topping for crunchy tostadas or tortilla chips.
- Brunch surprise: Serve it alongside scrambled eggs and a warm tortilla – perfect for a laid-back weekend morning.
- Side for grilled mains: Pairs beautifully with grilled chicken, beef, or fish if you’re planning a full dinner spread.
Whether you’re plating it up for a weeknight meal or a gathering with family, this dish brings that feel-good comfort to the table. And if you happen to have leftovers, no worries – we’ve got that covered next.
How to Store and Reheat Calabacitas Without Losing Flavor
One of the best parts of this calabacitas recipe is how well it holds up the next day. If you’re like me and love a quick lunch that still tastes like it was made with love, this dish is a keeper.
Here’s how to keep it tasting just as delicious the next time around:
- In the fridge: Let it cool completely, then store in an airtight container. It’ll stay fresh for up to 4 days.
- In the freezer: Place cooled portions in freezer-safe bags or containers (press out the air) and freeze for up to 2 months. Thaw overnight in the fridge.
- To reheat on the stove: Warm gently in a skillet over medium-low heat. If it looks a little dry, add a splash of water or broth to loosen things up.
- To reheat in the microwave: Heat in 30- to 60-second intervals, stirring between bursts until warmed through.
- Brighten it back up: Sprinkle a bit of fresh cilantro or a squeeze of lime over the top before serving – it brings back that fresh-from-the-pan flavor.
Leftovers never feel like a repeat when they’re this tasty and easy to bring back to life.
More Side Dishes You’ll Want to Try
If you enjoyed this calabacitas recipe, here are a few more flavorful ideas to bring variety and comfort to your table:
- Loaded Fries Recipe – Perfect for game day or an indulgent side dish everyone will love.
- Sourdough Discard Tortillas – Great for tacos, wraps, or to enjoy with your favorite dips.
- Old-Fashioned Pimento Cheese Recipe – A creamy, classic spread that pairs beautifully with veggies or crackers.
- Hibachi Noodles Recipe – A savory stir-fry noodle dish that makes a fun side or quick meal.
- Charro Beans Recipe – A warm, smoky bean dish that complements any Southwestern-style plate.

Easy Calabacitas Recipe You’ll Crave Again and Again
Equipment
- Large nonstick or cast-iron skillet (12-inch)
- Cutting board
- Sharp knife
- Measuring spoons and cups
- Wooden Spoon or Spatula
- Lid for skillet (to melt cheese evenly)
Ingredients
- 3 medium zucchini diced
- 1 medium onion chopped
- 3 garlic cloves minced
- 1 bell pepper chopped
- 2 Roma tomatoes diced
- 2 cups corn kernels fresh or frozen
- 1 4 oz can diced green chiles
- 1 tsp ground cumin
- ½ tsp dried oregano Mexican oregano if possible
- 1 tsp salt
- ½ tsp black pepper
- 1½ cups shredded Monterey Jack or queso Oaxaca
- 2 Tbsp chopped fresh cilantro
- Lime wedges for serving
Optional (Add if Desired):
- ½ cup cooked black beans
- ½ cup canned hominy
- Extra cheese for topping
- Pinch of crushed red pepper flakes for heat
Instructions
- Heat oil in skillet over medium heat. Sauté onion and bell pepper until soft (about 3–4 minutes).
- Add garlic, cumin, and oregano. Stir for 1 minute until fragrant.
- Stir in zucchini and green chiles. Cook 5–6 minutes until zucchini is just tender.
- Add corn and tomatoes. Season with salt and pepper. Cook 3–4 minutes until warmed through.
- Sprinkle cheese on top, cover, and reduce heat. Let melt for 2 minutes.
- Turn off heat, top with cilantro, and serve with lime wedges.
Notes
Key Takeaways
- Quick and easy one-skillet recipe
- Great way to use up zucchini, corn, and tomatoes
- Mild, family-friendly flavor everyone will enjoy
- Melty cheese adds cozy comfort to every bite
- Easy to customize with your favorite add-ins
- Stores well and reheats beautifully for later meals
Next up, let’s answer a few common questions to help you feel even more confident in the kitchen.
Calabacitas Recipe FAQs: Your Questions Answered
Still have a few questions before you grab your skillet? I’ve got you covered. These common questions will help you feel even more confident about making and enjoying this calabacitas recipe, from prep to leftovers.
Can I make this calabacitas recipe spicier?
Definitely! If you like a little more kick, try swapping the mild green chiles for diced jalapeños, or stir in ¼ teaspoon of chipotle powder with the spices. Start with a small amount and build from there – everyone’s spice level is different, so taste as you go.
Does calabacitas freeze well for later?
Yes, it freezes nicely. Let the mixture cool completely, then portion it into freezer-safe containers or bags. Flatten them out to save space and help them thaw faster. When you’re ready to enjoy it again, reheat gently on the stove or in the microwave until warmed through.
What cheese should I use if I don’t have queso Oaxaca?
No worries – Monterey Jack is a great alternative. It melts smoothly and keeps the flavor mild and creamy. If you prefer a little more boldness, go with pepper Jack – just keep in mind it adds some extra spice.
How can I keep the zucchini from turning mushy?
Zucchini cooks fast, so use medium heat and keep an eye on it. You’re aiming for just-tender pieces with a little bite left. That way, even after the cheese melts in, your veggies won’t lose their texture.
Is this calabacitas recipe vegetarian or vegan?
This version is vegetarian as written. If you’d like to make it vegan, just use your favorite plant-based cheese that melts well, and double-check canned ingredients like chiles to make sure they meet your preferences.
Have another question? I’d love to hear it – leave a comment and I’ll be happy to help. Now let’s bring everything full circle with a cozy wrap-up.
Conclusion
There’s something truly special about a dish that’s simple, satisfying, and brings a little joy to your table – this calabacitas recipe does exactly that. Whether you’re making it for a quick dinner, adding it to a family taco night, or tucking away leftovers for later, it’s one of those meals that just fits into your week with ease.
If you gave it a try, I’d love to know how it turned out! Leave a review and let me know what twist you added or how you served it. Your feedback means so much and helps others enjoy it just as much as you did.