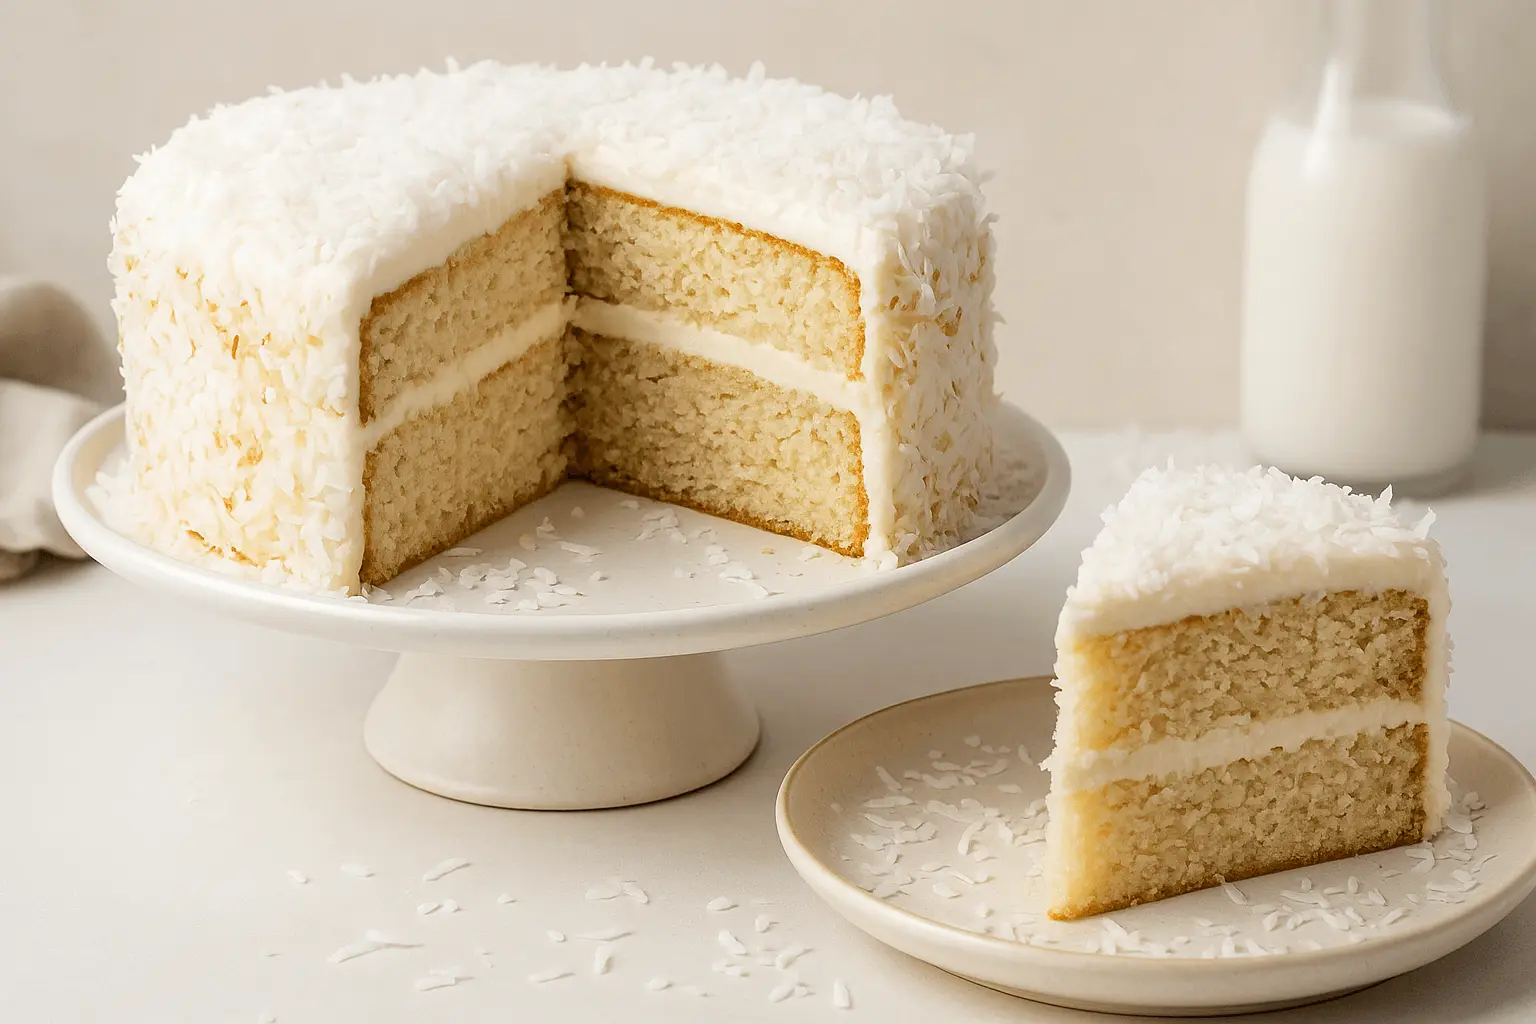
If you’ve ever wanted to bake something that makes people stop mid-bite and say, “Wow, did you really make this?” this is the one. There’s just something about a coconut cake that feels like a warm, welcome-home hug on a dessert plate. It’s rich with flavor, beautifully fluffy, and that sprinkle of toasted coconut on top? Pure joy.
I’ve made this cake more times than I can count for birthdays, potlucks, and even just because it was a regular Tuesday and we needed something sweet after dinner. It’s the kind of recipe that looks impressive but comes together in a way that actually feels doable, even with little helpers around the kitchen.
In this post, I’ll walk you through exactly how to make it from start to finish. You’ll get a simple ingredient list, easy steps, handy tips, and a few fun twists to make it your own. Whether you’re baking for guests or just craving something cozy and delicious, you’re in the right place. Let’s get into it!
Why You’ll Love This Coconut Cake
There’s something so comforting about a coconut cake that feels homemade and special all at once. This recipe is family friendly and easy enough to bake on a cozy afternoon but elegant enough for birthdays or holidays.
Soft, tender layers full of coconut flavor from real coconut milk and flakes
Customizable options like adding pineapple or a swirl of cocoa for a fun twist
Simple ingredients you probably have in your pantry
Make-ahead friendly, so you can prep the layers and frosting in advance
Every slice brings a little moment of joy and a touch of celebration. Let’s gather what you’ll need to bring this cake to life.
Simple Coconut Cake Ingredients You’ll Need
Let’s talk about what goes into this cozy, crowd-pleasing coconut cake. You don’t need anything fancy – just a few pantry staples, a can of coconut milk, and some sweet coconut flakes to pull off a dessert that tastes like it came from a bakery. Every ingredient in this recipe brings something to the table, and I’ll walk you through exactly how it all works together.
Basic Ingredients
2 ½ cups all-purpose flour
Gives the cake its soft, sturdy base – just enough structure to hold those fluffy layers together without feeling dense.
1 ¾ cups granulated sugar
Adds sweetness and helps the edges turn a lovely golden brown.
1 cup unsalted butter, room temperature
Brings richness and moisture to the crumb. Softened butter blends better, so be sure to let it sit out for a bit.
4 large eggs, room temperature
These help bind everything together and give the cake its tender texture.
1 ¼ cups canned coconut milk (shaken well)
The star of the show – this gives the batter that deep coconut flavor and makes every bite extra soft.
1 cup unsweetened shredded coconut
Adds texture and a bit of chew to balance the fluffiness of the cake.
1 ½ teaspoons baking powder + ½ teaspoon baking soda
These leavening agents help the cake rise up nice and tall.
1 teaspoon fine sea salt
Just a little to balance out the sweetness and bring out all the flavors.
2 teaspoons pure vanilla extract
Adds warmth and enhances the coconut flavor beautifully.
Coconut Frosting Ingredients
12 oz cream cheese, softened
Gives the frosting that creamy tang we love – especially when paired with coconut.
¾ cup unsalted butter, softened
Makes the frosting light, spreadable, and rich.
4 cups confectioners’ sugar, sifted
Sweetens and smooths out the texture of the frosting.
1 teaspoon coconut extract
Just a splash to double down on the coconut flavor.
1 cup sweetened shredded coconut, lightly toasted
This goes on top – it’s crunchy, golden, and adds the perfect finish.
Optional Add-Ins
These are totally optional, but fun if you want to try something new:
½ cup crushed pineapple for a pineapple coconut cake twist
3 tablespoons cocoa powder to swirl into the batter for a marbled chocolate coconut cake
Zest of 1 lemon for a bright and sunny lemon coconut cake version
Pro Tip: Want a flavor spin? For a tropical fusion, use mango extract instead of vanilla. Or try almond extract for a richer, dessert-like twist. Small changes can take your coconut cake from scratch in a whole new direction.
Now that we’ve got everything ready, let’s bake this beauty!
How to Make Coconut Cake Step by Step

Baking this coconut cake is a joy from start to finish – seriously. There’s something special about watching the batter come together and knowing the end result is going to be a show-stopper. Here’s a simple, step-by-step guide to make it feel like second nature.
1. Preheat and prep your pans
Set your oven to 350°F (177°C). Line the bottoms of two 9-inch cake pans with parchment paper after greasing them well – this helps the cakes release cleanly without sticking. This extra step makes removing the cakes smooth and stress-free.
2. Cream the butter and sugar
Using a large mixing bowl, cream the softened butter with the sugar for 3–4 minutes until it turns light in color and has a soft, airy texture. You’re looking for a light texture, almost like soft frosting.
3. Add the eggs and vanilla
One at a time, crack in the eggs, beating well after each addition. Then stir in the vanilla extract. Don’t worry if it looks slightly uneven – it will smooth out once the flour goes in.
4. Mix the dry ingredients separately
In a separate bowl, combine the flour, baking powder, baking soda, and salt by whisking them together until evenly blended. This step helps distribute the leavening agents evenly so the cake rises properly.
5. Alternate dry mix and coconut milk
Gradually mix the dry ingredients and coconut milk into the butter mixture – begin with a third of the flour mixture, then add half the coconut milk. Repeat the process, ending with the remaining flour. Stir gently after each addition – just until it’s all combined. You’ll end up with a rich, velvety batter that holds its shape but spreads easily.
6. Fold in the shredded coconut
Switch to a spatula and gently fold in the unsweetened shredded coconut. This keeps the batter airy and adds lovely texture.
7. Divide and bake
Evenly divide the batter between your prepared pans, smoothing the surface with a spatula. Bake for 25–30 minutes, until the tops are lightly golden and a toothpick poked into the center comes out clean.
8. Cool completely
Let the cakes cool in the pans for 10 minutes, then carefully flip them onto a wire rack. Peel off the parchment and let them cool all the way before frosting – trust me, it’s worth the wait.
9. Make the frosting
Cream the softened cream cheese and butter until the mixture looks light and silky, almost cloud-like. Gradually add the confectioners’ sugar, then stir in the coconut extract. You’ll end up with a rich, spreadable frosting that holds its shape but glides on easily.
10. Frost and decorate
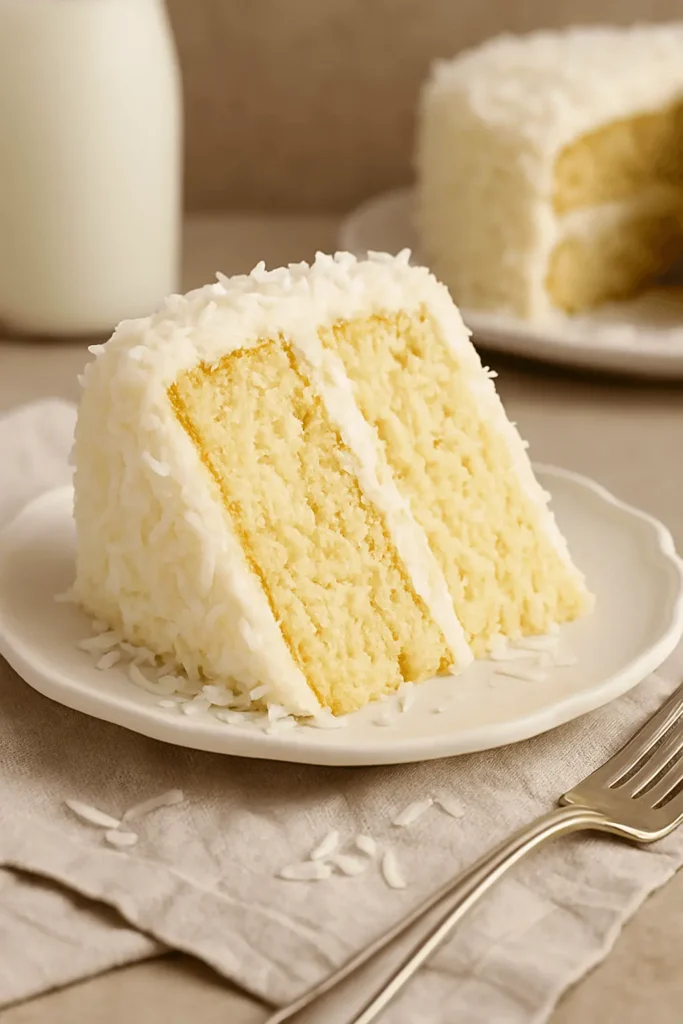
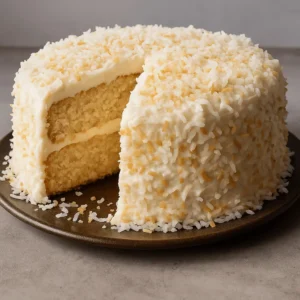
Place one cake layer on a serving plate. Add a thick layer of frosting over the first cake, then gently place the second layer right on top. Frost the top and sides, then gently press the toasted coconut onto the sides of the cake and sprinkle the rest over the top.
If the frosting feels too soft: Pop the whole cake in the fridge for 15–20 minutes to help it firm up before slicing.
There’s nothing quite like baking a cake that smells like a tropical vacation and brings smiles with every bite. Up next, I’ll share some of my favorite tips, tricks, and variations to help you put your own spin on this coconut classic!
Coconut Cake Tips, Tricks & Easy Variations to Try
Once you’ve got the basics of this coconut cake down, you’ll find it’s surprisingly fun to tweak and customize. Whether you’re baking it for the third time or just feeling creative, these handy tips and flavor twists will help make the recipe your own while keeping things stress-free in the kitchen.
Helpful Tips for Foolproof Coconut Cake:
Use room temperature ingredients. Cold butter or eggs can mess with the texture. Give your ingredients a little time on the counter before you begin – it helps everything blend together more easily.
Don’t skip parchment paper in your pans. This one’s a lifesaver when it comes to flipping your layers out cleanly.
Toast your coconut for more flavor. A quick 5–6 minutes in the oven at 325°F gives it a golden, nutty finish that really stands out.
Let the cake cool completely. Resist the urge to frost too soon – warm cake will melt the frosting, and we want those layers looking their best.
If the frosting feels too soft: Pop it in the fridge for 10–15 minutes before spreading. It firms up just enough for clean edges and easier decorating.
Easy and Fun Variations to Try:
Pineapple Coconut Cake – Fold ½ cup of drained crushed pineapple into the batter for a tropical twist that’s fresh and fruity.
Chocolate Coconut Cake – Add 3 tablespoons of cocoa powder to the dry mix for a marbled effect or go full-on cocoa for a chocolate-coconut combo.
Lemon Coconut Cake – Stir in the zest of one lemon to brighten things up. A splash of lemon in the frosting works, too!
Coconut Poke Cake – After baking, poke small holes and drizzle with sweetened coconut milk. Chill, frost, and enjoy – moist and flavor-packed.
Coconut Bundt Cake – Pour the batter into a well-greased Bundt pan and bake 10–15 minutes longer. Dust with powdered sugar or glaze for a casual finish.
Even small tweaks can bring out big flavors. Try one or two and make it your signature version!
Serving Ideas for Coconut Cake Everyone Will Love

Serving this coconut cake is where the fun really begins. Whether you’re setting the table for a weekend gathering or sneaking a slice with your afternoon tea, this cake brings warmth, comfort, and a little celebration to any moment.
Fun and Simple Ways to Serve:
Birthday favorite – Add candles, sprinkles, or even a little cake topper. It’s festive, coconutty, and crowd-approved.
Brunch treat – Serve thin slices alongside fresh fruit and coffee. It pairs beautifully with a light breakfast spread.
Tropical twist – Plate each slice with a ring of grilled pineapple or a spoonful of mango sauce for that pineapple coconut cake flair.
Holiday-ready – Top the cake with sugared cranberries or edible flowers for a seasonal finish that’s photo-ready.
Party platter – Cut the cake into small squares or triangles for bite-sized pieces perfect for potlucks and showers.
Add a drizzle – A thin stream of melted chocolate or a touch of lemon glaze can turn each slice into something brand new.
No matter how you serve it, this coconut cake brings smiles to the table. Dress it up or keep it casual – it fits right in.
And if you’ve got leftovers (lucky you!), let’s talk about how to store them properly so nothing goes to waste.
How to Store and Reheat Coconut Cake Without Losing Flavor
Baked a big batch and ended up with leftovers? No need to stress – this coconut cake holds up beautifully and tastes just as lovely the following day (and even the one after that).
How to Store:
At Room Temperature:
If your kitchen is cool and the cake will be eaten within 1–2 days, you can cover it with a cake dome or airtight container and leave it on the counter.
In the Fridge:
Wrap the cake tightly or place slices in a sealed container. It’ll hold up nicely in the fridge for about 4 to 5 days without losing its texture or flavor. Let it sit at room temperature for 20–30 minutes before serving – the texture softens beautifully.
Freezer-Friendly Layers:
Planning ahead? Freeze unfrosted cake layers tightly wrapped in plastic, then foil. They’ll keep well for up to 2 months. Let the layers defrost in the refrigerator overnight so they’re ready to frost and serve the next day.
How to Reheat (If Desired):
Quick Warm-Up:
For a soft, just-baked texture, microwave a slice for 8–10 seconds. It helps the frosting melt just slightly, making every bite dreamy and tender. Avoid overheating so it doesn’t dry out.
Taking care of leftovers is easy, and makes having an extra slice even more rewarding.
Coconut Cake to Impress Guests
Equipment
- Two 9-inch round cake pans
- Mixing bowls (at least 2)
- Hand or stand mixer
- Rubber spatula
- Whisk
- Parchment paper
- Wire cooling rack
Ingredients
For the Cake:
- 2 ½ cups all-purpose flour
- 1 ¾ cups granulated sugar
- 1 cup unsalted butter room temperature
- 4 large eggs room temperature
- 1 ¼ cups canned coconut milk well shaken
- 1 cup unsweetened shredded coconut
- 1 ½ teaspoons baking powder
- ½ teaspoon baking soda
- 1 teaspoon fine sea salt
- 2 teaspoons pure vanilla extract
For the Frosting:
- 12 oz cream cheese softened
- ¾ cup unsalted butter softened
- 4 cups confectioners’ sugar sifted
- 1 teaspoon coconut extract
- 1 cup sweetened shredded coconut lightly toasted, for topping
Optional Add-Ins:
- ½ cup crushed pineapple for a pineapple coconut cake
- 3 tablespoons cocoa powder for a chocolate coconut cake
- Zest of 1 lemon for a lemon coconut cake twist
Instructions
- Preheat oven to 350°F (177°C). Grease and line cake pans.
- Cream butter and sugar until light and fluffy.
- Beat in eggs one at a time, then mix in vanilla.
- In a separate bowl, whisk flour, baking powder, baking soda, and salt.
- Alternate adding dry mix and coconut milk into the wet mixture.
- Gently fold in shredded coconut.
- Divide batter between pans and smooth the tops.
- Bake 25–30 minutes, until a toothpick comes out clean.
- Cool in pans for 10 minutes, then transfer to wire racks.
- Beat cream cheese and butter for frosting; add sugar and coconut extract.
- Frost cooled cakes and top with toasted coconut. Chill briefly for clean slices.
Notes
Key Takeaways
- Every slice of coconut cake delivers tender layers and a cozy burst of coconut flavor
- Easy-to-follow steps with simple, everyday ingredients
- Customizable with pineapple, chocolate, or lemon twists
- Perfect for birthdays, holidays, or casual get-togethers
- Layers and frosting can be made ahead and stored with ease
- This is the kind of dessert that looks impressive but still feels like something made with love from your own kitchen
Now that you’ve got the highlights, let’s answer a few common questions to make sure you’re set for success.
FAQs:
Can I make this coconut cake from scratch without coconut milk?
Yes, you can! If you don’t have canned coconut milk on hand, use whole milk and stir in ¼ teaspoon of coconut extract. You’ll still get that delicious coconut flavor with ingredients you probably already have.
Can I turn this coconut cake into cupcakes?
Definitely! Just divide the batter evenly into 24 cupcake liners and bake at 350°F for 18–20 minutes. Start checking around the 17-minute mark – you’re looking for a light golden top and a springy feel when touched.
Should I use sweetened or unsweetened shredded coconut?
Unsweetened shredded coconut keeps the texture light and lets the cake’s sweetness shine through. If you prefer a bit more chew or a sweeter topping, sweetened works fine too – just use a gentle hand when folding it in.
Is there a way to adjust the frosting if I want something a little lighter?
Sure! You can swap half of the cream cheese for whipped Greek yogurt. It’ll still give you that smooth, creamy finish with a slightly tangier twist.
Could I make this coconut cake with a gluten-free flour blend?
Yes, a cup-for-cup gluten-free flour blend (with xanthan gum included) works well here. Just note that the cooling time might be a little longer, and the texture could be slightly more delicate, but still tasty!
Should I store the coconut cake in the fridge after baking?
If you plan to serve it within a day or two and your kitchen is cool, it’s fine at room temp. Otherwise, pop it in the fridge – especially since the frosting is made with cream cheese and butter.
Have another question while baking? Leave a comment or share your version – I’d love to hear how your coconut cake turns out!
Conclusion
There’s just something special about a homemade coconut cake – from the moment you stir that creamy batter to the first slice you serve with a proud smile. It’s warm, welcoming, and perfect for gathering your favorite people around the table. Whether you kept it classic or added your own twist, I hope this recipe brought a little joy (and maybe some happy forks scraping plates).
If you gave it a try, I’d love to hear how it went! Leave a review and let me know what you baked it for – birthdays, Sunday dessert, or just because. Your feedback means the world and helps others feel confident baking it too.