A beautiful bowl of melted chocolate can feel like magic. But when it turns grainy, thick, and dull instead of glossy and silky… well, it’s more like a kitchen heartbreak.
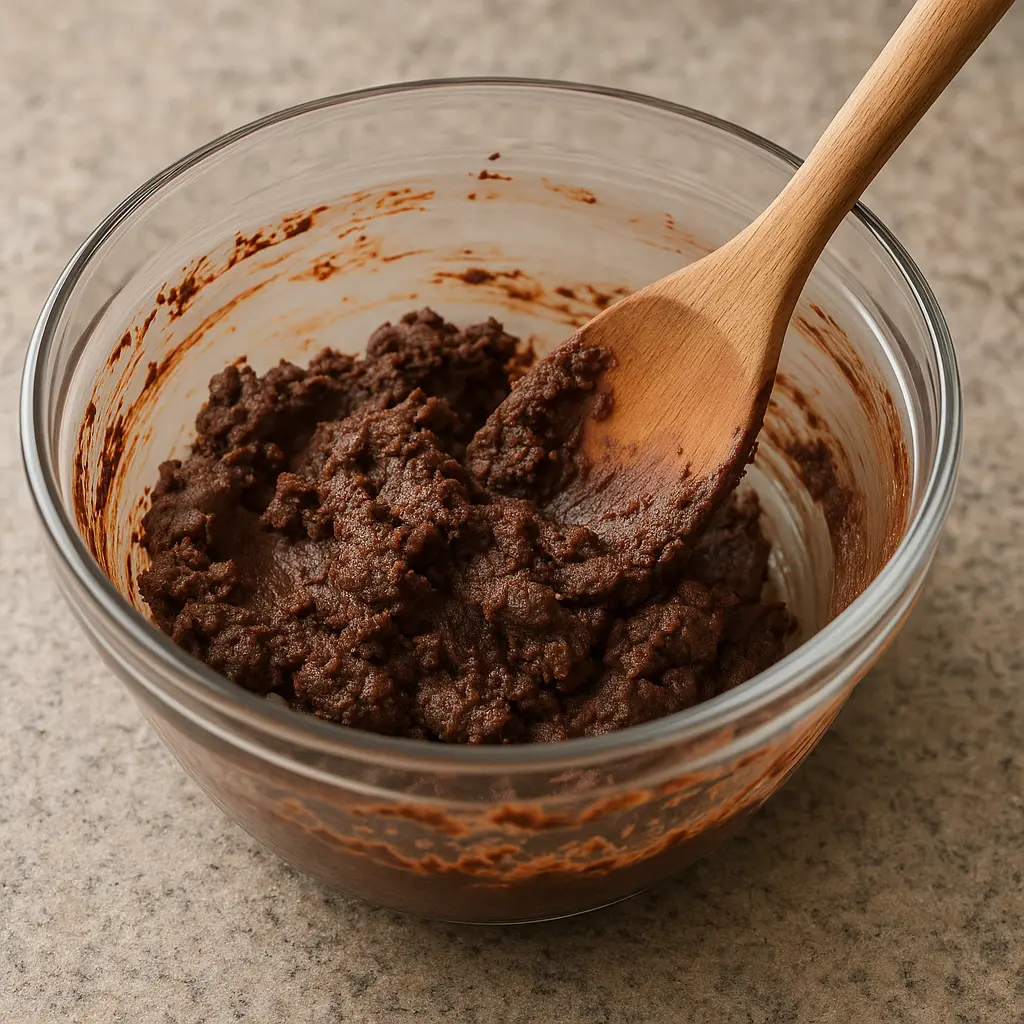
The other day, I was prepping a batch of chocolate-dipped strawberries for a friend’s birthday. I had my bowl set up, my chocolate chips ready, and my double boiler warming gently on the stove. I turned away for just a second – only to come back to a chunky, gritty mess. My wooden spatula stood straight up like it was stuck in chocolate cement.
Let’s just say the strawberries stayed plain that day.
If you’ve ever been in this situation (or just saw a sad bowl of chocolate in your kitchen), you’re not alone. This article explores what went wrong, how to fix seized chocolate (or if you even can), and how to prevent it next time.
What Actually Happened to the Chocolate?
Chocolate is a bit sensitive – okay, very sensitive. When it seizes, it goes from smooth and shiny to thick and clumpy. It’s no longer pourable, no longer dippable, and definitely no longer beautifully glossy.
This happens when just a small amount of moisture comes into contact with the melted chocolate. Even a drop of water from steam or a damp spatula can cause the sugar in the chocolate to clump together. Suddenly, it’s like your creamy dream turned into brownie batter without the fun part.
Another culprit? Overheating. Chocolate likes gentle heat. Too hot, too fast, and it breaks down, leaving you with a paste instead of a puddle.
So… Can You Fix Seized Chocolate?
Sometimes, yes. Other times, it’s better to let it go and try again. But let’s look at what you can try first:
1. Add a Little Fat (Yes, Really)
If the chocolate seized because of overheating or just slightly too much moisture, you can often bring it back to life with a bit of fat. Try adding:
- A spoonful of neutral oil (like sunflower or canola)
- A small pat of butter
- A bit of warm cream
Start small – about a teaspoon at a time – and stir gently. The goal is to loosen the mixture and restore its smoothness. Sometimes, you’ll see the texture shift and start to cooperate again.
It won’t be quite the same as it was before, but it might just become usable for things like frosting, ganache, or drizzling over brownies.
2. Turn It Into a Sauce or Glaze
Let’s say your chocolate’s too far gone to dip strawberries. That’s okay. Melt it the rest of the way over low heat, stir in warm milk or cream (a little at a time), and whisk it into a rich chocolate sauce.
Perfect over pancakes, ice cream, or even stirred into coffee. The graininess might soften enough to disappear once diluted.
3. Repurpose It in Baking
Sometimes, seized chocolate isn’t pretty, but it still tastes good. If it’s not burnt or bitter, chop it up into small chunks and fold it into cookie dough or brownie batter. You’ll end up with gooey pockets of chocolate, and nobody will guess it started out as a kitchen fail.
When to Just Start Over
If the chocolate smells burnt, looks dry and crumbly, or has become rock solid, it’s probably beyond saving.
We’ve all been there. Burnt chocolate has a sharp, unpleasant flavor that can ruin whatever you’re making. Better to toss it and start again with a clean bowl and dry utensils.
Pro tip: Always melt chocolate low and slow, and avoid letting water (even steam) sneak into the mix.
How to Prevent Chocolate From Seizing (Next Time)
You’ve got your chocolate ready, and you’re feeling brave again. Let’s talk about keeping it silky and happy.
1. Keep Water Far, Far Away
This one’s big. Even a tiny drop of water from a lid, a wet spoon, or steam from a pot can throw off your chocolate completely.
Use dry utensils, dry bowls, and if you’re using a double boiler, make sure the bowl doesn’t touch the water. Steam is sneaky; one wrong puff can ruin the batch.
2. Chop the Chocolate Evenly
Larger chunks take longer to melt and can cause uneven heating. Chop or break your chocolate into small, even pieces so it melts gently and consistently.
3. Stir Gently and Patiently
It’s tempting to crank up the heat to get things moving, especially when you’re in a rush. But chocolate likes to be treated gently. Stir slowly and melt over low heat or use a microwave in short 15-second bursts.
It’s all about patience here. Smooth chocolate is a reward for going slow.
What If You’re Using Chocolate Chips?
Chocolate chips are designed to hold their shape, so they’re trickier to melt than baking chocolate or couverture. If you’re using chips, go even slower with the heat and consider adding a bit of fat upfront to help them melt more smoothly.
Or, if you’re serious about your chocolate work, look for chocolate specifically labeled for melting or dipping.
Final Thoughts: It Happens to All of Us
So, your chocolate didn’t turn out like the photo in the recipe. That’s okay. It doesn’t mean you’re a bad cook – it just means you had a moment with a sensitive ingredient.
Next time, you’ll know the signs to watch for. You’ll dry your spoon, lower the heat, and melt slowly with a little more confidence.
And hey, even seized chocolate can lead to something good – a quick glaze, a cookie mix-in, or just a story to tell while you try again.
Let’s embrace the messes. That’s half the joy of being in the kitchen.