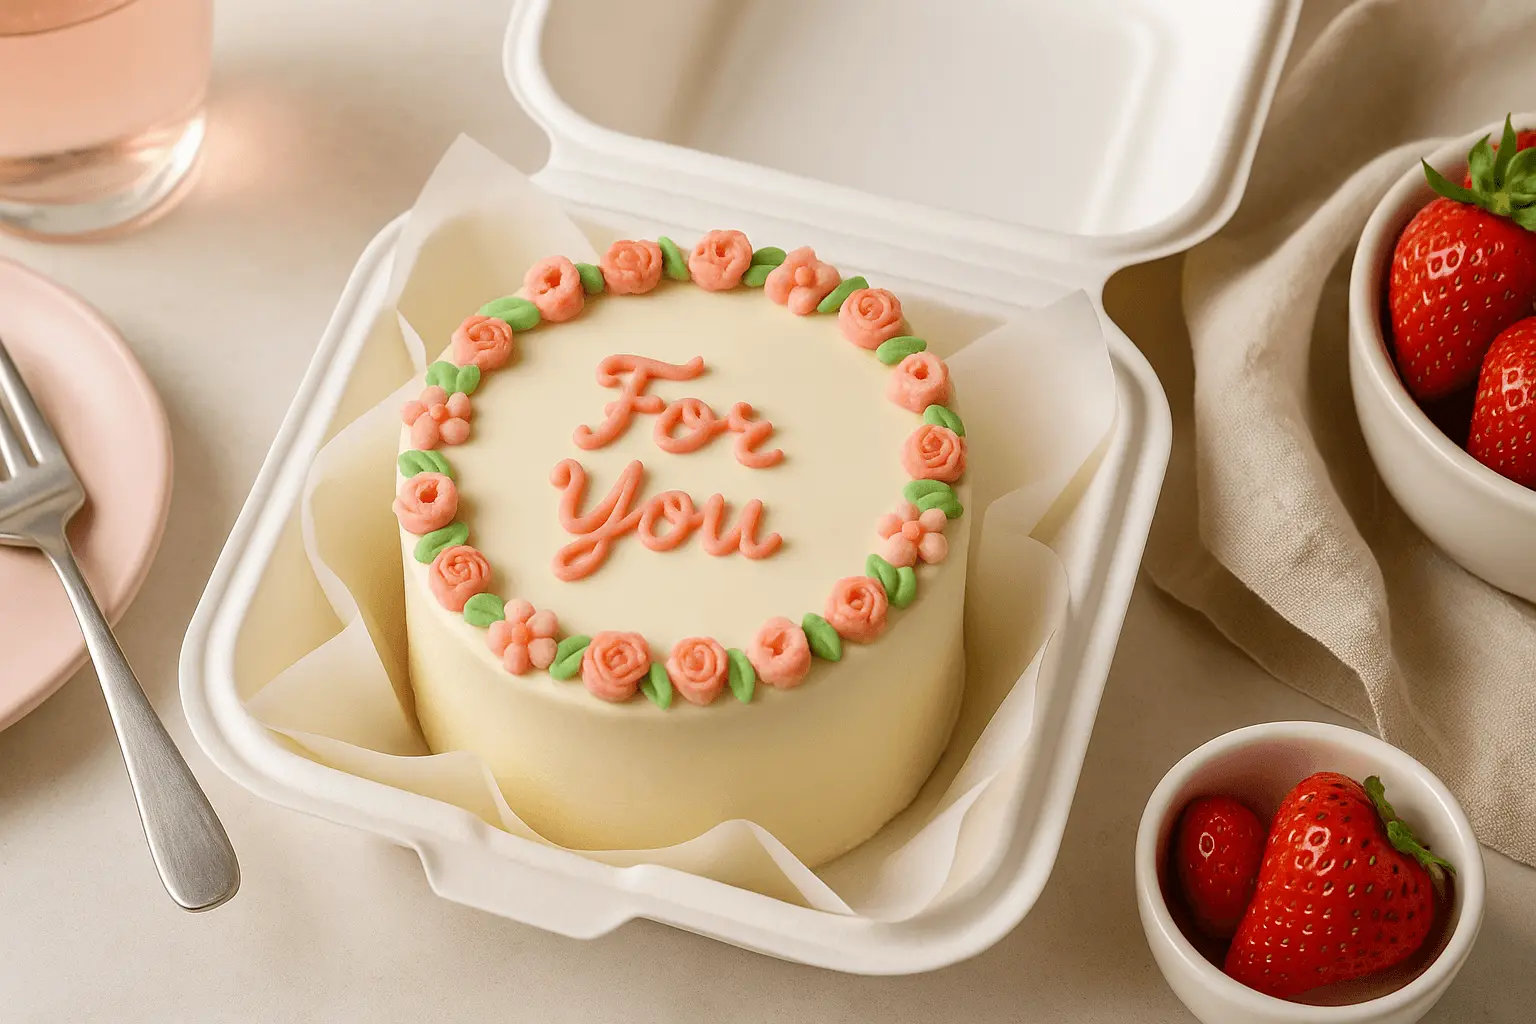
Have you ever seen one of those adorable little cakes tucked inside a takeout box and thought, “I wish I could make that!”? You’re not alone – Bento cake is one of those sweet treats that makes people smile the moment they open the lid. It’s fun, personal, and just the right size when you want something special without making a full-sized dessert.
I started making these for birthdays, small surprises, and sometimes just to make an ordinary day feel a bit brighter. They’re easy to customize with colors, decorations, or even a cute message, and the best part? You don’t need fancy bakery skills to make them look amazing.
In this post, I’ll walk you through every step, from mixing the batter to decorating your Bento cake like a pro. You’ll also get helpful tips, creative ideas, and storing tricks so you can make these little cakes anytime the mood strikes. Let’s get into it – you’re going to love how simple (and fun) this is!
Why You’ll Love Making Bento Cake at Home

If you’ve ever wanted a dessert that feels homemade, fun, and totally personal, Bento cake is the answer. These little cakes pack a lot of joy into a small package – and the best part? They’re simple enough to make on a cozy afternoon but special enough for birthdays, celebrations, or sweet surprises. Whether you’re planning a bento cake design for boyfriend, creating a bento cake aesthetic with pastel colors, or just want something playful and personal, this recipe gives you all the tools to make it your own.
- Family-friendly and fun to decorate – Great for kids or weekend baking with friends.
- Quick and easy to make – No need for complicated tools or techniques.
- Perfect for gifting or special occasions – From a birthday bento cake to a cheerful thank-you treat.
- Customizable designs – Try a cute bento cake, go bold with a blue bento cake, or keep it simple and sweet.
- Great portion size – Just right for two or a small group, with no waste and no fuss.
This is one of those recipes that brings a smile before the first bite – and lasts long after.
Let’s gather our ingredients and set the stage for baking your perfect little cake.

Easy Bento Cake Ingredients and What They Do
Let’s talk ingredients – nothing fancy, just the good stuff that brings this Bento cake to life. These small cakes come together with pantry staples, and a few extras if you’re feeling creative. I’ll guide you through what each item does, how much you need, and how to make it your own with optional add-ins.
Basic Ingredients
Here’s everything you’ll need for one delightful 4-inch two-layer bento box cake (serves 2):
- ¾ cup all-purpose flour – This gives the cake its soft, structured base.
- ½ cup granulated sugar – Sweetens the cake and helps with that golden color.
- 4 tablespoons unsalted butter (softened) – Adds richness and keeps the crumb tender.
- 1 large egg (room temperature) – Holds everything together and adds moisture.
- ¼ cup whole milk – Makes the batter smooth and creamy.
- 1 teaspoon vanilla extract – Brings a warm, cozy flavor that works with almost anything.
- 1 teaspoon baking powder – Helps your cake rise up tall and fluffy.
- ⅛ teaspoon salt – Just a pinch balances out the sweetness.
For the Buttercream
- 6 tablespoons unsalted butter (softened)
- 1 ¼ cups powdered sugar (sifted)
- 1–2 tablespoons whole milk
- ½ teaspoon vanilla extract
Optional Add-Ins
- Gel food coloring – For fun themes like bento cake pink, blue bento cake, or a bento cake design for boyfriend.
- Fruit jam or curd – Swirl into the batter or layer for a sweet surprise inside.
- Sprinkles or edible glitter – Add flair and texture on top.
- Mini chocolate chips – Fold into the batter for extra richness.
Pro Tip: Want to play with flavors? Add a dash of almond extract for a lovely floral note or swap the vanilla for lemon to brighten it up. A little orange zest also adds a fresh twist – perfect for spring or summer parties!
Now that your ingredients are ready to go, let’s bake this little beauty step by step.
Step-by-Step Guide: How to Make a Bento Cake
This is the part where the kitchen starts to smell amazing. Making your Bento cake is fun and surprisingly simple. Just take it one step at a time, and you’ll have a tiny masterpiece ready before you know it.
1. Preheat and prep your pans
Set your oven to 350°F (175°C). Lightly grease two 4-inch round cake pans, then line the bottoms with parchment paper. This keeps the layers from sticking and helps you get a clean release.
2. Cream the butter and sugar
In a medium mixing bowl, beat the softened butter and sugar together until it looks light and fluffy, like pale yellow frosting. This step adds air, which gives the cake its tender texture.
3. Add the egg and vanilla
Crack in the egg and pour in the vanilla. Beat until the mixture turns smooth and slightly glossy. If it looks a bit separated, that’s okay – it’ll come together when you add the dry ingredients.
4. Mix the dry ingredients
In a separate bowl, whisk the flour, baking powder, and salt. This evenly distributes the leavening so the cake bakes up light and even.
5. Combine the wet and dry
Add half the dry mixture to your wet ingredients and stir gently. Pour in the milk, stir again, then finish with the rest of the dry mix. Don’t overmix – just until there are no streaks of flour.
6. Divide and smooth
Spoon the batter into your prepared pans and gently tap them on the counter to level out the tops and release any air bubbles.
7. Bake the layers
Place the pans in the center of the oven and bake for 18–20 minutes. The tops should spring back when touched lightly, and a toothpick should come out with a few moist crumbs.
8. Cool completely
Let the cakes rest in their pans for 5 minutes, then turn them out onto a wire rack to cool fully. Warm cake and frosting don’t mix well – give it time to settle.
9. Make the buttercream
Beat the softened butter until creamy, then slowly add the powdered sugar. Drizzle in the milk a little at a time until it’s smooth and spreadable. Add vanilla and beat again until fluffy.
10. Assemble and decorate
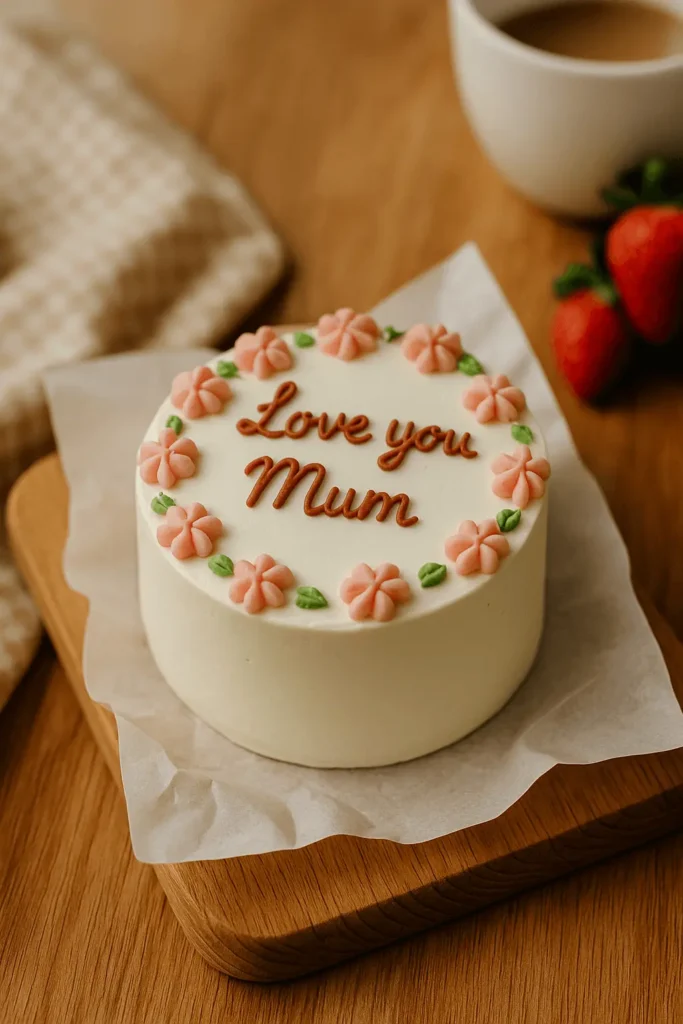
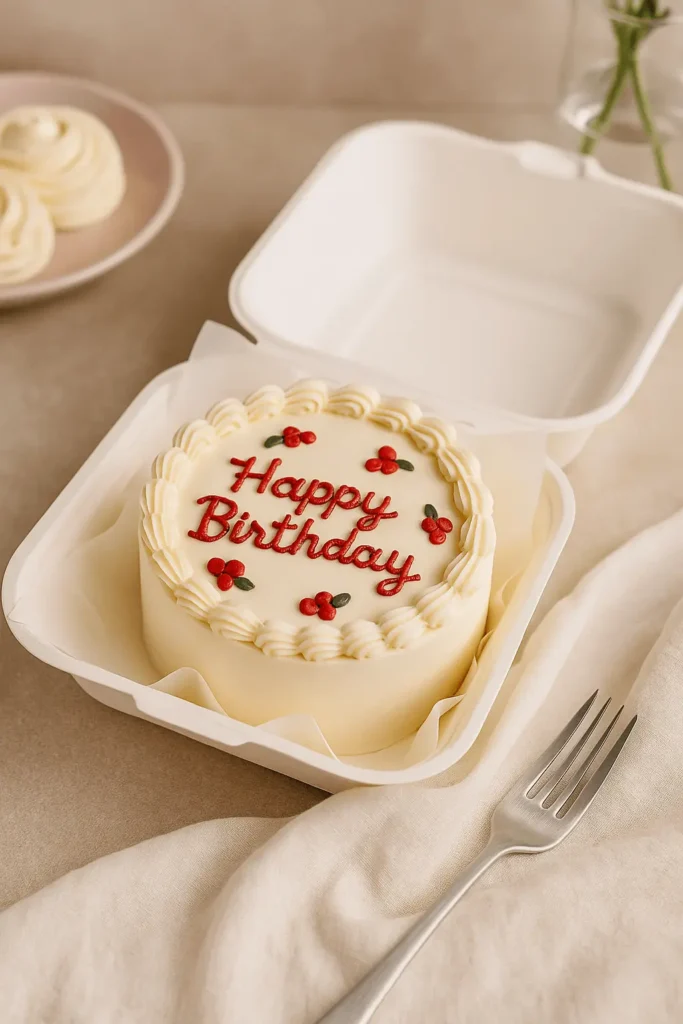
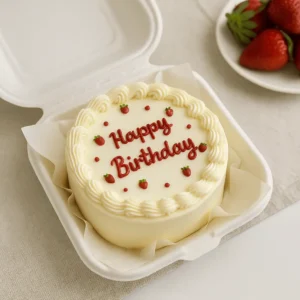
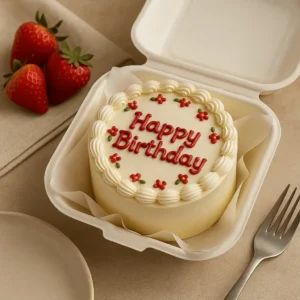
Trim the tops if needed to make flat layers. Add a layer of frosting in between, then stack and cover the outside. Now comes the fun – decorate with piping, colors, sprinkles, or write a short note like “Happy Birthday” or “I Love You” for that sweet bento cake design touch.
There’s nothing quite like seeing your creation come together, especially when it’s this cute and personal.
Let’s keep the fun going – next up, I’ll show you my favorite tips and flavor twists to make your Bento cake truly your own.
Bento Cake Tips and Fun Variations to Try
Now that your bento cake is baked and frosted, let’s sprinkle in a few helpful tricks to make the whole process smoother – and more fun. Whether you’re baking for the first time or adding a personal twist, these tips will help you get the most out of every layer and swirl.
Helpful Tips
- Chill before decorating: Pop your cake in the fridge for 10–15 minutes before adding designs. A slightly firmer frosting base makes piping and decorating easier.
- Use a serrated knife for clean cuts: Leveling the tops? A gentle sawing motion keeps crumbs under control.
- Don’t overmix the batter: Stir just until everything comes together. Overmixing can make the cake a little too dense.
- Room temp ingredients are key: This helps everything blend smoothly for a consistent batter and even baking.
Fun Variations
- Color themes: Tint the frosting pastel pink for a pink bento cake or bold blue for a bento cake for boyfriend or birthday celebration.
- Flavor twist: Swap vanilla for almond or lemon extract to change things up.
- Filling option: Add a spoonful of strawberry jam or chocolate spread between the layers for a sweet surprise.
- Add texture: Stir in mini chocolate chips or fold in sprinkles for a funfetti effect that bakes right into the cake.
- Cute bento cake styles: Write short messages on top like “Love You” or “You Got This” using a piping bag or edible markers.
The beauty of this cake is how adaptable it is – you can dress it up for a special occasion or keep it simple for a cozy treat at home. Let’s talk about how to serve it in style!
Creative Ways to Serve Your Bento Cake
Serving a bento cake is half the fun – it’s not just dessert, it’s a moment. These little cakes are perfect for sharing, gifting, or adding a personal touch to just about any occasion.
- Special occasions: Create a birthday bento cake with piped names or colorful sprinkles. Pop it into a takeaway box with a ribbon, and you’ve got a sweet gift ready to go.
- Date night dessert: Share a heart-shaped bento cake design for boyfriend with a simple message like “Love U.” It’s sweet, simple, and thoughtful.
- Lunchbox surprise: Pack one up for a school treat, work snack, or picnic. Just be sure to include a fork – it’s too cute to resist!
- Celebration sampler: Make a few simple bento cakes in different colors and flavors for holidays or family parties. Everyone gets their own little cake to decorate or enjoy.
- Cute table centerpiece: Serve them on individual plates with a few berries or edible flowers for a café-style dessert that looks as good as it tastes.
However you present it, a bento box cake always brings joy with its charm and creativity.
And if you’ve got leftovers (lucky you!), let’s make sure they stay fresh and delicious.
How to Store and Reheat Bento Cake the Right Way
Made more than one cake? Or saving a slice for later? No problem! These tips will help keep your bento cake as tasty on day two as it was fresh out of the oven.
- Refrigerate: Store your frosted cake in an airtight container in the fridge for up to 3 days. Let it sit at room temperature for 10–15 minutes before serving so the frosting softens up.
- Freeze for later: You can freeze the unfrosted cake layers. Wrap each one tightly in plastic wrap, then place them in a freezer bag or container for up to 1 month. Let the cake layers rest in the refrigerator overnight so they’re ready to frost the next day.
- Refreshing texture: If your cake has been chilled and feels a bit firm, microwave individual slices for just 5–8 seconds, not too long, just enough to soften the crumb.
- Transport tip: If you’re traveling with the cake, chill it first to set the frosting. That way, it’ll stay neat and picture-perfect in the box.
With these easy tips, your little cake stays just as enjoyable the next day, because let’s be honest, sometimes it’s even better after a little rest.
More Desserts to Try After Your Bento Cake
If you enjoyed baking your bento cake, here are a few more sweet and simple treats you might love next:
- Chocolate Ganache Cake – Rich, glossy, and perfect for chocolate lovers.
- Cotton Candy Cake – A fun, colorful cake that brings out your inner child.
- Cinnamon Roll Cake – Swirled with cinnamon and topped with cozy glaze.
- Brownie Cupcakes – Fudgy, bite-sized, and full of chocolatey goodness.
- Chocolate Chip Cupcakes – Soft cupcakes dotted with melty chips in every bite.
- Mini Cupcakes – Great for parties or just a little something sweet to share.
Each one brings a new flavor to the table, and they’re all as fun to make as they are to eat!
Bento Cake
Equipment
- Two 4-inch round cake pans
- Mixing bowls
- Hand or stand mixer
- Offset spatula or butter knife
- Cooling rack
- Parchment paper
- Sifter (for powdered sugar)
Ingredients
Cake:
- ¾ cup all-purpose flour
- ½ cup granulated sugar
- 4 Tbsp unsalted butter softened
- 1 large egg room temperature
- ¼ cup whole milk
- 1 tsp vanilla extract
- 1 tsp baking powder
- ⅛ tsp fine salt
Buttercream:
- 6 Tbsp unsalted butter softened
- 1 ¼ cups powdered sugar sifted
- 1 –2 Tbsp whole milk
- ½ tsp vanilla extract
Optional Add-Ins:
- Gel food coloring for a pink bento cake, blue bento cake, or themed decorations
- Strawberry or fruit jam for layering
- Sprinkles edible glitter, or piped messages
- Mini chocolate chips
Instructions
- Preheat oven to 350°F (175°C); grease and line two 4-inch pans.
- Cream butter and sugar until fluffy.
- Beat in egg and vanilla.
- Mix flour, baking powder, and salt in a separate bowl.
- Add half the dry mix to the wet, then milk, then remaining dry mix.
- Divide into pans and smooth the tops.
- Bake 18–20 minutes; test with toothpick.
- Cool 5 minutes in pans, then transfer to rack to cool completely.
- Beat buttercream ingredients until smooth and creamy.
- Frost, stack, decorate, and enjoy!
Notes
 You’ll need two 4-inch cake pans for the perfect size. Feel free to add food coloring or filling to match the occasion – bento cake designs are meant to be playful!
Key Takeaways
- Bento cake is a fun, mini-sized dessert that’s perfect for any occasion.
- It’s quick to make with simple ingredients and easy steps.
- You can personalize it with colors, messages, or fillings.
- Great for gifting, celebrating, or just treating yourself.
- Stores well and stays delicious for days when kept properly.
Sweet, simple, and full of charm – this little cake is sure to become a favorite in your kitchen.
FAQs About Making and Decorating Bento Cake
Can I double the recipe to make more than one bento cake?
Yes, you can! Just double all the ingredients evenly and divide the batter between multiple 4-inch pans. For best results, place them with a little space between each and rotate the pans halfway through baking to keep things rising evenly.
What kind of frosting works best for decorating a bento cake?
American buttercream is your best bet – it’s sturdy, easy to work with, and holds designs well. If you prefer something lighter, a stabilized whipped frosting works too, but keep your cake chilled so it stays in shape.
How do I get bold colors without making the frosting too soft?
Use gel food coloring instead of liquid. Start with a little – just a touch on a toothpick – then mix it in and let it sit for a few minutes before adjusting. It gives you strong color without changing the frosting texture.
One cake layer turned out taller than the other. What happened?
It usually comes down to uneven batter amounts or a warmer spot in the oven. Try weighing the batter into each pan and rotating them halfway through to help both cakes bake up evenly.
Can I make this bento cake without eggs?
Yes! You can use 3 tablespoons of unsweetened applesauce instead of the egg. The texture will be a little softer, but still delicious and great for decorating.
How do I make a black bento cake design without overdoing the color?
To get that deep charcoal look without using too much dye, mix a small amount of black cocoa powder into white buttercream along with gel food coloring. The color deepens as it sits, so refrigerating it overnight gives you a darker shade with less dye.
Still have questions? Feel free to experiment – bento cake designs are meant to be playful and personal!
Conclusion
There’s something so special about making a bento cake – from mixing the batter to piping on that final swirl of frosting. It’s a recipe that invites creativity, brings smiles, and makes even the simplest moment feel like a celebration. Whether you made it for someone you love or just to brighten your day, I hope this little cake brought joy to your kitchen.
If you gave this recipe a try, I’d love to hear how it turned out! Leave a quick review and let me know what colors, designs, or fun ideas you added to make it your own.