You know those nights when everyone’s hungry and you’re trying to figure out something satisfying without turning the whole kitchen upside down? This Chicken Pita Recipe is one of those go-to meals that just makes sense. It’s warm, filling, easy to customize, and comes together quickly – even when the day’s been a whirlwind.
What I love most is that it feels a little special without being fussy. You’re working with everyday ingredients, layering them into soft, cozy pita pockets, and suddenly dinner feels exciting again.
In this post, I’ll walk you through everything: the ingredients I use (and why), simple cooking steps, time-saving tips, and fun ways to serve it. Whether it’s your first time or a regular on your weekly menu, this recipe is one you’ll want to keep close.
Why You’ll Love This Chicken Pita Recipe for Any Occasion
This chicken pita recipe is one of those meals you’ll want to keep in your back pocket for busy evenings or casual weekends. It’s quick to put together, easy to customize, and always feels satisfying. The warm pita wraps hold tender, golden-brown chicken, crisp veggies, and a creamy sauce that brings everything together in the best way.
Here’s why it stands out:
- Family-friendly: Everyone can fill their pita just the way they like it.
- Quick and easy: Ready in about 30 minutes with simple steps.
- Perfect for any occasion: Great for weeknight dinners or relaxed get-togethers.
- Flexible: Use it as a wrap, a platter, or even a pita pocket.
You’ll love how this recipe feels both comforting and fresh every time. Let’s take a look at what you’ll need to get started!
Ingredients You Need for the Perfect Chicken Pita Recipe
Let’s keep things simple and flavorful – just how I like it when I’m juggling dinner and everything else happening around the house. This chicken pita recipe uses everyday ingredients that come together beautifully. You don’t need anything fancy, just good basics that work hard in the flavor department.
Basic Ingredients
Here’s what you’ll need to make about 4 generous pitas:
- 1 ½ pounds boneless, skinless chicken thighs – These cook up juicy and tender, perfect for slicing into pita pockets.
- 2 tablespoons olive oil – Helps coat the chicken and carry the spices evenly while searing.
- 2 tablespoons lemon juice (fresh if possible) – Adds brightness and helps the chicken soak up flavor quickly.
- 3 garlic cloves, finely minced – Brings that savory, aromatic kick we all know and love.
- 1 teaspoon dried oregano – A classic herb that gives it that unmistakable Mediterranean feel.
- ½ teaspoon ground cumin – Earthy and warm, it balances the brightness of the lemon.
- ½ teaspoon smoked paprika – Adds just a hint of smokiness and a lovely red-gold color.
- 1 teaspoon salt + ½ teaspoon black pepper – A must for flavor and balance.
- 4 large pita breads – Soft, warm, and ready to be stuffed with all your tasty fillings.
- ½ cup plain Greek yogurt – Creamy and tangy, it makes the perfect base for your sauce.
- 1 tablespoon fresh dill, chopped – Freshens up the sauce with a soft herbal note.
- 1 cup cherry tomatoes, halved – Juicy and sweet, they add color and a nice pop in every bite.
- ½ cup cucumber, diced – Adds that crisp, cool crunch that contrasts perfectly with the warm chicken.
- ¼ cup red onion, very thinly sliced – Brings a little bite and vibrant color.
Optional Add-Ins
- Crumbled feta – Adds a salty, creamy touch if you’re a fan of bold cheese.
- Shredded romaine lettuce – Great if you want to add some greens and extra crunch.
- Pickled peppers – A fun way to sneak in some tang or spice.
Pro Tip: Want to give this a little international flair? Swap the oregano and dill for a pinch of ground coriander and chopped fresh cilantro for a Middle Eastern twist. Or add a spoonful of harissa to the yogurt for a North African-style kick.
Now that everything’s on the counter, let’s cook it up step by step – this is where it really comes together!
How to Make This Easy and Flavorful Chicken Pita Recipe
Okay friend, here’s where the kitchen starts smelling amazing. This chicken pita recipe is straightforward, but every step builds that flavor. It’s one of those meals that feels hands-on, but in the best way – like you’re layering love into each bite.
Step-by-Step Instructions
1. Make the marinade.
In a large bowl, whisk together the olive oil, lemon juice, garlic, oregano, cumin, paprika, salt, and pepper. The mixture should look glossy and smell fragrant – that’s your flavor base.
2. Coat the chicken.
Add the chicken thighs to the bowl and toss them gently with clean hands or tongs until every piece is evenly coated. Let it rest at room temperature for 10–15 minutes while you prep the toppings. (Or, cover and refrigerate it for up to 24 hours if you’re planning ahead.)
3. Prepare the sauce.
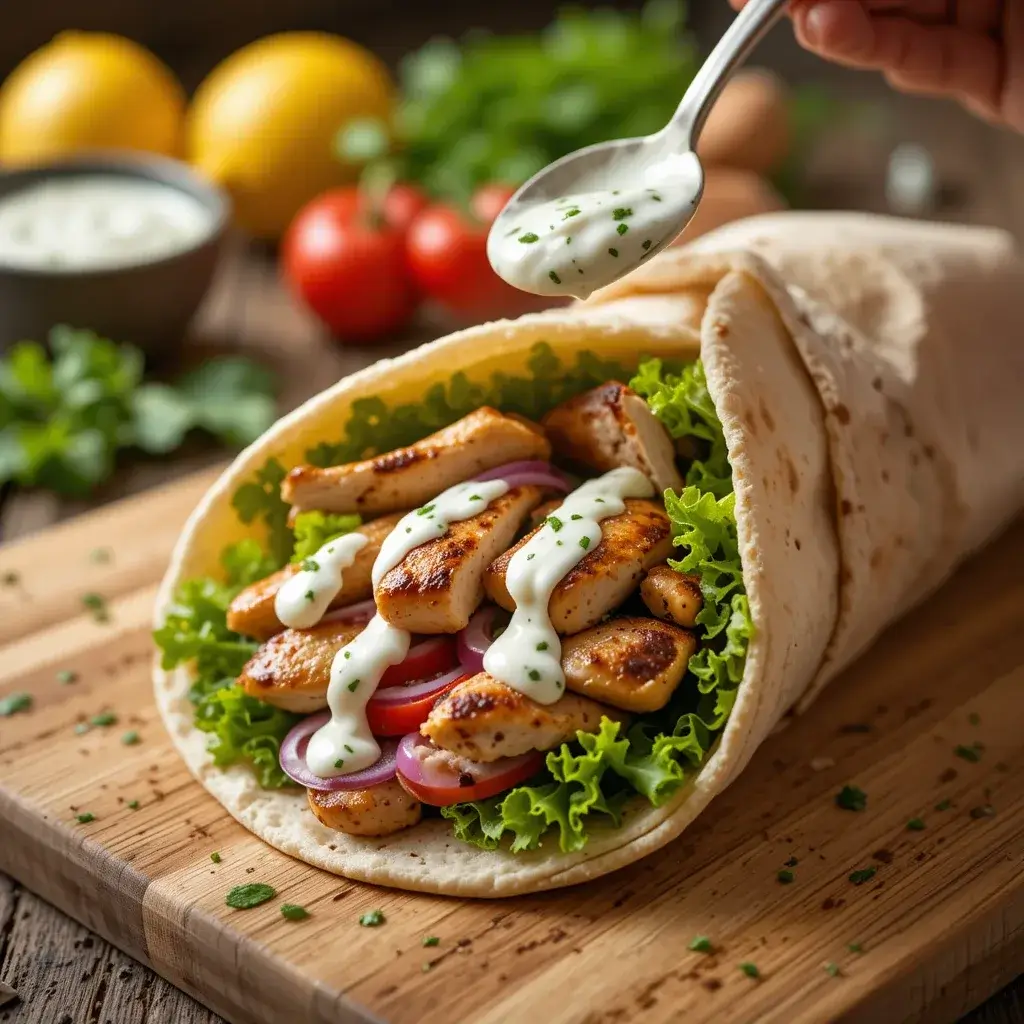
In a small bowl, combine the Greek yogurt with freshly chopped dill, a splash of lemon juice, and a light sprinkle of salt, then stir until smooth and creamy. Set it aside in the fridge to chill while the chicken cooks – the flavors meld while it rests.
4. Heat the skillet.
Place a large skillet (cast iron or nonstick) over medium-high heat. Give it a minute or two to get nice and hot – this helps you get that golden sear.
5. Cook the chicken.
Carefully lay the marinated chicken pieces into the hot skillet, spreading them out so they cook evenly without overlapping. You should hear a good sizzle. Cook for about 4–5 minutes per side, flipping once, until it’s golden and cooked through (165°F internal temperature). If the skillet feels a bit crowded, cook the chicken in two rounds so it sears nicely instead of steaming.
6. Let it rest and slice.
Transfer the chicken to a cutting board and let it sit for a few minutes. This helps the juices stay where they belong – inside! Then slice the thighs into thin strips.
7. Warm the pitas.
While the chicken rests, toss the pitas into the skillet (or wrap them in foil and warm them in a 300°F oven for 5 minutes). You just want them soft and bendable, with a little toasty warmth.
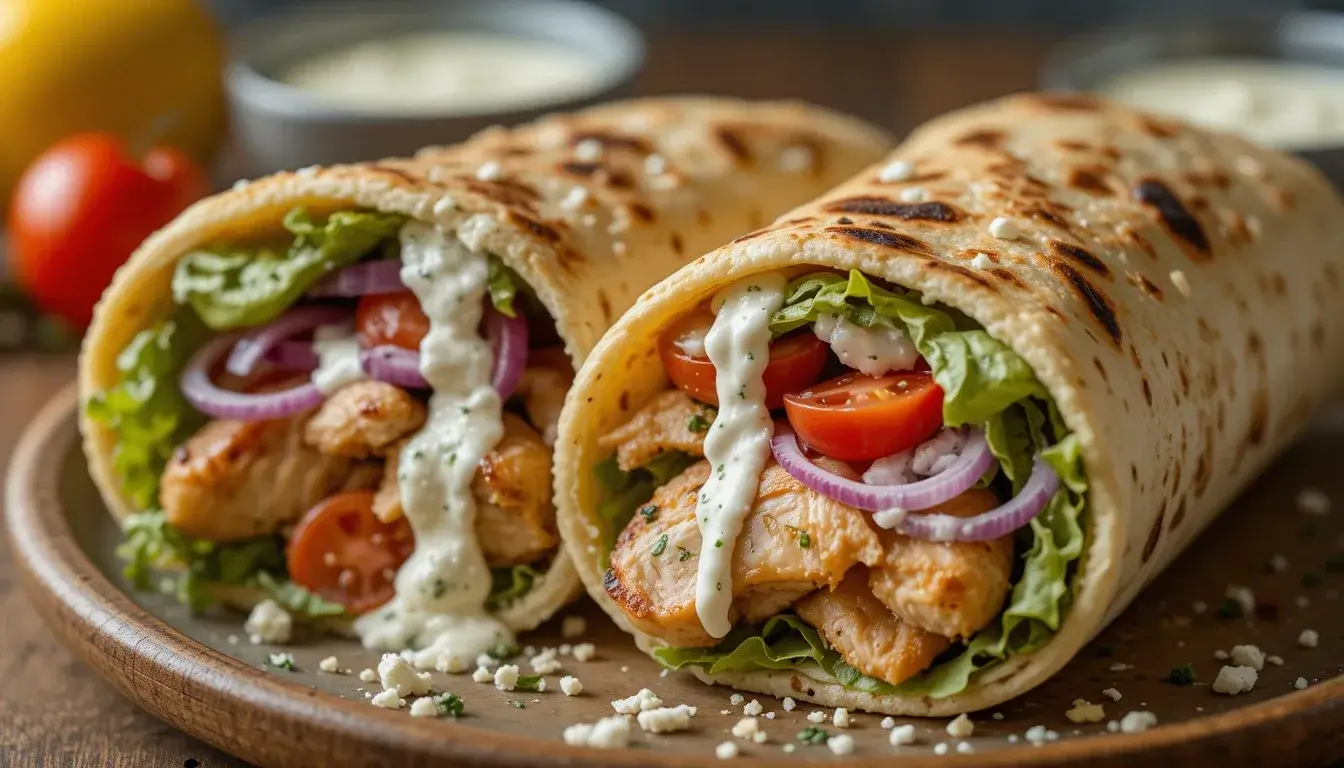
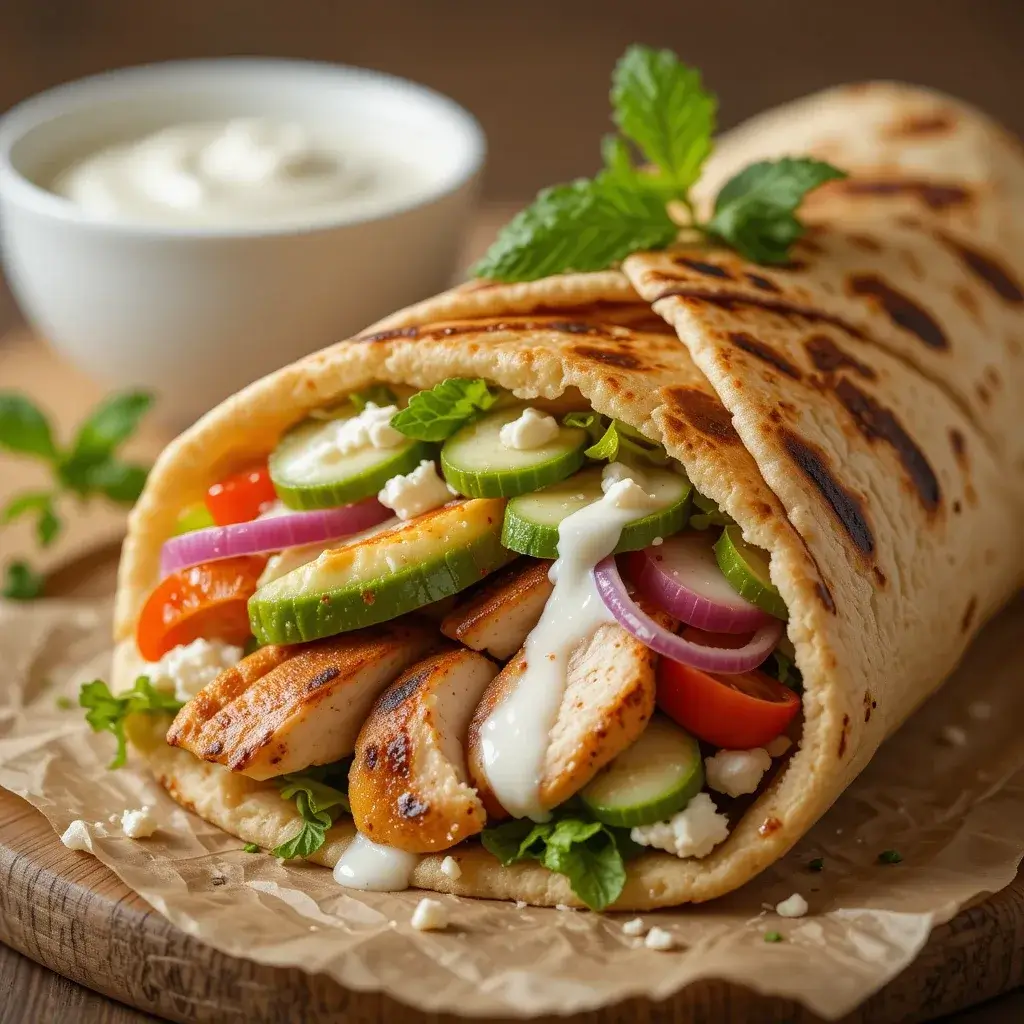
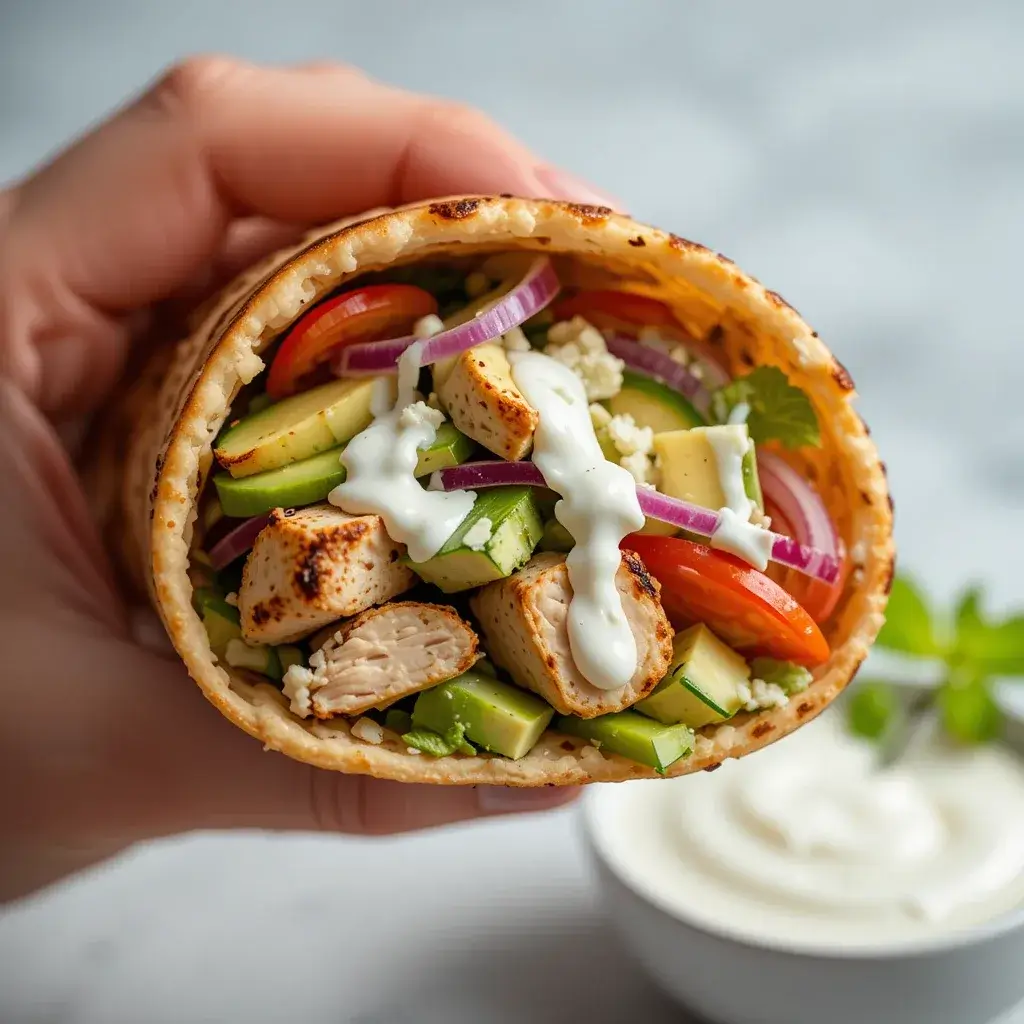
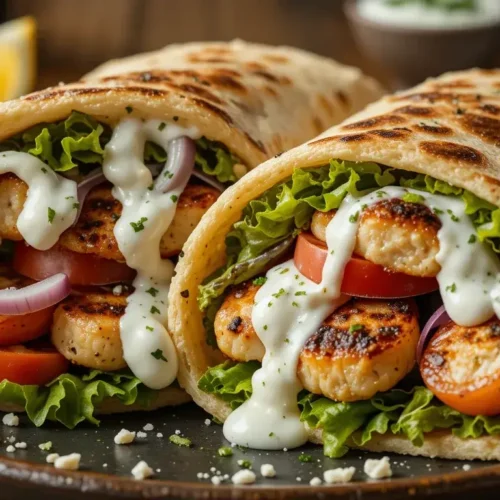
8. Assemble your pita pockets.
Fill each pita with a generous layer of sliced chicken. Top with tomatoes, cucumber, red onion, and a spoonful (or two) of that creamy dill yogurt sauce. Fold, tuck, or roll it however you like – no wrong way here.
9. Serve and enjoy.
That first bite? Warm, juicy, fresh, and satisfying all at once. It’s a hands-on meal, so expect happy, messy faces and second helpings.
And just like that, you’ve got dinner wrapped up – literally! Now that your chicken pita is sizzling and stacked with flavor, let’s take it to the next level with a few creative chef tips and delicious variations.
Chicken Pita Recipe Tips and Tasty Variations to Try
Once you’ve mastered the basics of this chicken pita recipe, there are so many easy ways to personalize it! Whether you’re switching up ingredients based on what’s in the fridge or trying out different styles, these tips help you bring something a little extra to the table each time.
Handy Tips to Make It Even Better:
- Marinate longer for deeper flavor: If time allows, let the chicken soak overnight. Cover it, tuck it into the fridge, and let it hang out until you’re ready to cook.
- Don’t rush the sear: A hot skillet and a little patience give the chicken that beautiful golden color. No need to fuss – just let it do its thing.
- Use tongs, not a fork: Tongs turn your chicken without piercing it, so you don’t lose any of those delicious juices.
- Warm your pitas last minute: Heat them just before serving to keep them soft and ready to fold without tearing.
Simple Swaps & Variations:
- Different cuts of chicken: Boneless breasts work fine, just slice them thin before cooking to keep them tender.
- Spice it up: Add a pinch of crushed red pepper flakes or a spoonful of harissa to the marinade for a bolder flavor.
- Try other herbs: Swap dill for parsley or mint in the yogurt sauce, depending on your preference or what you have on hand.
- Make it a chicken pita wrap: Roll everything up tightly and slice it in half for an easy lunchbox idea or picnic favorite.
- Turn it into a bowl: Skip the pita and serve the chicken and toppings over rice, couscous, or greens.
These little tweaks can help you turn the same base into something fresh each time. It’s one of those recipes that keeps on giving!
Next, let’s talk about the fun part – how to serve it and make it feel like a full, delicious meal.
Serving Ideas for Your Chicken Pita Wraps and Pockets
There’s just something joyful about loading up warm pitas with flavorful fillings – especially when everyone gets to build their own! Whether you’re feeding the family on a weeknight or hosting a casual dinner with friends, this chicken pita recipe fits right in.
Fun & Flexible Ways to Serve It:
- Build-your-own bar: Lay out all the toppings buffet-style – chicken, veggies, sauce, optional extras – and let everyone fill their own pita just the way they like.
- Mediterranean plate: Serve the pita alongside hummus, olives, and a simple cucumber salad for a colorful spread that feels a little festive.
- Weekday lunch wraps: Wrap the fillings in foil or parchment and pack them up for work or school lunches. Just keep the sauce on the side to avoid soggy bread.
- Mini versions for gatherings: Use smaller pita rounds or cut regular ones in half for appetizer-sized servings – great for potlucks or game night!
- Serve with a simple side: Think roasted potatoes, lemony couscous, or even sweet potato fries for a hearty, satisfying plate.
No matter how you serve it, these chicken pitas are sure to bring smiles all around. And guess what? The leftovers are just as tasty – let’s talk about how to keep them fresh.
How to Store and Reheat Your Chicken Pita Leftovers
If you’re anything like me, you’ll want to make a little extra just to have leftovers. Thankfully, this chicken pita recipe holds up beautifully the next day, and you can store everything in separate containers so it stays fresh and ready to go.
How to Store It:
- Chicken: Transfer the cooked, sliced chicken to a sealed container and refrigerate – it stays tasty and tender for up to 4 days.
- Sauce: Store the yogurt-dill sauce separately in a sealed jar or container and give it a quick stir before using again.
- Toppings: Keep your chopped cucumbers, tomatoes, and onions in a small covered bowl so they stay crisp.
Can You Freeze It?
- Chicken only: Yes! The chicken holds up nicely in the freezer and can be stored for up to 3 months. Just place it in a freezer bag with the air pressed out. When it’s time to use it, let it defrost slowly in the fridge overnight so it’s ready to reheat the next day.
Reheating Tips:
- Stovetop: Warm the chicken in a skillet over medium heat with a tiny splash of water to keep it juicy.
- Microwave: Use short bursts and cover loosely with a damp paper towel to keep things from drying out.
- Pitas: Wrap them in foil and pop them in a 300°F oven for 5 minutes or warm in a dry skillet until soft.
There’s nothing like knowing a delicious meal is just a few minutes away – leftovers have never been this exciting!
Related Chicken Recipes You May Love
If this chicken pita recipe has you craving more flavorful meals, here are a few other easy and crowd-pleasing chicken dishes you might enjoy:
- Forgotten Chicken Recipe – A cozy, hands-off baked dish that’s big on comfort.
- Marry Me Chicken Soup – Creamy, savory, and perfect for chilly days.
- Jalapeño Chicken Recipe – A little bold, a lot flavorful, and easy to make.
- Gluten-Free Chicken Pot Pie – A hearty option with a flaky, comforting crust.
Irresistible Chicken Pita Recipe for Busy Weeknights
Equipment
- Large skillet (cast iron or nonstick)
- Mixing bowls (1 large, 1 small)
- Tongs
- Cutting board and knife
- Measuring spoons
- Serving plate or board
Ingredients
- 1 ½ lbs boneless skinless chicken thighs
- 2 tbsp olive oil
- 2 tbsp lemon juice fresh is best
- 3 garlic cloves minced
- 1 tsp dried oregano
- ½ tsp ground cumin
- ½ tsp smoked paprika
- 1 tsp salt
- ½ tsp black pepper
- 4 large pita breads
- ½ cup plain Greek yogurt
- 1 tbsp fresh dill chopped
- 1 cup cherry tomatoes halved
- ½ cup diced cucumber
- ¼ cup thinly sliced red onion
Optional Add-Ins:
- Crumbled feta
- Shredded romaine lettuce
- Pickled peppers
Instructions
- Whisk marinade: Combine olive oil, lemon juice, garlic, oregano, cumin, paprika, salt, and pepper in a bowl.
- Marinate chicken: Add chicken thighs, toss to coat, and let rest 10–15 minutes.
- Make the sauce: Mix yogurt, dill, lemon, and a pinch of salt in a small bowl. Chill.
- Cook the chicken: Sear chicken in a hot skillet 4–5 minutes per side until golden and cooked through.
- Rest and slice: Let chicken rest a few minutes, then slice into thin strips.
- Warm the pitas: Heat in the skillet or oven until soft and warm.
- Assemble: Fill each pita with chicken, veggies, and a dollop of yogurt sauce.
- Serve: Enjoy warm with your favorite sides or as-is!
Notes
Key Takeaways
- This chicken pita recipe is quick, flavorful, and perfect for busy days.
- Made with everyday ingredients and minimal prep.
- Easy to customize with different toppings or wraps.
- Great for family dinners, lunchboxes, or casual get-togethers.
- Leftovers reheat well and make delicious next-day meals.
Now that everything’s wrapped up (literally and figuratively!), let’s tackle a few common questions you might still have.
Common Questions About Making This Chicken Pita Recipe
Here are a few common questions that come up when making this chicken pita recipe, along with helpful, kitchen-tested answers to keep your cooking smooth and stress-free.
Is it okay to use chicken breast in place of thighs?
Yes, you can! Just slice the boneless chicken breasts horizontally so they cook evenly. They usually take about 3–4 minutes per side in a hot skillet. For best results, use an instant-read thermometer and cook until they reach 165°F – no guesswork needed.
What’s the best way to prep this chicken pita recipe ahead of time?
Feel free to marinate and cook the chicken a day or two ahead of time. Store it in an airtight container in the fridge. When you’re ready to serve, just reheat the chicken and prep your fresh toppings that day – this keeps everything crisp and flavorful.
How do I keep the pitas from tearing?
The trick is to warm them first! Heat each pita for about 30 seconds per side in a dry skillet or give them a few seconds in the microwave under a damp paper towel. This softens them just enough to fold easily. Then, slice along one edge instead of splitting them open all the way.
Is the yogurt sauce a must-have?
It really adds that cool, creamy finish that pairs perfectly with the seasoned chicken, but it’s not the only option. Try hummus, tzatziki, or mashed avocado if you’re looking for something different. These swaps work great in other chicken pita recipes too.
Is there a way to bake the chicken instead of cooking it on the stove?
Absolutely. Just place the marinated chicken on a parchment-lined baking sheet and bake at 425°F for 18–20 minutes, flipping halfway through. You’ll still get beautifully cooked, juicy pieces perfect for stuffing into your pita.
Why should I let the chicken rest before slicing?
Letting the chicken rest for a few minutes after cooking gives the juices time to settle back into the meat. This makes each bite tender and flavorful, and keeps the fillings in your chicken pita wrap from getting too wet or dry.
If you’re feeling ready to give this recipe a try, there’s just one last thing to do – wrap it all up with a delicious final thought in the conclusion!
Conclusion
There’s something special about a recipe that feels both easy and exciting, and this chicken pita recipe really hits that sweet spot. It’s the kind of meal that brings people together around the table, whether it’s a busy weeknight or a casual weekend lunch. You’ve got juicy chicken, warm pita, crisp toppings, and a creamy sauce – all wrapped up in something the whole family can enjoy.
If you give it a try (and I hope you do!), I’d love to hear how it turned out. Leave a review and let me know what you added, swapped, or served on the side. Your feedback makes this kitchen feel even more connected, like we’re all cooking together.