
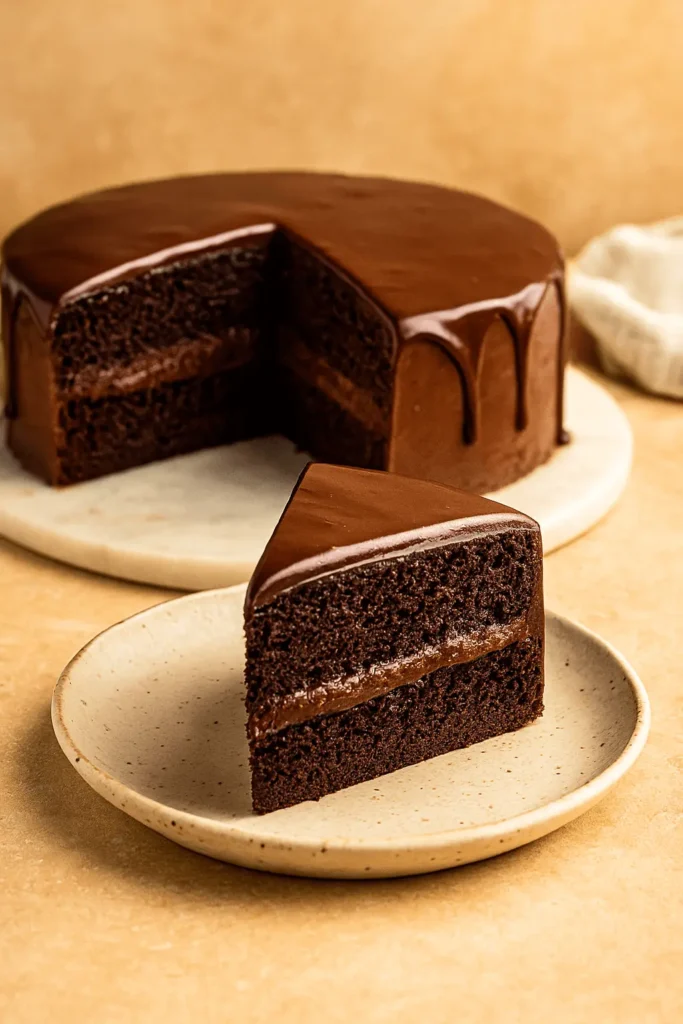
There’s something so comforting about baking a chocolate cake from scratch, especially when the house starts filling with that deep, cocoa-rich aroma. You don’t need a big occasion to make something special – sometimes a good cake is the occasion. That’s exactly why I love this Chocolate Ganache Cake. It’s rich, glossy, and feels fancy without being fussy.
I’ve made this one more times than I can count – birthdays, potlucks, rainy afternoons – it never lets me down. The ganache glides on like a dream, the cake stays soft for days, and let me tell you, people always ask for the recipe.
In this post, I’ll walk you through every step: from gathering ingredients to pouring that silky ganache over the top, plus plenty of tips to help you make it your own. Whether it’s your first time baking a layer cake or you’re just looking for a new favorite, this guide has you covered. Let’s get that oven warm!
Why You’ll Love This Chocolate Ganache Cake
There’s something special about a dessert that feels both impressive and approachable, and this Chocolate Ganache Cake does exactly that. It’s the kind of cake you can serve at a birthday party or slice up for a quiet weekend treat.
- Simple to make: No fancy steps or equipment needed – just basic pantry staples and a little stirring.
- Rich, classic flavor: Every bite is full of deep chocolate and smooth ganache.
- Flexible for any occasion: Dress it up with berries, try a white chocolate ganache cake twist, or keep it beautifully plain.
- Great texture: Soft, tender cake layers with a silky finish that holds up beautifully.
Once you taste it, you’ll find yourself coming back to this recipe again and again. Let’s see what you’ll need to get started!
Chocolate Ganache Cake Ingredients You’ll Need
This is the part where the fun begins – gathering everything you need to create a beautiful Chocolate Ganache Cake right in your own kitchen. Don’t worry, nothing fancy or complicated here. Just real, dependable ingredients that come together to make something truly special.
Here’s what you’ll need:
Basic Ingredients
- All-purpose flour – 2¼ cups
It lays the foundation for a sturdy yet soft cake that holds together beautifully. - Unsweetened cocoa powder – ¾ cup
Brings that deep, chocolatey richness to the cake. Go for a good-quality cocoa – it really makes a difference. - Granulated sugar – 2 cups
Adds sweetness and helps keep the cake moist and tender from the inside out. - Baking powder – 1½ teaspoons and Baking soda – 1½ teaspoons
These two work together to give the cake lift and a light texture. - Salt – 1 teaspoon
Just enough to balance the sweetness and bring out the chocolate flavor. - Large eggs – 2
They bind everything together and give the cake its smooth texture. - Buttermilk – 1 cup
Adds a gentle tang and helps make the crumb extra soft and rich. - Neutral oil (like canola or vegetable) – ½ cup
Keeps the cake tender and gives it a lovely soft bite, even after a day or two. - Pure vanilla extract – 2 teaspoons
A touch of warmth and background flavor that rounds out the cocoa beautifully. - Hot brewed coffee – 1 cup
This won’t make your cake taste like coffee – it just deepens the chocolate flavor and enhances the cocoa.
Ganache Topping
- Semi-sweet chocolate (finely chopped) – 12 oz
Melts into a silky, rich ganache with just the right balance of sweetness. - Heavy cream – 1½ cups
Creates that ultra-smooth, glossy texture when mixed with the chocolate. - Unsalted butter – 2 tablespoons
Adds shine and gives the ganache that perfect pourable consistency.
Optional Add-Ins
- Mini chocolate chips – ½ cup (folded into the batter for little molten bursts inside)
- Seedless raspberry jam – 2 tablespoons (stirred into the ganache for a fun chocolate raspberry cake ganache twist)
- White chocolate chunks – ½ cup (for a white chocolate ganache cake variation)
Pro Tip:
Want to put your own spin on it? Try adding a teaspoon of cinnamon for a subtle Mexican chocolate vibe, or a pinch of instant espresso powder if you’re into bold cocoa flavors. You can also experiment with chocolate cake with white chocolate ganache for a completely different (but equally indulgent) finish.
All set? Let’s bring it all together in the next step and turn these ingredients into a show-stopping cake.
How to Make Chocolate Ganache Cake Step by Step
Now the fun part – let’s bake! Making this Chocolate Ganache Cake is a simple, step-by-step process. Whether it’s your first time or your fiftieth, these directions will help you pull off a rich, velvety cake with confidence.
Step-by-Step Instructions:
1. Prep your pans and preheat the oven.
Start by preheating your oven to 350°F (175°C). Grease two 9-inch round cake pans, line the bottoms with parchment paper, then lightly dust the sides with cocoa powder. This helps the cakes release beautifully and keeps the edges from sticking.
2. Mix the dry ingredients.
Combine the flour, cocoa powder, sugar, baking powder, baking soda, and salt in a large bowl, mixing until the color is deep and even. You’ll know it’s ready when the mix turns a uniform chocolatey brown – no white streaks in sight.
3. Add the wet ingredients.
Crack in the eggs, pour in the buttermilk, oil, and vanilla extract. Mix until the batter is silky and well-blended, with a smooth texture and no lumps hiding underneath. It should look glossy and rich, with no dry bits at the bottom.
4. Pour in the hot coffee.
Slowly add the hot brewed coffee and stir gently. The batter will thin out a bit – that’s a good thing! This step helps bloom the cocoa and gives the cake its signature deep flavor. Don’t worry if it seems a bit runny.
5. Divide and bake.
Pour the batter evenly into your prepared pans. Try to get the amounts as equal as possible so they bake up evenly. Bake for 30–33 minutes, or until a toothpick inserted in the center comes out with just a few moist crumbs. Not wet, not dry – just right.
6. Cool the cakes.
Let the cakes rest in their pans for about 10 minutes before gently flipping them out onto a cooling rack. Remove the parchment paper and give the cakes time to cool all the way down. Don’t rush this step – if the cakes are even a little warm, the ganache will slide right off.
7. Make the ganache.
While the cakes cool, place your chopped chocolate in a heat-safe bowl. In a small saucepan, bring the heavy cream just to a gentle simmer – you should see small bubbles around the edges, not a rolling boil. Carefully pour the warm cream over the chopped chocolate and give it a couple of minutes to soften. Gently stir from the center outward until the ganache turns smooth and shiny. Drop in the butter and stir until it melts in completely, adding a silky finish.
8. Assemble the cake.
Place one cake layer on your serving plate or cake stand. Spread about ½ cup of the ganache over the top. Set the second layer on top and lightly press to secure it in place. Let it chill for 10–15 minutes to set the base.
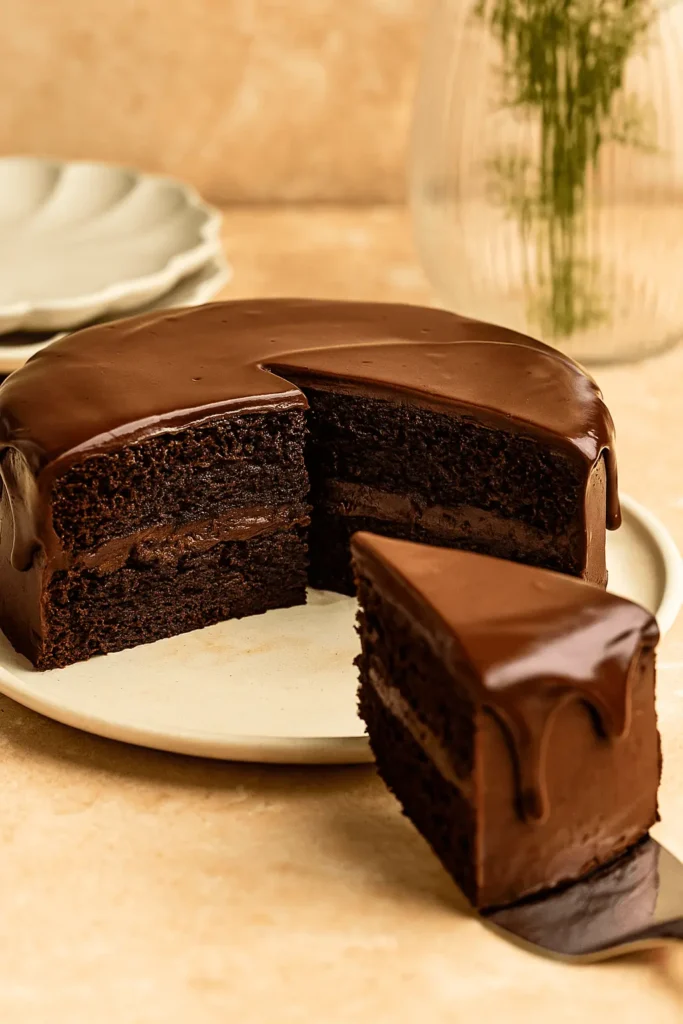
9. Glaze with ganache.
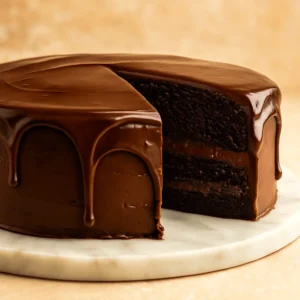
Pour the remaining ganache slowly over the top of the cake, starting in the center and gently guiding it toward the edges with a spatula. Let it cascade naturally for that classic chocolate ganache cake design look.
10. Let it set and serve.
Let the cake sit at room temperature or pop it into the fridge if you want the ganache to firm up a bit more. For neat slices, run your knife under warm water before cutting – it makes all the difference!
This cake smells like home while it bakes and slices like a dream once it’s set. You’ll love how the glossy ganache hugs each layer like a warm blanket.
Next up? Let’s take a look at some handy chef tips and fun ways to personalize your cake!
Helpful Tips and Fun Variations for Chocolate Ganache Cake
Once you’ve made this Chocolate Ganache Cake the first time, you’ll want to experiment with little changes to make it your own. These tips and ideas come straight from years of home baking and learning what works (and what doesn’t) when it comes to chocolate cakes. Whether you’re keeping it classic or adding a fun twist, this section is here to help you make it even better.
Helpful Tips for the Best Results:
- Measure flour the right way:
Always spoon flour into your measuring cup and level it with a knife – don’t scoop directly from the bag. It keeps the texture soft and light, not dense. - Let the ganache sit before pouring:
Once it’s silky and smooth, give it 5–10 minutes to thicken slightly. This helps it flow beautifully without running off the cake too fast. - Don’t rush the cooling:
The ganache needs a cool cake to set properly. If the cake is even a little warm, the topping may slide right off or soak in too much. - Warm your knife for clean slices:
Run a sharp knife under hot water, then dry it before slicing. It cuts cleanly through the ganache without dragging or cracking.
Fun Variations to Try:
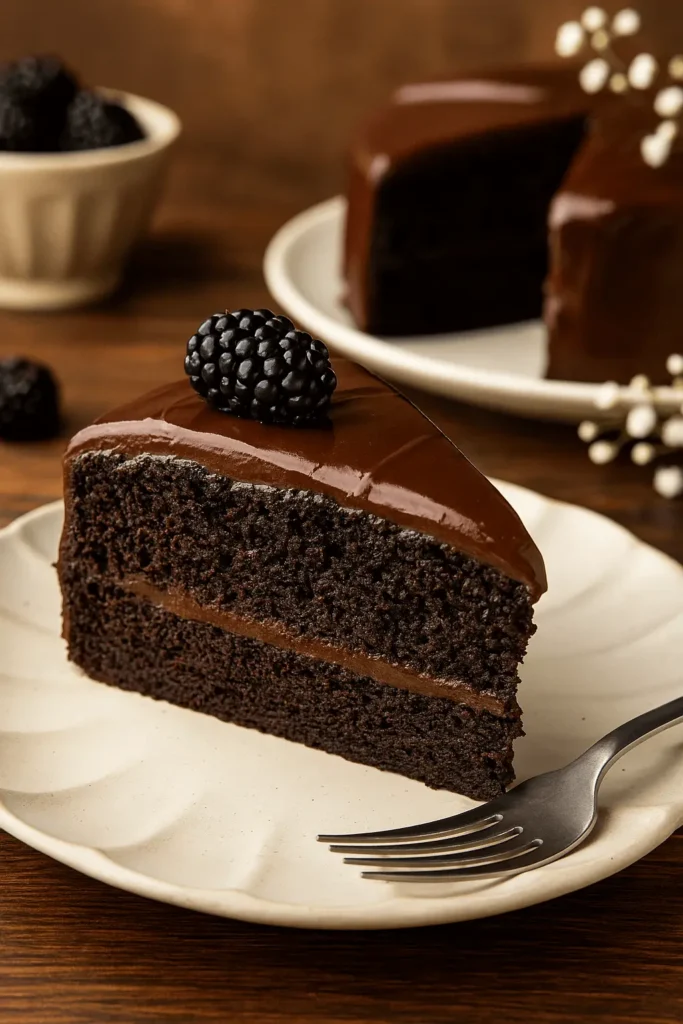
- Chocolate Raspberry Cake Ganache:
Stir a spoonful of raspberry jam into the ganache for a fruity twist that pairs beautifully with the rich chocolate. - White Chocolate Ganache Cake:
Swap the semi-sweet chocolate for white chocolate in the ganache. It creates a creamy, sweet finish and looks lovely when paired with fresh berries. - Bundt Cake with Chocolate Ganache:
Pour the batter into a well-greased 10-cup bundt pan and bake for 45–50 minutes. Drizzle ganache over the top for an elegant shape and easy slicing. - Chocolate Mousse Cake with Ganache Layers:
Spread a thin layer of chocolate mousse (made with whipped cream and cooled ganache) between the cake layers before topping with glaze. A fun twist for special occasions!
There’s no one “right” way to enjoy this cake, and that’s the best part. You get to make it yours, one batch at a time.
Let’s move on to the fun part – serving up this beauty!
Serving Ideas for Your Chocolate Ganache Cake
Whether you’re hosting a birthday party, planning a weekend dinner, or just want a cake that makes the table feel extra special, this Chocolate Ganache Cake fits right in. Its shiny glaze and rich texture make it a go-to for just about any occasion.
How to Serve It:
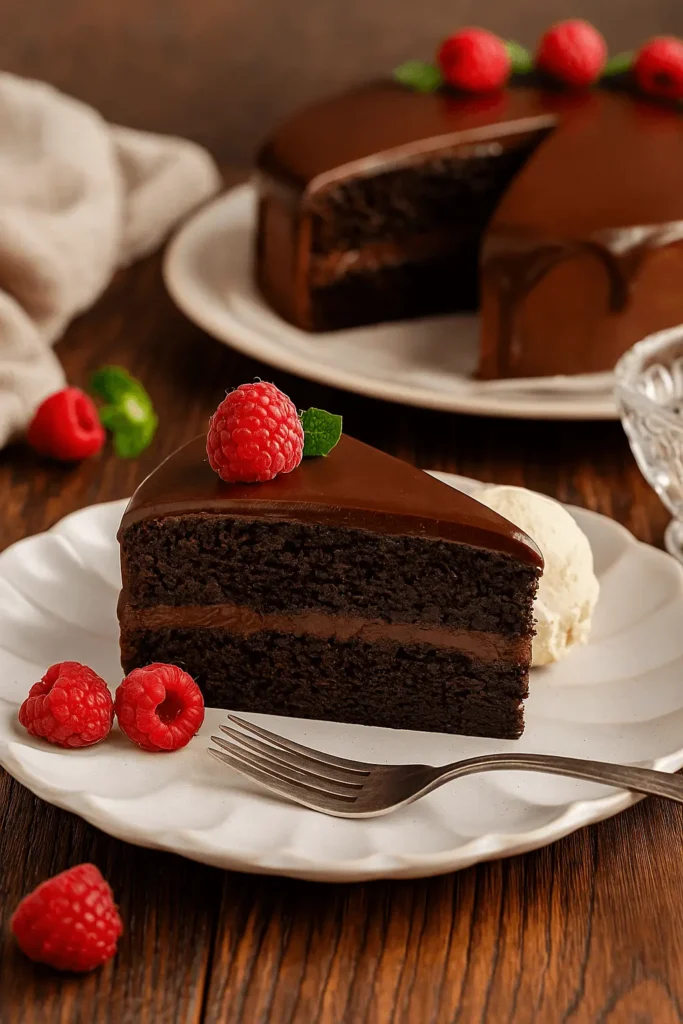
- Classic dessert plate:
Serve chilled or room temp slices with a dollop of whipped topping or a scoop of vanilla bean ice cream. - Dressed up with fresh fruit:
Add sliced strawberries, raspberries, or a handful of pomegranate seeds for a pop of color and flavor. - Coffeehouse style:
Cut the cake into thin, tall slices and pair with strong brewed coffee or a warm mug of cocoa. - Celebration ready:
Top with colorful sprinkles, gold flakes, or even a few edible flowers for a picture-perfect chocolate ganache cake decoration. - Make it mini:
Bake the batter in cupcake tins and dip the tops in ganache for bite-sized chocolate cake with ganache treats.
Whether it’s a family birthday or just a quiet moment with tea, this cake has a way of making any day feel like a celebration.
Now, let’s make sure you know how to keep those leftovers just as tasty as the first slice!
How to Store and Reheat Chocolate Ganache Cake Leftovers
One of the best things about this Chocolate Ganache Cake is how well it holds up. The texture stays soft, the ganache keeps its shine, and the flavors get even better the next day. Here’s how to store and enjoy your leftovers without losing any of that goodness.
How to Store:
- Room Temperature (short-term):
If you’re eating the cake within 1 day, you can leave it covered at room temperature in a cool spot. - Fridge (for a few days):
Keep the cake covered in an airtight container or gently wrapped in plastic to lock in freshness. It stays moist and delicious for up to 5 days. - Freezer (for longer storage):
Freeze individual slices on a tray until solid, then wrap each slice in parchment paper and place them in a zip-top bag. Store for up to 2 months. Let the slices defrost in the fridge overnight or leave them out for a few hours until soft and ready to enjoy.
How to Reheat:
- Room temperature:
Let the cake sit out for 20–30 minutes before serving – it brings the ganache back to that soft, creamy texture. - Microwave (just a little warmth):
Warm a slice for 8–10 seconds in the microwave. This softens the ganache and gives it that melt-in-your-mouth feel again.
A cake this good should never go to waste – and with these storage tips, it won’t.
More Chocolate & Cake Recipes to Try
If you loved this Chocolate Ganache Cake, here are a few more sweet treats you might enjoy baking next:
- Brownie Cupcakes – Rich, fudgy, and just the right size for sharing.
- Chocolate Chip Cupcakes – A classic twist with gooey pockets of chocolate in every bite.
- Gender Reveal Cupcakes – Perfect for celebrations with a sweet surprise inside.
- Mini Cupcakes – Bite-sized and fun to decorate for any occasion.
- Cotton Candy Cake – Light, colorful, and a true crowd-pleaser.
- Matcha Cake Recipe (Vegan) – A cozy flavor with a soft crumb and no dairy or eggs.
Chocolate Ganache Cake
Equipment
- Two 9-inch round cake pans
- Mixing bowls (large and medium)
- Whisk and rubber spatula
- Measuring cups and spoons
- Saucepan
- Heat-safe bowl for ganache
- Cooling racks
- Offset spatula (optional but helpful)
Ingredients
Cake Batter:
- 2¼ cups all-purpose flour
- ¾ cup unsweetened cocoa powder
- 2 cups granulated sugar
- 1½ teaspoons baking powder
- 1½ teaspoons baking soda
- 1 teaspoon fine sea salt
- 2 large eggs
- 1 cup buttermilk
- ½ cup neutral oil like canola or vegetable
- 2 teaspoons vanilla extract
- 1 cup hot brewed coffee
Ganache:
- 12 oz semi-sweet chocolate finely chopped
- 1½ cups heavy cream
- 2 tablespoons unsalted butter
Optional Add-Ins:
- ½ cup mini chocolate chips folded into the batter
- 2 tablespoons seedless raspberry jam stirred into ganache
- ½ cup white chocolate chunks for variation
Instructions
- Prep oven to 350°F. Grease and line two 9-inch pans with parchment; dust lightly with cocoa powder.
- Whisk flour, cocoa, sugar, baking powder, baking soda, and salt in a large bowl.
- Add eggs, buttermilk, oil, and vanilla. Whisk until smooth.
- Pour in hot coffee. Stir until fully blended – batter will be thin.
- Divide evenly into pans. Bake 30–33 min until a toothpick comes out with moist crumbs.
- Cool cakes in pans 10 min; then transfer to wire racks to cool fully.
- Heat cream until it simmers, pour over chopped chocolate. Let sit 2 min. Stir slowly until smooth. Add butter and stir in.
- Spread a thin layer of ganache between cake layers. Chill briefly.
- Pour remaining ganache over top and gently spread to edges.
- Let set at room temp or refrigerate before slicing and serving.
Notes
Key Takeaways
- This Chocolate Ganache Cake is soft, chocolatey, and surprisingly simple to make from scratch.
- The ganache adds a glossy finish and doubles as a filling.
- Simple pantry ingredients turn into something truly special.
- Great for birthdays, holidays, or any time you want to bake something beautiful.
- Easy to store, freeze, and enjoy later without losing flavor.
Now that you’ve got the highlights, let’s answer a few common questions that pop up when making this cake!
Chocolate Ganache Cake FAQs: Your Questions Answered
Can I make Chocolate Ganache Cake gluten-free?
Yes, you can! Just swap the all-purpose flour with a 1:1 gluten-free baking flour blend. Make sure it includes xanthan gum or a similar binder to help with structure. Follow the rest of the steps exactly the same – you’ll still get that soft, rich texture and glossy chocolate cake ganache finish.
Why does my ganache look dull instead of shiny?
It usually comes down to the chocolate you’re using. Chocolate chips often contain stabilizers that affect how smooth and glossy the ganache looks. For best results, use high-quality baking bars when making your chocolate ganache filling for cake – they melt more evenly and create that beautiful finish.
Is it okay to make and fill the cake a day ahead?
Absolutely. Making it ahead works really well! Just assemble your layers, cover the cake gently, and store it in the fridge overnight. The ganache sets nicely and makes slicing easier. Let it sit at room temperature for 20–30 minutes before serving to bring back the perfect texture.
Is the coffee in the batter necessary?
Not at all, but it does help bring out the depth of the cocoa. If you prefer, use hot water instead. Your Chocolate Ganache Cake will still turn out moist and full of chocolate flavor, just a little more mellow.
How do I turn this cake into cupcakes?
So simple! Just pour the batter into 24 cupcake liners and bake at 350°F for about 18–20 minutes. Once cooled, dip the tops into ganache or pipe it on for an elegant chocolate cake with chocolate ganache twist in individual servings.
Does white chocolate ganache set the same way as dark?
White chocolate has more cocoa butter, so it tends to be a bit softer. If you’re making a chocolate cake with white chocolate ganache, give it a little extra chill time – about 10–15 minutes more – to help it firm up before slicing.
Still got questions? Drop them in the comments – we’re always here to help in the kitchen! Let’s wrap things up with a final thought.
Conclusion
There’s something so special about baking a cake from scratch, especially one like this Chocolate Ganache Cake that brings smiles with every slice. Whether you’re making it for a celebration or simply because you feel like baking, it’s the kind of dessert that turns moments into memories.
If you give this recipe a try, I’d love to know how it went! Leave a quick review or share a little note – your feedback means a lot and helps others in the kitchen too. Happy baking, and thank you for spending time here with me!