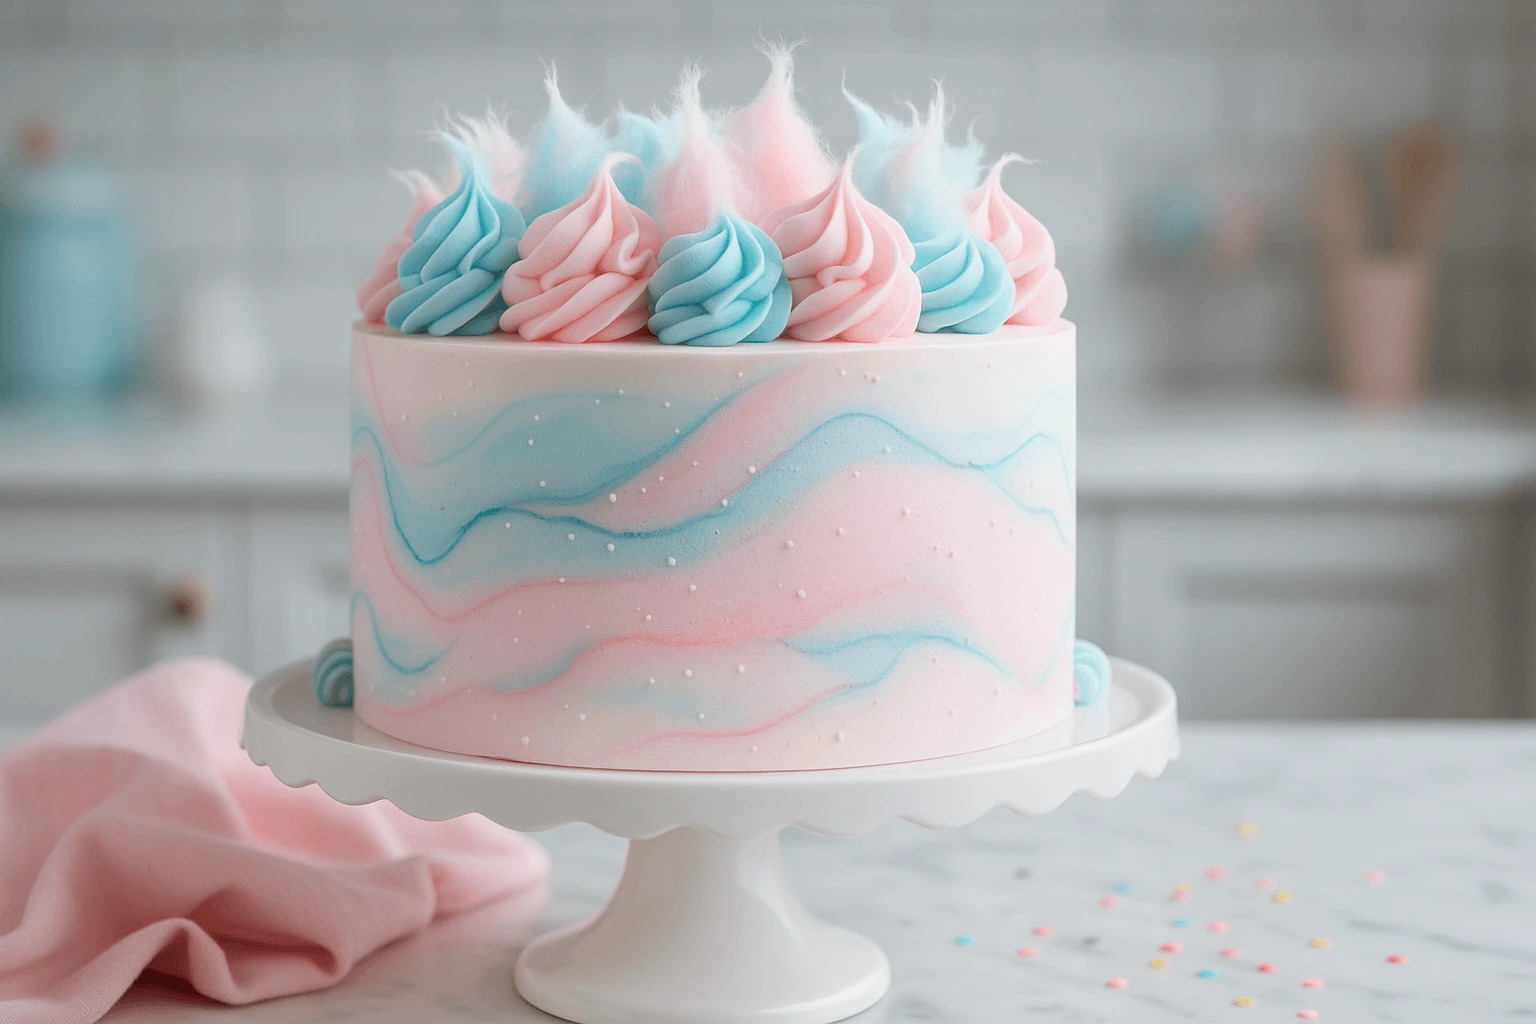
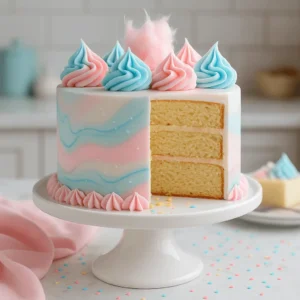
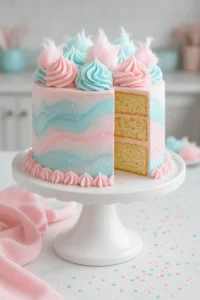
Have you ever looked at a cake and thought, “That just looks like pure fun”? That’s exactly what this cotton candy cake is all about – playful colors, a soft crumb, and a frosting that tastes like a sweet summer breeze at the fair. The challenge with celebration cakes is that they can sometimes feel overcomplicated or fussy. But this one? It’s all about enjoying the process and making something that brings smiles the moment it’s sliced.
Whether you’re planning a birthday, a baby shower, or just want to surprise someone with something extra cheerful, this cake delivers on flavor, charm, and color. In this post, I’ll walk you through every step – from mixing up the batter to adding those dreamy pastel swirls and fluffy toppings. We’ll also chat about simple decorating ideas, how to store it, and fun ways to make it your own.
So tie on your apron, grab a few mixing bowls, and let’s bring the fairgrounds into your kitchen – one delicious layer at a time.
Why You’ll Love This Cotton Candy Cake Recipe
This cotton candy cake feels like a celebration from the very first slice. It’s the kind of dessert that makes everyone smile, whether you’re planning a birthday party, a baby shower, or just a weekend treat. The pastel pink and blue swirls look so cheerful, and the cotton candy flavoring gives each bite a sweet, playful twist.
- Family-Friendly Fun: Kids and grown-ups alike will love the bright colors and soft texture.
- Easy to Customize: Try it as a cotton candy birthday cake or bake it into cupcakes.
- Perfect for Any Occasion: From holidays to casual get-togethers, this cake always fits in.
- Beautiful Presentation: The frosting alone is enough to impress your guests.
Get ready to gather your ingredients – next, I’ll show you exactly what you need!
Cotton Candy Cake Ingredients and Optional Add-Ins
Let’s start by pulling out the ingredients you’ll need – nothing fancy here, just a handful of baking basics with a fun little twist. Each one plays an important role in making your cotton candy cake light, colorful, and full of personality.
Basic Ingredients
- 2 ¾ cups all-purpose flour – This is your structure. It gives the cake body and helps it hold its shape while staying soft.
- 2 ½ teaspoons baking powder – Adds a gentle lift, helping your layers bake up fluffy and tender.
- ½ teaspoon fine sea salt – Just enough to balance the sweetness and make the flavors pop.
- 1 cup unsalted butter (softened) – For richness and a soft crumb that almost melts on your tongue.
- 1 ¾ cups granulated sugar – Sweetens the cake and helps it brown just right.
- 5 large egg whites – These give the batter structure while keeping the color light for those pretty pastel shades.
- 1 teaspoon pure vanilla extract – Adds a cozy backdrop to the brighter cotton candy flavor.
- 1 ½ teaspoons cotton candy flavoring – This brings the fun! It gives the cake that unmistakable fairground sweetness.
- 1 cup whole milk – Loosens the batter and helps everything bake up moist and smooth.
- 2 drops pink gel food coloring – For blush-pink layers that look as sweet as they taste.
- 2 drops blue gel food coloring – A soft sky-blue that pairs beautifully with the pink for that signature swirl.
For the Frosting
- 1 ½ cups unsalted butter (softened) – The base of a creamy, dreamy buttercream.
- 4 ½ cups confectioners’ sugar (sifted) – Makes the frosting smooth and light in texture.
- 3–4 tablespoons heavy cream – Helps get that perfect spreadable consistency.
- 1 teaspoon cotton candy flavoring – So the frosting matches the fun of the cake itself.
- A pinch of salt – Just enough to mellow the sweetness.
- Pink & blue gel food coloring – Swirled into the frosting for an eye-catching finish.
Optional Add-Ins
- Sprinkles – Stir some into the batter for a surprise pop of color.
- Edible glitter – Adds sparkle to your cotton candy cake decoration.
- Spun sugar – Perfect as a fluffy topper right before serving for that extra wow factor.
Pro Tip: Want to mix things up? For a slightly fruity twist, swap ½ cup of the milk with strawberry or blueberry milk – a fun way to lean into different cotton candy cake ideas while keeping it festive.
Now that everything’s ready, let’s bake this pastel beauty from start to finish!
How to Make a Cotton Candy Cake Step by Step
This is the part where your kitchen starts to smell like a little celebration. Don’t worry – every step is beginner-friendly and full of color, joy, and that delightful carnival flair. Just take it one step at a time, and you’ll have a show-stopping cotton candy birthday cake before you know it.
Step-by-Step Instructions
1- Preheat and prep your pans
Set your oven to 350°F (175°C). Lightly coat two 8-inch round cake pans with baking spray or butter, then place a circle of parchment paper at the bottom of each to help the cakes release easily once baked.
2- Mix the dry ingredients
Combine the flour, baking powder, and salt in a medium bowl, and give them a quick whisk to blend everything evenly before adding to your batter.
3- Cream butter and sugar
In a large mixing bowl, beat the softened butter and sugar together on medium speed for about 3 minutes. You’re looking for a pale, fluffy texture – almost like smooth frosting. This step builds the foundation of your cake’s tenderness.
4- Add the egg whites
One at a time, beat in the egg whites. The batter will become glossy and thicker with each addition. Don’t rush – this part helps the layers stay light.
5- Flavor it up
Stir in the vanilla and cotton candy flavoring. A subtle sweetness will start to come through the air – it’s a hint of the treat to come!
6- Alternate milk and flour mixture
Reduce the mixer speed and add the dry ingredients in three parts, alternating with the milk in two parts. Start and end with the dry ingredients. This method helps keep the batter silky and smooth.
7- Color the batter
Divide the batter into two bowls. Stir pink gel food coloring into one and blue into the other. A few drops go a long way – soft pastels are what we’re after here.
8- Pour and swirl
Pour each colored batter into a prepared pan. You can leave them as separate layers or use a spatula to gently swirl the colors together for a marbled look. Be gentle – over-mixing dulls the colors.
9- Bake the layers
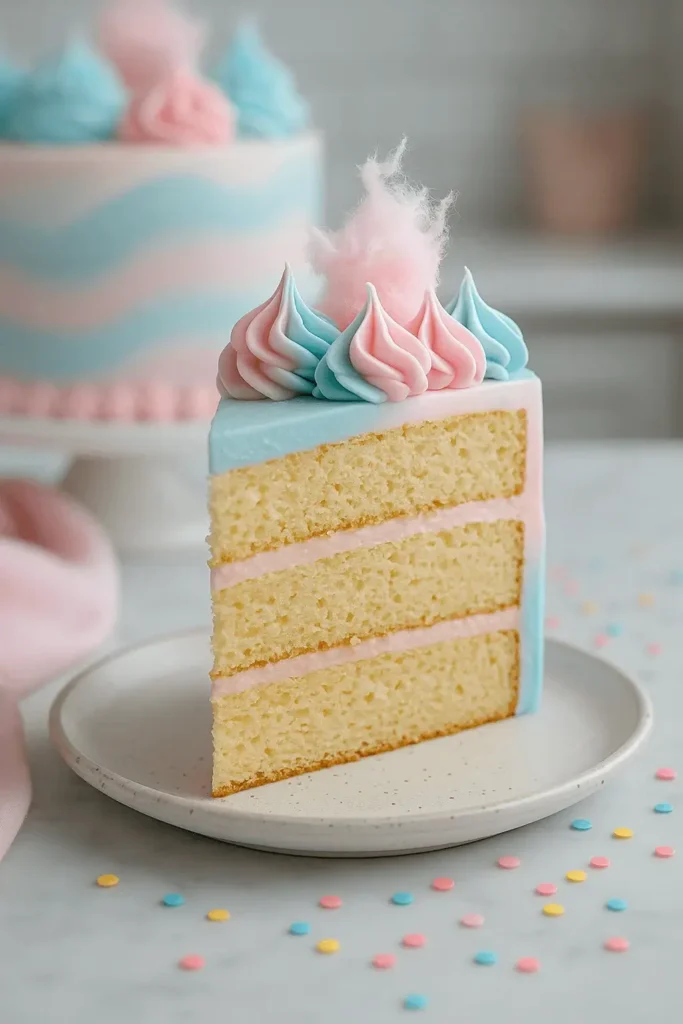
Bake for 25–28 minutes or until the centers spring back lightly when touched and a toothpick comes out clean. Let them cool in the pans for 10 minutes, then turn them out onto wire racks to cool completely.
10- Make the frosting
While the cakes cool, beat the butter until creamy. Add the confectioners’ sugar in stages, mixing slowly at first, then increasing speed until the frosting is light and fluffy. Stir in the flavoring, salt, and cream until smooth. Tint half the frosting pink and the other half blue.
11- Assemble the cake
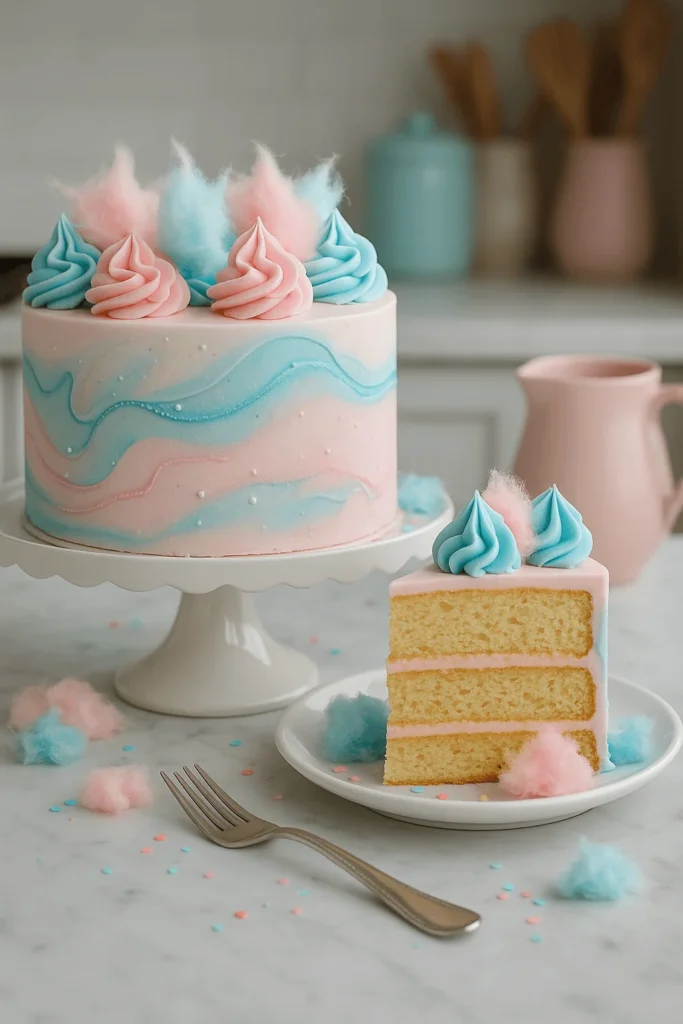
Level your cake layers if needed. Spread a layer of frosting on the bottom cake, stack the second layer on top, and frost the outside with a swirl of the pink and blue frostings. No need for perfection – part of the charm is the playful look!
12- Decorate and serve
Just before serving, add sprinkles, edible glitter, or a small fluff of cotton candy on top. It’s your cake – have fun with it!
That’s it! You’ve just created a beautiful, fun-filled cake with cotton candy flavor that’s perfect for any special moment. Now let’s talk about how to make it even more personal with a few extra ideas!
Cotton Candy Cake Tips and Creative Variations
Once you’ve got the basics down, it’s fun to play a little. Whether you want to personalize the colors, get creative with presentation, or simply avoid a few common cake hiccups, this section is packed with helpful ideas and gentle reminders – like the kind you’d hear from a mom who’s baked a few of these before.
- Measure flour the right way
Gently spoon the flour into your measuring cup, then level it off with a knife to avoid using more than needed. This helps your cake bake up soft and fluffy – just right for a light, colorful cotton candy flavored cake. - Don’t overmix after adding colors
Once you stir in the food coloring, fold gently. Stirring too much after adding color can mute the shades and leave the cake heavier than it should be. You want pastel and fluffy, not muddy and chewy. - Chill the layers before frosting
A quick 20-minute chill in the fridge helps the cake firm up, making it easier to frost without crumbs getting in your swirls. - Use a light hand with food coloring
Gel coloring is strong – start with just a drop or two. You can always add more, but once it’s in, you can’t take it out. You’re aiming for soft and dreamy, like your favorite cotton candy at the fair. - Try different formats
Want to make cotton candy cupcakes? Just divide the batter into lined tins and bake 18–20 minutes. For a cotton candy pound cake, use a loaf pan and bake 45–50 minutes. Both versions freeze beautifully. - Switch up the frosting color swirl
If you’re feeling fancy, pipe alternating colors or blend them with a spatula for a soft watercolor effect. There are so many fun cotton candy cake decoration ideas to try!
No matter how you style it, this cake brings color and joy to your kitchen. Now let’s talk about how to serve it with flair!
Serving Ideas for Your Cotton Candy Birthday Cake
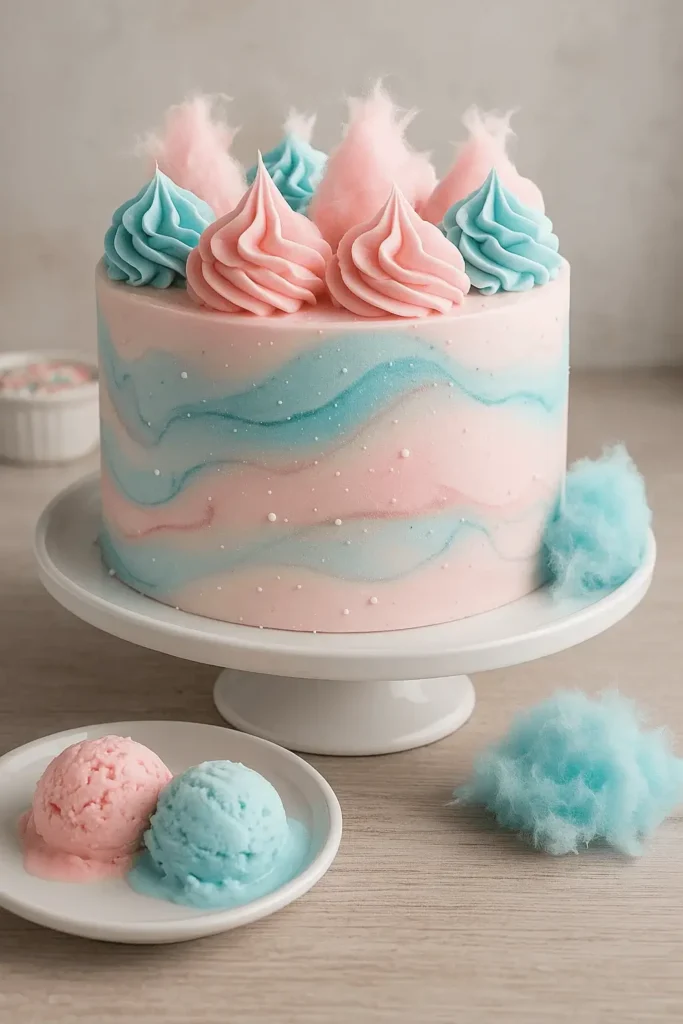
This cake isn’t just a dessert – it’s a centerpiece. Whether you’re planning a full-on party or just celebrating the everyday, there are plenty of playful ways to serve this cotton candy cake and make it feel extra special.
- Birthday star
Add tall candles, pastel sprinkles, and place it front and center as a showpiece cotton candy birthday cake. It’s a guaranteed smile-maker. - Carnival table theme
Pair slices with mini funnel cakes, popcorn bags, and lemonade jars for a county fair vibe right in your backyard. - Surprise inside
Add pink or blue sprinkles to the batter as a sweet way to do a baby shower gender reveal – slice into the cake to reveal the surprise. - Slice-and-serve station
Set up a cake-cutting station with bowls of cotton candy ice cream and let guests build their own plates – a fun twist for parties or teen sleepovers. - Cupcake bar alternative
Bake the batter as cupcakes and let little ones decorate their own with mini tubs of colored frosting and edible glitter. Great for birthdays or class parties!
Every slice becomes a mini moment when you add a little creativity. But don’t worry – even simple works beautifully here. And if you’ve got leftovers (lucky you), the next part will help you save every bite.
How to Store and Reheat Cotton Candy Cake Leftovers
Let’s be honest – leftover cake is one of life’s little joys. And yes, this cotton candy cake stays just as soft and delicious the next day, as long as you store it right. Here’s how to keep it fresh and party-ready even after the candles are blown out.
- To store in the fridge
Wrap leftover slices individually in parchment or plastic wrap, then place them in an airtight container. This helps prevent the frosting from drying out. Enjoy within 3–4 days. - To freeze layers or slices
For unfrosted layers: wrap tightly in plastic wrap and then foil, and freeze for up to 2 months.
For frosted slices: place on a baking sheet to flash-freeze for 1 hour, then transfer to freezer-safe containers or bags. They’ll keep well for about a month. - To thaw and serve
Bring frozen slices to room temperature for 30–40 minutes. If you like your cake just slightly warm, pop it into a 250°F (120°C) oven for about 5 minutes – just enough to soften it up without melting the frosting.
Having leftovers never feels like an afterthought when you know how to store them right.
More Desserts to Try After This Cotton Candy Cake
If you loved baking this cotton candy cake, here are a few more fun and festive dessert ideas to keep the inspiration going:
- Vegan Matcha Cake Recipe – A soft, earthy twist with gorgeous green layers
- Brownie Cupcakes – Rich, fudgy, and great for chocolate lovers
- Chocolate Chip Cupcakes – A classic favorite in cupcake form
- Gender Reveal Cupcakes – Fun for special announcements and sweet surprises
- Mini Cupcakes – Tiny, adorable, and easy to share
The Best Cotton Candy Cake for Sweet Celebrations
Equipment
- 2 (8-inch) round cake pans
- Stand or hand mixer
- Mixing bowls
- Spatula and offset spatula
- Wire cooling rack
- Parchment paper
- Cake stand or plate for assembling
Ingredients
Cake Layers:
- 2 ¾ cups all-purpose flour
- 2 ½ tsp baking powder
- ½ tsp fine sea salt
- 1 cup unsalted butter softened
- 1 ¾ cups granulated sugar
- 5 large egg whites
- 1 tsp vanilla extract
- 1 ½ tsp cotton candy flavoring
- 1 cup whole milk
- 2 drops pink gel food coloring
- 2 drops blue gel food coloring
Buttercream Frosting:
- 1 ½ cups unsalted butter softened
- 4 ½ cups confectioners’ sugar sifted
- 3 –4 tbsp heavy cream
- 1 tsp cotton candy flavoring
- Pinch of salt
- Pink & blue gel food coloring
Optional Add-Ins:
- Rainbow sprinkles for batter or topping
- Edible glitter
- Spun sugar for topping
Instructions
- Preheat oven to 350°F (175°C). Grease and line pans with parchment.
- Mix flour, baking powder, and salt in one bowl.
- In another bowl, beat butter and sugar until fluffy.
- Add egg whites one at a time, then mix in flavorings.
- Alternate adding flour mix and milk until smooth.
- Divide batter into two bowls; tint one pink and the other blue.
- Pour into pans and bake 25–28 minutes. Cool completely.
- For frosting, beat butter, sugar, cream, flavoring, and salt until fluffy.
- Tint half the frosting pink and the other half blue.
- Stack, frost, and swirl colors together for a pastel finish.
- Decorate with sprinkles or spun sugar just before serving.
Notes
 Contains dairy, eggs, and gluten. For best results, use gel food coloring and add spun sugar decorations just before serving to keep their shape.
Key Takeaways
- Light vanilla layers with cotton candy flavor
- Soft pink and blue colors for a playful look
- Easy to make ahead and decorate
- Perfect for birthdays, parties, or fun weekends
- Customizable with sprinkles, cupcakes, or a loaf version
- A sweet way to bring smiles to any celebration
Next, let’s answer a few common questions to help you bake with confidence!
Cotton Candy Cake FAQ: Decorating, Baking, and More
Can I use regular liquid food coloring instead of gel?
Yes, you can – just keep in mind that gel food coloring is more concentrated and won’t affect your batter’s texture. If you’re using liquid coloring, reduce the milk by about 1 tablespoon so your batter stays just right.
Where can I find cotton candy flavoring?
You’ll usually find it in the baking or candy-making section of craft stores. It’s often near candy molds or decorating tools. Many online shops carry it too – just look for one labeled specifically as “cotton candy flavor.”
Can I turn this into a cotton candy ice cream cake?
Absolutely! Bake one cake layer and let it cool. Then top it with a layer of softened cotton-candy-flavored ice cream. Freeze until firm, then frost and decorate. It’s a fun way to enjoy two favorites in one bite!
How do I keep spun sugar from melting on top of the cake?
Spun sugar is sensitive to moisture, so the best trick is to add it right before serving. Keep your cake in a cool, dry spot, and hold off on the topper until the last minute.
Is the buttercream too sweet with the cotton candy flavoring?
It’s definitely sweet, but the pinch of salt in the frosting helps balance everything. For a softer touch, you can mix in about ½ cup of softened cream cheese – it adds a little tang and makes the texture extra smooth.
Can I bake this cotton candy cake in a sheet pan instead?
Yes, you can! Just pour the batter into a greased 9×13-inch pan and bake for 28–32 minutes. Look for lightly golden edges and a clean toothpick in the center as your doneness check.
These quick answers should help you feel ready to jump in with confidence – and if you’re still unsure about anything, the next section will bring it all together in a nice little wrap-up!
Conclusion
There’s something so special about making a cake that feels like a celebration from the very first glance, and this cotton candy cake truly delivers. From its soft pastel swirls to that playful flavor, it’s a treat that brings joy to the kitchen and the table.
If you give this recipe a try, I’d love to hear how it turned out! Leave a review and let me know how you decorated it, what the occasion was, or who you shared it with. It always makes my day to hear your sweet baking stories.