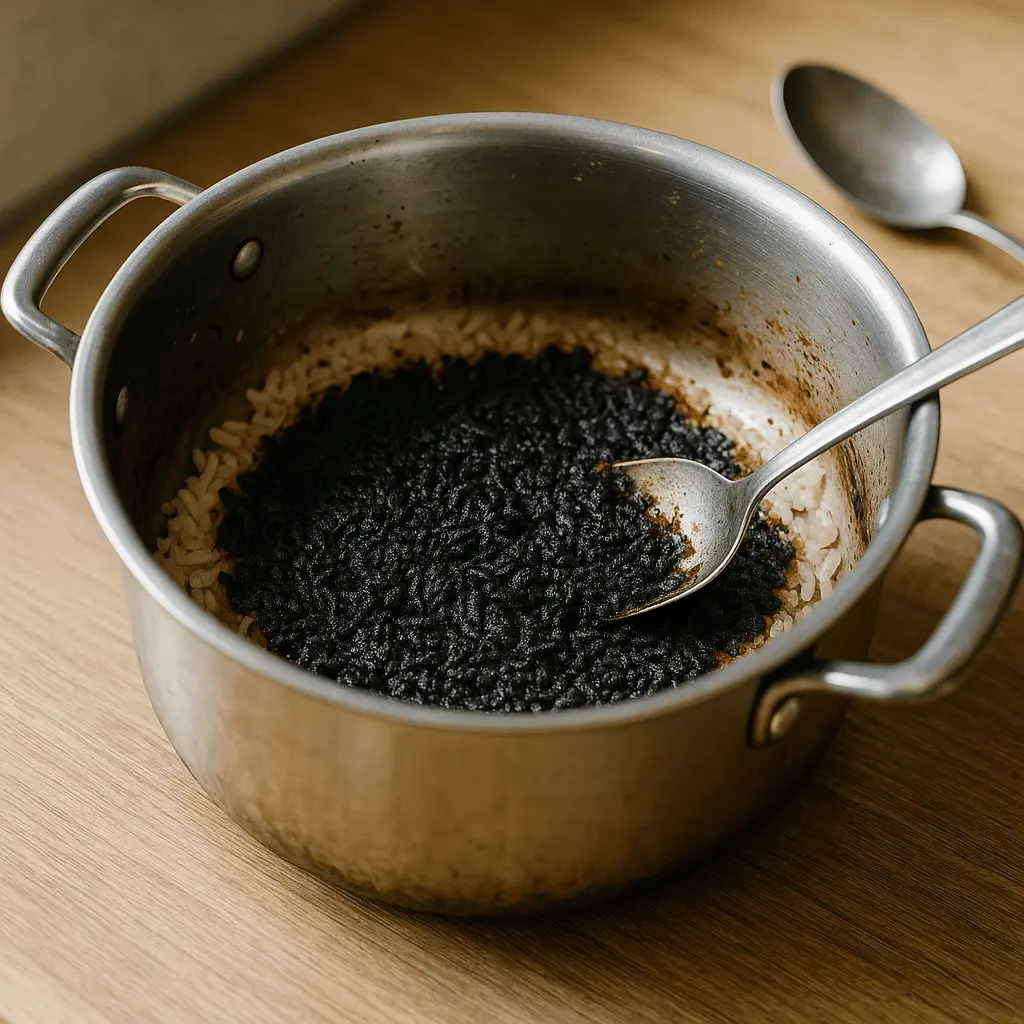
The kind of burnt where you don’t just smell it, you feel it in your soul. I left a pot of rice on the stove and completely forgot about it while helping my neighbor carry in groceries. When I finally lifted the lid, the top looked fine… but underneath? A thick, blackened layer, stuck tight like it was welded on. The spoon didn’t stand a chance.
If you’ve ever been here, you know the sinking feeling that follows.
This wasn’t just rice – it was my favorite pot. A gift from my aunt when I first moved out on my own. And now it looked ruined.
But before I gave up or scrubbed until my hands gave out, I decided to try a few things I found from chatting with friends and doing a bit of research. Let’s explore a few ways you can clean a scorched pot without losing your sanity – or your cookware.
1. Soak It – But Not Just with Water
We all know soaking is the go-to first move, but plain water isn’t always enough for serious burns like this.
You can try this instead:
Fill the pot with just enough water to cover the scorched area, and then add a generous squirt of dish soap or a tablespoon of baking soda. Let it sit for at least a few hours, or even overnight if it’s really bad.
In the morning, try scraping it with a wooden spoon (not metal – no need to scratch the pot more). You might be surprised how much comes off after a good soak.
Helpful tip: Sometimes heating the water a little before letting it soak helps loosen things faster. You don’t need to boil it – just warm enough to soften the grime.
2. Bring It to a Simmer (Yes, Really)
This one felt weird at first, but it worked better than I expected.
After soaking didn’t get all the charred rice off, I filled the pot with enough water to cover the scorch and chose one helper—either baking soda or white vinegar (not both at once).
Option A (Baking Soda): Add 1–2 tablespoons of baking soda, then bring it to a light simmer for 10–15 minutes.
Option B (Vinegar): Add 2–3 tablespoons of white vinegar to the water, then bring it to a light simmer for 10–15 minutes.
The gentle heat plus the solution helped loosen the stuck bits from the bottom. After it cooled a little, I used a wooden spatula to scrape gently, and most of the black layer lifted off easily. Rinse well when you’re done.
Friendly warning: Don’t walk away from the stove during this step—we’ve already learned that lesson, right?
3. Use a Paste for the Toughest Bits
After soaking and simmering, there were still a few stubborn black spots clinging on like they paid rent.
That’s where a cleaning paste came in handy.
You can make a quick one with:
- 2 tablespoons of baking soda
- A small splash of water (just enough to form a paste)
- A few drops of dish soap
Spread it over the burnt spots and let it sit for 10–15 minutes. Then scrub gently with a non-scratch scrubber or sponge. Don’t go too hard – you want to clean it, not destroy the surface.
In my case, this got rid of those last crispy bits and left the pot looking almost like new.
4. Try the Dryer Sheet Trick (It’s Weird, but It Works)
Okay, I was skeptical too. But someone on a cooking forum swore by it, so I gave it a shot.
- Fill the pot with warm water.
- Drop in a clean dryer sheet (yes, the kind for laundry).
- Let it soak for a few hours.
Somehow, the ingredients in the sheet help loosen the gunk. After a few hours, a light scrape lifted off more than I expected. It’s not a cure-all, but it is surprisingly helpful when used after soaking and simmering.
Bonus: Your kitchen smells kind of fresh afterward.
5. Let Time Be Your Friend (And Your Scrubber)
If nothing else is working and you’re tempted to give up, here’s your gentle nudge to wait just a little longer.
Sometimes, giving your pot a rest day – fully submerged in soapy water – can soften even the most stubborn burnt layer. And when you come back to it the next morning, everything’s easier. Especially if you’ve already tried a round of baking soda, vinegar, or heat.
Cleaning doesn’t always need to be a full battle. Sometimes it’s more like slow persuasion.
6. A Word on What Not to Do
Let’s avoid some common mistakes:
- Don’t use steel wool or metal scrubbers unless your pot is already damaged and you don’t mind scratches.
- Don’t keep scraping dry. If it’s not moving, go back to soaking.
- Don’t panic. Seriously – burnt rice isn’t the end of the world, and your pot probably isn’t ruined.
Sometimes, just knowing you’re not the only one who scorched something makes it easier to face the clean-up.
You’ve Got This – And So Does Your Pot
In the end, I saved my pot (and maybe a bit of my pride). It took a little patience, some baking soda, and a lot of gentle scraping, but I didn’t need to throw anything away.
If you’re staring at your own burnt mess right now, take a breath.
Let it soak. Try the simmer. Make a paste. It’s going to be okay.
We’ve all been there – and next time, we’ll remember the rice. Probably.