You know that feeling when you want to fire up the pellet grill but aren’t quite sure what to make? Maybe it’s a weekend, the weather’s nice, and you’re just craving something that makes the whole yard smell amazing. But you don’t want to fuss with tricky timing or complicated prep – just something that turns out right every time.
That’s where this pellet grill recipe comes in. It’s easy to prep, packed with smoky flavor, and flexible enough to fit your favorite cuts of chicken or whatever’s in the fridge. Whether you’re cooking for family, friends, or just filling up the week with good food, this recipe brings that comforting, made-with-care feeling to the table.
Stick with me – I’ll walk you through everything step by step. You’ll learn the best seasoning mix, how to get that crispy skin just right, and a few fun ways to change it up. Let’s get the grill going!
Why You’ll Love This Pellet Grill Recipe
This pellet grill recipe is one of those go-to meals that checks all the boxes. It’s easy to prep, full of smoky flavor, and turns out tender and delicious every single time. Whether you’re cooking for the family on a quiet evening or serving a crowd at your next cookout, it fits right in. The ingredients are simple, the steps are straightforward, and the final result feels like something special, without the stress.
- Family-friendly and great for picky eaters
- Customizable with different seasonings or cuts like smoked chicken wings pellet grill style
- Perfect for any occasion—weeknights, weekends, or backyard gatherings
- Hands-off cooking lets you relax while the grill works its magic
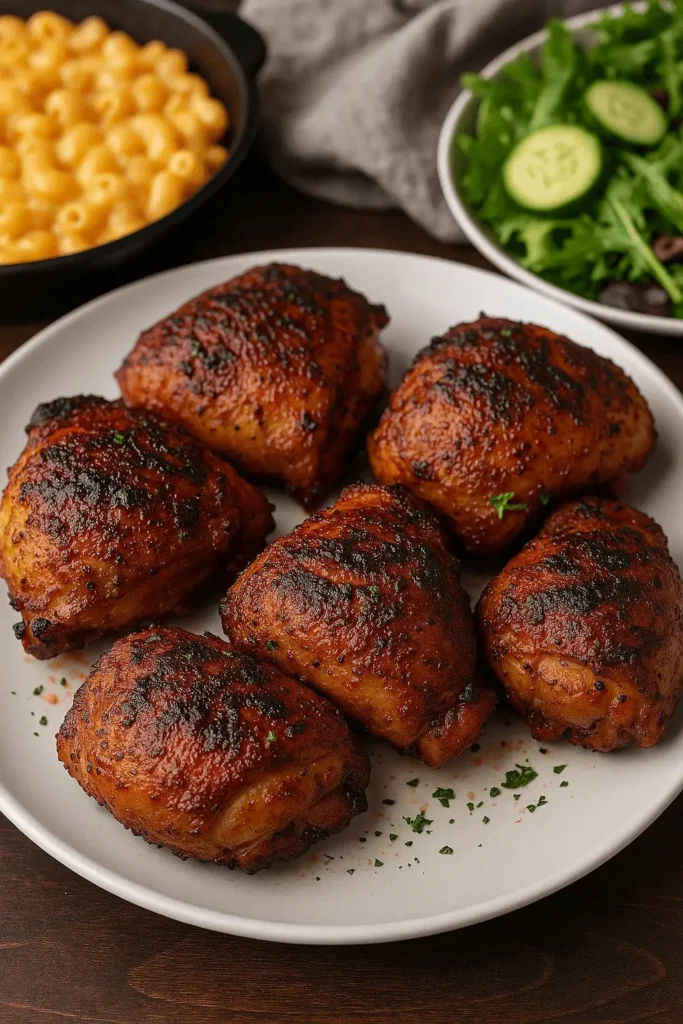
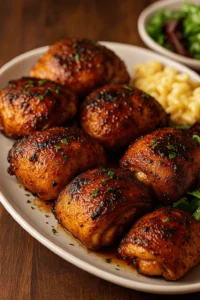
- Pairs well with everything from mac and cheese to fresh salads
Give it a go, and don’t be surprised if it ends up in your regular rotation. Let’s take a look at what you’ll need to get started!
What You’ll Need to Make This Flavor-Packed Pellet Grill Recipe
Let’s keep things simple, flavorful, and totally doable. This ingredient list brings together pantry staples with a few extras to layer on the smoky, savory goodness. Whether you’re sticking with the basics or adding your own twist, each part plays an important role in making this pellet grill recipe shine.
Here’s what you’ll need:
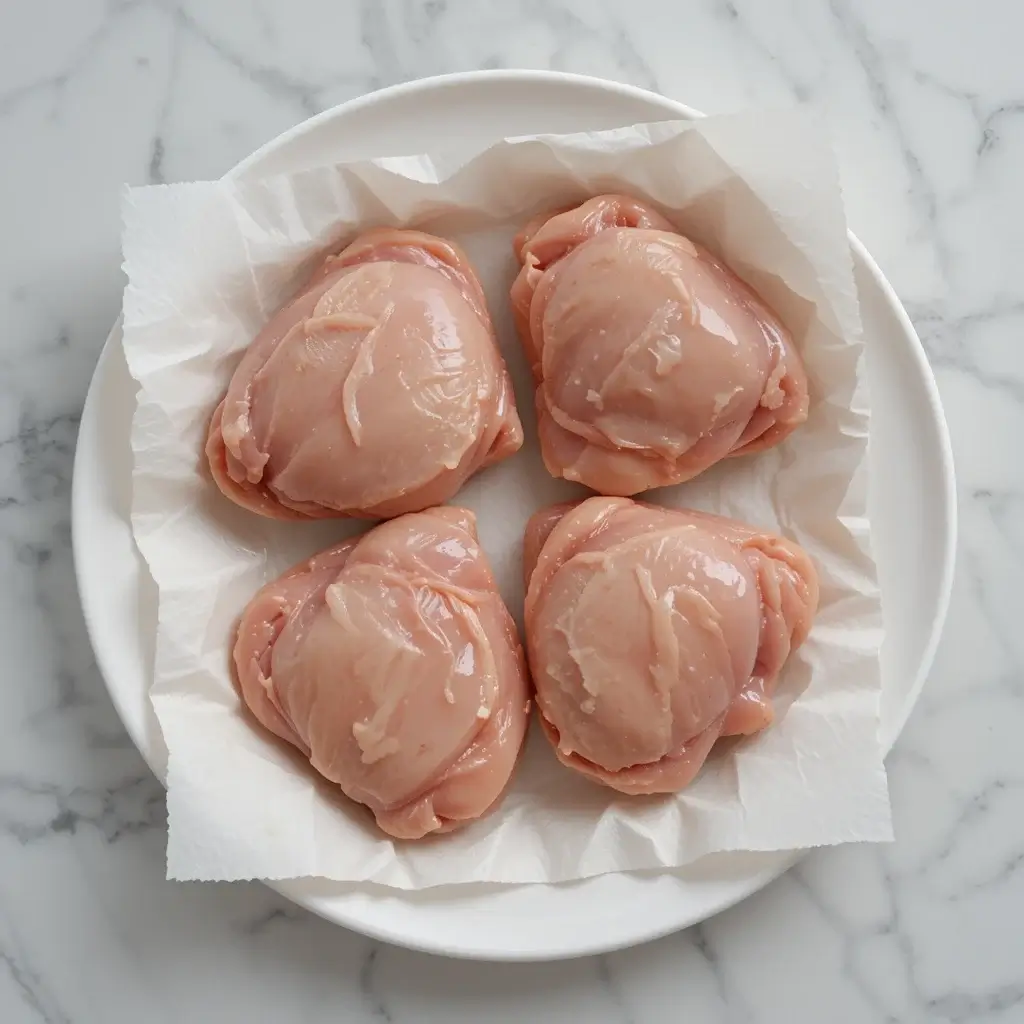
- 3 lb bone-in, skin-on chicken thighs
These hold up beautifully on the grill – juicy on the inside, golden and crispy on the outside. - 2 tablespoons olive oil
Helps the seasonings cling to the chicken and gives the skin a nice finish during that final sear. - 2 teaspoons kosher salt
Helps the chicken taste well-seasoned all the way through. - 1 teaspoon ground black pepper
Adds just the right amount of gentle heat and balance. - 1 tablespoon smoked paprika
A little sweet, a little earthy – it deepens the smoky profile beautifully. - 2 teaspoons garlic powder
Gives the seasoning a rich, cozy depth that works beautifully with the smoke. - 1 teaspoon onion powder
Brings mellow depth to the seasoning blend without overpowering. - 2 tablespoons honey
Brushed on at the end, it caramelizes lightly for a sweet and sticky glaze. - ½ cup chicken broth (optional)
Pour it into a drip pan to keep things humid in the grill chamber, which helps keep your chicken extra tender.
Optional Add-Ins:
- ½ teaspoon crushed chili flakes
For a little extra spark if your crew likes heat. - 1 tablespoon apple cider vinegar
Stir it into the honey to add a gentle splash of brightness.
Pro Tip: Want to give this a global spin? Swap the smoked paprika for curry powder for an Indian-inspired flavor, or try cumin and lime zest for a Tex-Mex vibe. You can also switch out the honey for maple syrup or even a touch of brown sugar if that’s what’s in the pantry.
Now that the ingredients are lined up, let’s get to the fun part – making it all come together on the grill.
How to Make This Easy and Flavorful Pellet Grill Recipe
There’s something satisfying about letting the grill do the heavy lifting while you enjoy the aroma drifting through the yard. This step-by-step guide will walk you through exactly how to prep, season, and smoke your chicken thighs to perfection. No fancy tricks – just reliable flavor, a good pellet fire, and a few tips along the way.
Step-by-step Instructions:
1- Start by firing up your pellet grill
Set the temperature to 250°F and load it with your favorite pellets. Hickory adds bold smoke, while applewood gives a sweeter touch. Add a foil-lined drip pan underneath if you’d like to use the chicken broth for moisture.
2- Pat the chicken dry
Use paper towels to gently blot each thigh until the surface feels nice and dry. The drier the skin, the better it’ll crisp up later. This one little step makes a big difference.
3- Rub them down with olive oil
Drizzle the chicken with oil and use your hands to coat each piece completely. It acts like a primer for the seasoning and helps everything stick.
4- Mix and apply the seasoning
In a small bowl, stir together the salt, pepper, paprika, garlic powder, and onion powder. Sprinkle the mix all over the thighs, coating every nook and cranny. Press it in gently so it stays put.
5- Place on the grill, skin side up
Arrange the thighs directly on the grate with space between them so the smoke can circulate. Close the lid and let the grill do its thing for about 60–75 minutes, or until the internal temp hits 155°F in the thickest part.
6- Time to glaze and crisp
Stir the honey (and vinegar, if using) in a small bowl. Once the thighs hit 155°F, raise the grill temp to 375°F. Brush the skin side of each thigh with the glaze, flip them skin-side down, and cook for 5–8 minutes, or until the internal temperature reaches 175°F and the skin is deeply golden and just starting to char.
7- Let it rest
Transfer the chicken to a plate or platter and loosely tent with foil. Let it sit for 10 minutes so the juices settle inside instead of running out when you slice.
You’ll know it’s ready when the meat is tender and juicy, and that sweet-smoky glaze clings to the crisp skin. It’s one of those recipes you’ll look forward to every time you fire up the grill. Next up, I’ll show you how to personalize it and play with the flavors even more!
Pellet Grill Recipe Tips, Tricks, and Tasty Variations
Once you’ve got the basics down, it’s fun to start playing with flavor and technique. Whether you’re making this pellet grill recipe for the first time or it’s already on repeat, these tips and twists will help you get the most out of every cook.
Helpful Tips:
- Always dry the skin thoroughly.
This is key for getting that crispy finish! Even a little moisture can prevent a good sear later on. - Check your pellets before starting.
Make sure the hopper’s full – running out mid-cook can cause a temperature drop and affect the final texture. - Use a reliable meat thermometer.
Look for 155°F before glazing, and 175°F when it’s ready. A good thermometer takes all the guesswork out. - Let it rest after cooking.
Don’t rush the rest time – 10 minutes is just enough for juices to settle inside the meat.
Flavor Variations:
- Spicy Honey Glaze:
Stir in a pinch of crushed chili flakes or cayenne with the honey for a bold twist. - Smoky BBQ Finish:
Swap the honey for your favorite thick barbecue sauce and baste in the last few minutes. Try this when you’re also making ribs on pellet grill to match the flavor profile. - Sweet & Tangy:
Add a splash of apple cider vinegar or even orange juice to the glaze to brighten things up. - Different Cuts:
This method works beautifully with smoked chicken wings pellet grill style – just reduce the cooking time. You can even try it with smoked meatloaf on pellet grill by shaping the loaf and using the same rub.
These little changes can bring something fresh to the table every time. Now let’s talk about how to serve it up with style and comfort.
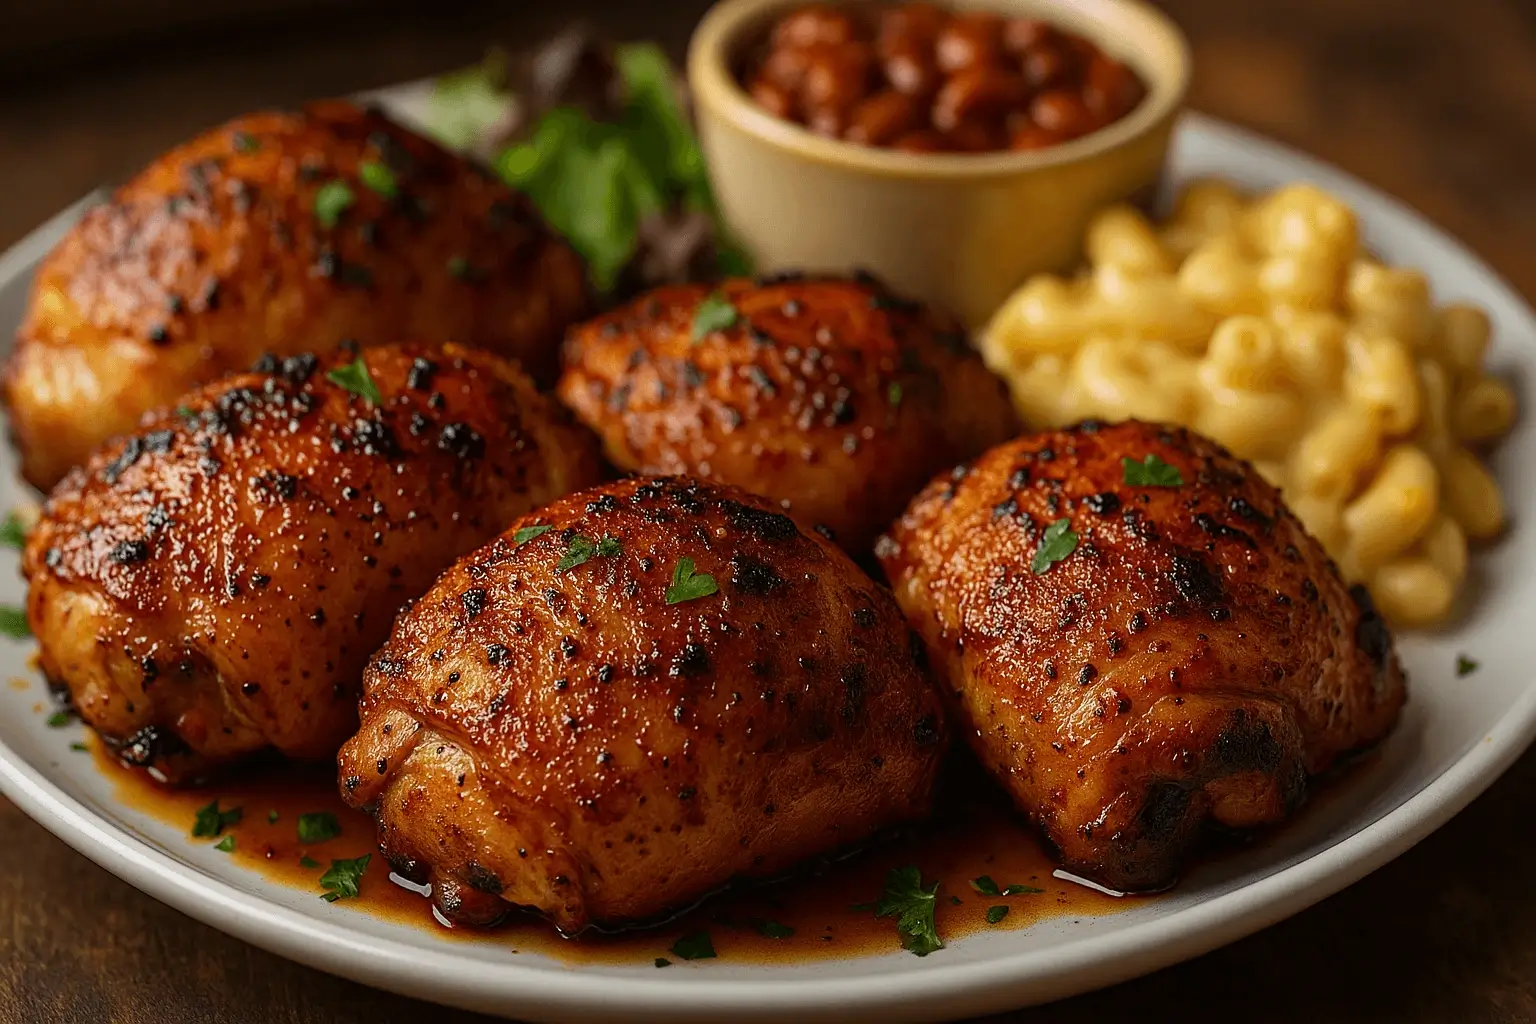
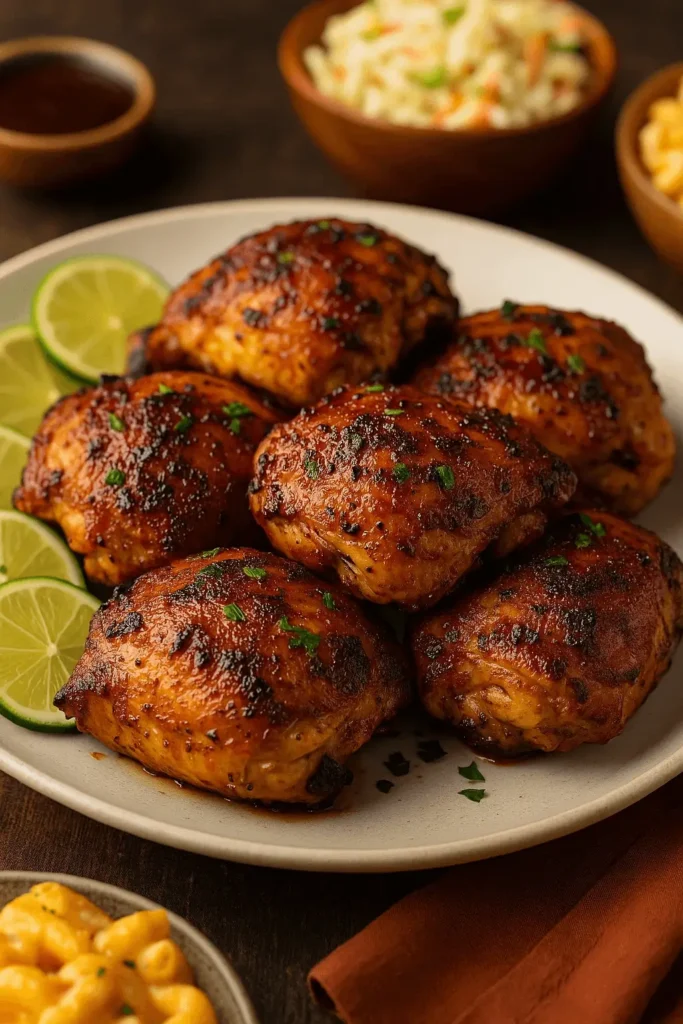
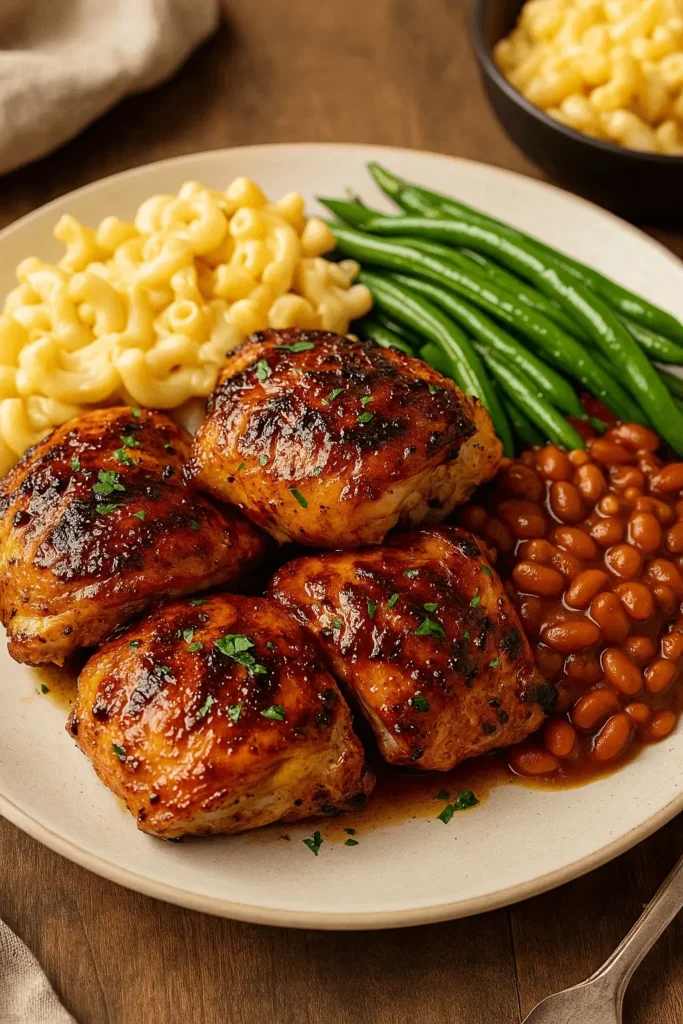
How to Serve This Pellet Grill Recipe for Any Occasion
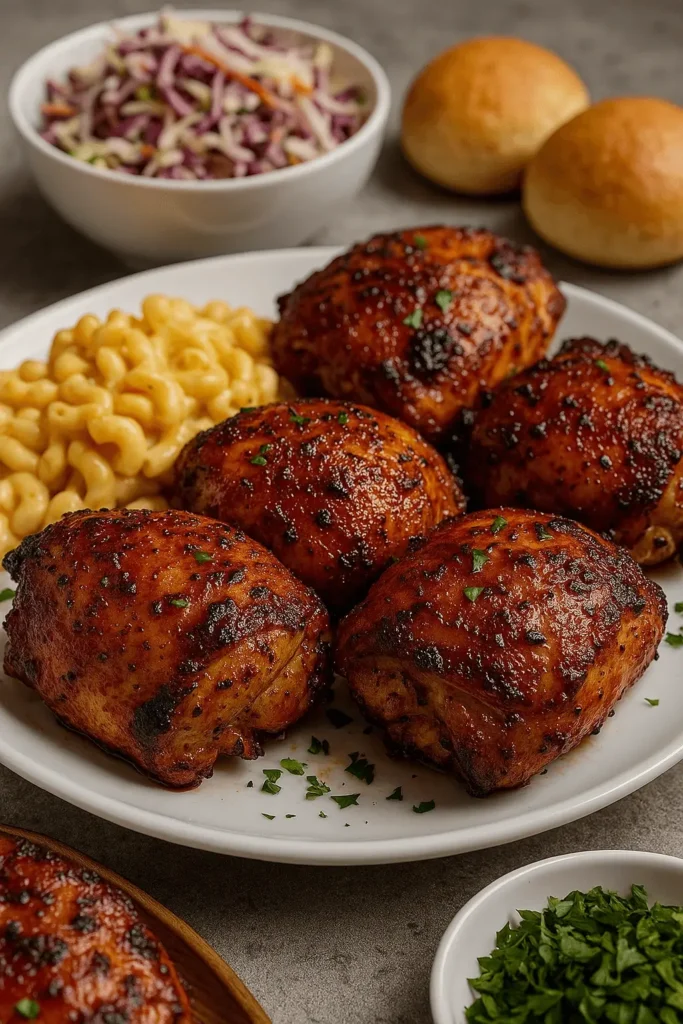
There’s nothing better than that first bite of juicy, smoky chicken fresh off the grill. But pairing it with the right sides – or turning it into something completely new – can make it even more special. This pellet grill recipe works beautifully for all kinds of meals – simple, special, or anything in between.
Try these serving ideas:
- Backyard BBQ platter:
Serve alongside smoked mac and cheese pellet grill style and grilled corn for the ultimate summer spread. - Weeknight favorite:
Pair with roasted potatoes and a quick cucumber salad for an easy, no-fuss dinner. - Tailgate-style sliders:
Shred the chicken and pile it onto toasted buns with pickles and coleslaw. - Smoked chicken rice bowls:
Slice and serve over fluffy rice with grilled veggies and a drizzle of glaze on top. - Sunday dinner centerpiece:
Add it to a table of comforting sides like baked beans, buttered rolls, and green beans.
Whatever you pair it with, this chicken holds its own and plays well with others. Got leftovers? Don’t worry – they store and reheat like a dream.
Keeping and Reheating Leftovers from Your Pellet Grill Recipe
Let’s be honest – sometimes the leftovers are even better the next day. And with this pellet grill recipe, you won’t waste a single bite. Here’s how to keep everything tasting fresh and just-right when you’re ready for round two.
Storage Tips:
- Refrigerate properly:
Let the chicken cool, then tuck it into an airtight container and keep it in the fridge for up to 4 days. - Freeze for later:
Wrap each piece in foil or parchment, pop them in a freezer bag, and store for up to 3 months. Thaw overnight in the fridge before reheating.
Reheating Tips:
- Oven method (best for crispy skin):
Preheat to 325°F, place the chicken on a rack, and bake for 15–18 minutes until hot and slightly crisp. - Air fryer quick fix:
Reheat at 350°F for 5–7 minutes. Perfect for busy moments when you still want that satisfying texture. - Microwave fallback:
Remove the skin if you’re going this route – heat the meat, then crisp the skin separately in the oven or broiler for a minute or two.
No matter how you enjoy it the next day, it’ll still bring that cozy, smoked flavor to your plate.
Related Recipes You May Love
If you’re firing up the pellet grill again soon or planning a full spread, here are a few more recipes you might enjoy:
- Smoked Boneless Chicken Thighs – Tender and full of flavor, with a simple prep and beautiful smoke finish.
- Smoked Chicken Rub – A go-to seasoning blend that works on everything from wings to turkey.
- Smoked Meatloaf – A comforting classic with bold smoky flavor, perfect for sharing.
- Smoked Cream Cheese – A creamy, crowd-pleasing appetizer that’s great with crackers or veggies.

Honey-Glazed Chicken Thighs – Pellet Grill Recipe
Equipment
- Pellet grill
- Instant-read thermometer
- Tongs
- Small mixing bowl
- Basting brush
- Foil-lined drip pan (optional)
- Paper towels
Ingredients
- 3 lb bone-in skin-on chicken thighs
- 2 tablespoons olive oil
- 2 teaspoons kosher salt
- 1 teaspoon ground black pepper
- 1 tablespoon smoked paprika
- 2 teaspoons garlic powder
- 1 teaspoon onion powder
- 2 tablespoons honey
Optional Ingredients:
- ½ teaspoon crushed chili flakes for heat
- 1 tablespoon apple cider vinegar to mix with honey for tangy glaze
- ½ cup chicken broth for optional humidity boost in drip pan
Instructions
- Preheat pellet grill to 250°F and add your choice of wood pellets.
- Pat chicken thighs dry, then coat them lightly in olive oil.
- Mix dry seasonings and rub evenly over the chicken.
- Place thighs skin-side up on the grill, spacing them out evenly.
- Smoke for 60–75 minutes, until internal temp reaches 155°F.
- Increase heat to 375°F, brush with honey glaze, flip skin-side down.
- Cook for 5–8 more minutes, until internal temp reaches 175°F and skin is crisp.
- Let rest under foil for 10 minutes, then serve.
Notes
 Gluten-free as written (just double-check your chicken broth and seasonings). Perfect for customizing with different rubs or glazes depending on your mood or occasion.
Key Takeaways
- This pellet grill recipe uses simple ingredients and easy steps.
- Slow smoking followed by a quick sear gives crisp skin and rich flavor.
- The honey glaze adds a delicious finish without extra fuss.
- Works great with other cuts like wings or turkey breast.
- Leftovers store and reheat beautifully for another tasty meal.
Pellet Grill Recipe FAQ: Your Questions Answered
Is it okay to use boneless, skinless thighs for this pellet grill recipe?
Yes, you can! Just keep in mind they’ll cook a little faster – around 50 minutes total – and since there’s no skin to crisp, you can skip the high-heat sear at the end. The flavor still holds up beautifully.
What kind of pellets should I use for a mild smoke flavor?
Fruitwood pellets like apple or cherry give you a softer, sweeter smoke. They’re a great choice if you’re cooking for a crowd or anyone who prefers a gentler aroma over stronger woods like hickory.
Do I need to flip the chicken more than once?
No need! Once is enough. Flip it after glazing, just before the final sear. That keeps things simple and gives you crisp skin without losing juices.
What helps prevent the skin from turning rubbery?
Start by patting the skin dry before seasoning – this makes a big difference. Then stick to steady temps and finish the chicken over high heat for at least 5 minutes to get that crispy bite.
Can I cook anything else alongside this pellet grill recipe?
Definitely. If you’ve got space on the grill, try adding a smoked chuck roast pellet grill style cut or a pan of smoked mac and cheese. Just adjust the times based on each dish’s needs and rotate them if needed.
Do I need a water pan in the grill?
It’s optional, but adding a pan with broth or water underneath the grate helps keep the environment humid, especially on dry days. This can help maintain moisture without complicating the cook.
Conclusion
There’s something so satisfying about pulling a tray of smoky, golden chicken off the grill – especially when you know it’s going to bring everyone to the table with big smiles and second helpings. This pellet grill recipe isn’t just about the food; it’s about those easy moments that turn into lasting memories. Whether you’re making it for a backyard dinner or just because it’s Tuesday, it’s the kind of meal that fits right in.
If you give it a try, I’d love to hear how it turned out for you! Feel free to leave a quick review or share your own twist – it always makes my day to hear from fellow home cooks.