
There’s something special about pulling out a homemade dessert that makes everyone at the table pause and smile. Maybe it’s the layers, maybe it’s the creaminess, or maybe it’s just knowing you made something with a little love and care. This pistachio tiramisu brings all of that to life – no baking, no fuss, just thoughtful layering and a dreamy blend of flavors.
You know those times when you want to impress without spending hours in the kitchen? This recipe is perfect for that. It’s simple to follow, comes together beautifully, and has just the right touch of elegance to wow your family or guests.
In this post, I’ll walk you through every step – from ingredients to assembling and chilling – and even share tips to make it your own. Whether you’re serving it after dinner, at a gathering, or just because you feel like treating yourself, this dessert is a keeper. Let’s get into it!
Why You’ll Love This Pistachio Tiramisu Recipe
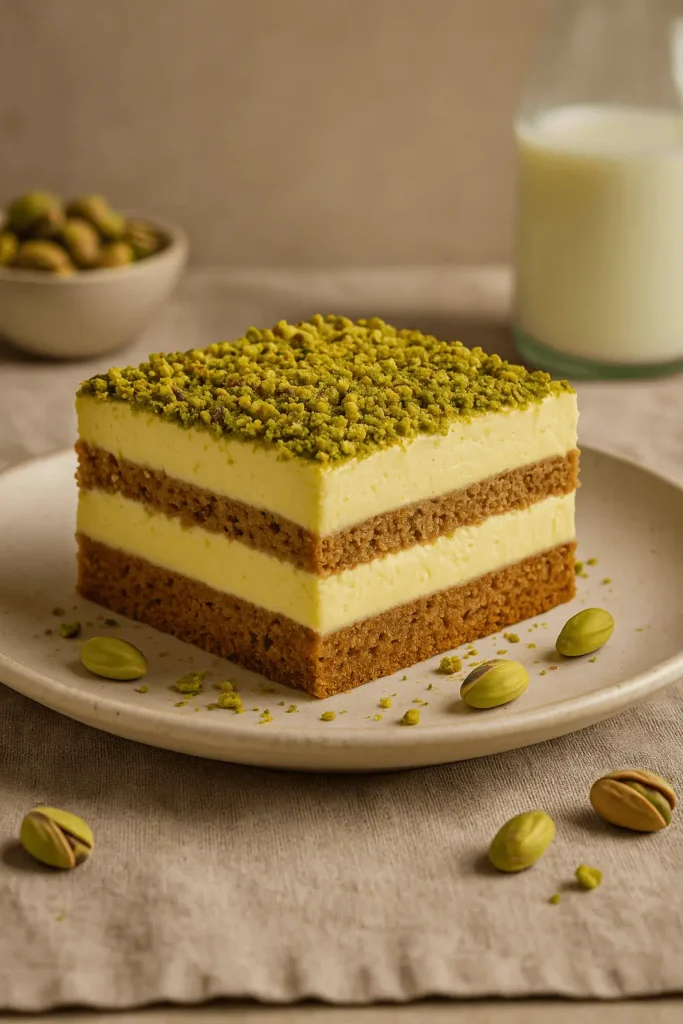
If you’ve been dreaming of a dessert that feels a little fancy but is simple enough to make on a busy weeknight, this pistachio tiramisu has you covered. It’s layered with tender espresso-dipped ladyfingers and smooth mascarpone cream, with a gentle pistachio flavor that makes every bite feel special.
- Quick to prepare – You can assemble it in about 25 minutes.
- Perfect for any occasion – From birthdays to quiet evenings in.
- Family-friendly – No liqueur needed, so everyone can enjoy.
- Customizable – Try it as a pistachio tiramisu cake or in little jars.
This dessert brings people together around the table, one creamy slice at a time. Let’s gather the ingredients you’ll need to get started!
Pistachio Tiramisu Ingredients You’ll Need
Let’s gather the good stuff! This recipe keeps it simple with a handful of everyday ingredients, but the result feels like something you’d get from a fancy café. Each one has a purpose, and together they build layers of creamy, nutty, coffee-soaked goodness.
You’ll Need:
- 24 ladyfingers – These sponge-like cookies soak up the espresso and give the tiramisu its soft, layered texture.
- 1 cup freshly brewed espresso, cooled – Adds that classic deep coffee flavor you expect in tiramisu.
- ¼ cup pistachio milk (or pistachio beverage) – Boosts the nutty notes in the soak and complements the mascarpone beautifully.
- 16 oz mascarpone cheese – This is the creamy heart of the dessert. It blends into a smooth, rich filling that sets up beautifully in the fridge.
- 1 cup cold heavy cream – Whips up into light, airy volume to fold into the mascarpone.
- 3 large pasteurized egg yolks – Give structure and richness to the filling while keeping it silky.
- ½ cup granulated sugar – Sweetens the custard base just enough without overpowering the pistachio.
- 1 tsp vanilla extract – Adds warmth and brings everything together.
- 2 Tbsp pistachio cream or spread – A swirl of this into the mascarpone adds concentrated pistachio flavor and a creamy finish.
- ¾ cup shelled pistachios, finely chopped – Adds crunch and a pop of that beautiful green color between the layers and on top.
Optional Add-Ins:
- Dark chocolate curls – For a little extra flair and contrast.
- Pinch of cardamom or cinnamon – A subtle twist if you’re in the mood for something cozy.
Pro Tip:
Want to explore a different flavor profile? Swap pistachio milk for almond or hazelnut milk, and add a splash of orange blossom water or rose water for a Mediterranean vibe. It’s a fun way to personalize your pistachio tiramisu based on the season or occasion.
Now that everything’s on the counter, let’s dive into layering it all together – this is where the fun starts.
How to Make Pistachio Tiramisu Step by Step
This is the part where it all comes together – and the best part? No oven. Just some light mixing, layering, and chilling. Think of it like building a cozy blanket of flavor, one layer at a time.
Step-by-Step Instructions:
1- Chill your tools.
Pop your mixing bowl and beaters in the fridge for 10 minutes before whipping the cream. It helps the cream fluff up faster and hold its shape longer.
2- Whip the cream.
In the chilled bowl, beat the heavy cream on medium-high speed until it forms soft peaks. Look for smooth ripples that hold their shape without going stiff. Set aside.
3- Make the custard base.
In another bowl, whisk the egg yolks and sugar until pale and creamy – about 2–3 minutes. You want a smooth, slightly thick consistency. Then stir in the mascarpone, vanilla, and pistachio cream. Mix gently until everything is blended and creamy.
4- Fold in the whipped cream.
Gently fold the whipped cream into the mascarpone blend in two parts, using a rubber spatula to keep the mixture smooth and airy.
5- Mix the espresso soak.
In a shallow bowl or dish, combine the cooled espresso with the pistachio milk. Stir just enough to blend the two. This will be your dipping station.
6- Dip and layer the ladyfingers.
Quickly dip each ladyfinger – just 1–2 seconds per side – to avoid sogginess. Lay them snugly into the bottom of your serving dish (a 9-inch square or trifle bowl works great).
7- Add the first layer of cream.
Spoon half of the mascarpone mixture over the ladyfingers and gently spread it into an even layer, all the way to the edges.
8- Sprinkle the crunch.
Add about a third of the chopped pistachios over the top. They bring a nice contrast in texture and look gorgeous, too.
9- Repeat the layers.
Layer the remaining soaked ladyfingers on top, then gently spread the rest of the mascarpone cream over them.
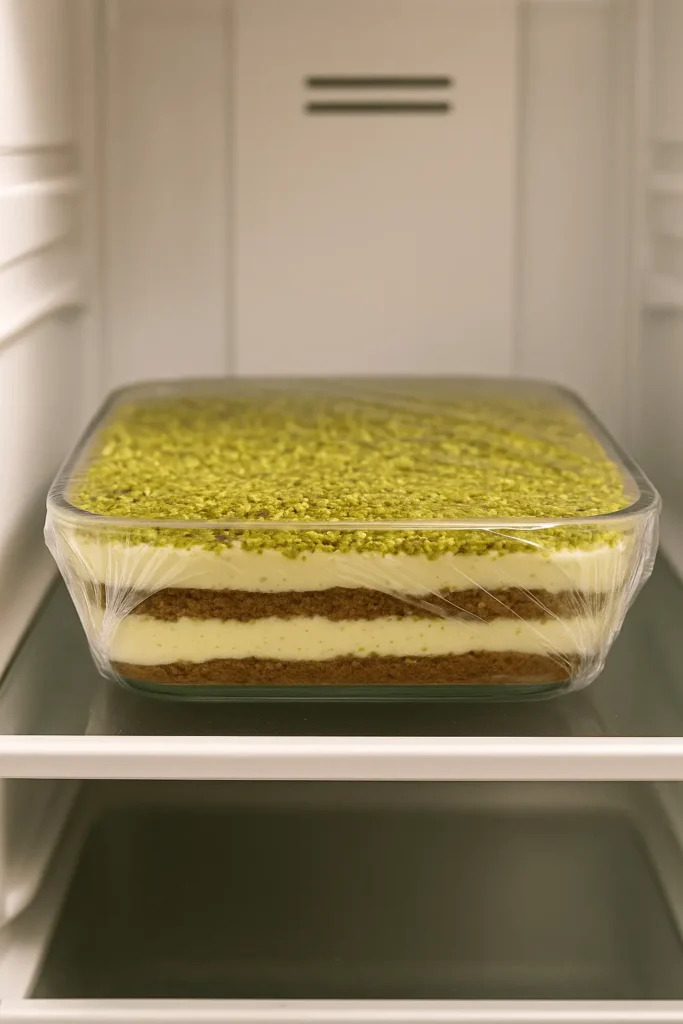
10- Chill and let the magic happen.
Wrap the dish tightly and place it in the fridge for at least 4 hours to set – leaving it overnight gives the best flavor and texture.
And that’s it – you’ve built a pistachio tiramisu that feels elegant but was totally manageable. Now let’s explore a few ways to level it up or switch it around to fit your style.
Pistachio Tiramisu Tips and Easy Variations
Once you’ve made your first pistachio tiramisu, it becomes second nature, like folding towels or making that one casserole your family always asks for. But if you’re anything like me, you’re always looking for ways to fine-tune or switch things up just a little. Here’s where we get to have fun and make it truly yours.
Helpful Tips for Success:
- Don’t oversoak the ladyfingers – A quick dip (1–2 seconds) is all it takes. Too long, and they’ll fall apart and turn mushy.
- Use room-temp mascarpone – Cold mascarpone can clump when mixing. Let it sit out for 10 minutes before blending to keep everything smooth.
- Fold gently – When adding the whipped cream to the mascarpone mixture, go slow and fold instead of stirring. That airiness makes the cream extra dreamy.
- Chill time counts – Four hours minimum is great, but overnight makes the layers even more flavorful and easy to slice.
Creative Variations:
- Pistachio tiramisu cake – Build your layers in a springform pan, then chill and unmold for a cake-style presentation. Decorate with extra pistachios on top!
- Vegan pistachio tiramisu – Swap mascarpone with thick coconut cream, egg yolks with silken tofu purée, and use plant-based cream. Still rich, still delicious.
- Tiramisu pistachio parfaits – Layer everything into small jars or cups for a pretty grab-and-go version – perfect for parties or picnics.
- Try different nuts – Almonds or hazelnuts also work wonderfully if you’re out of pistachios, but still want a nutty variation.
This recipe is flexible, forgiving, and fun – just how dessert should be. Let’s move on to some ideas for serving that’ll make your pistachio tiramisu shine even brighter.
Serving Ideas for Pistachio Tiramisu
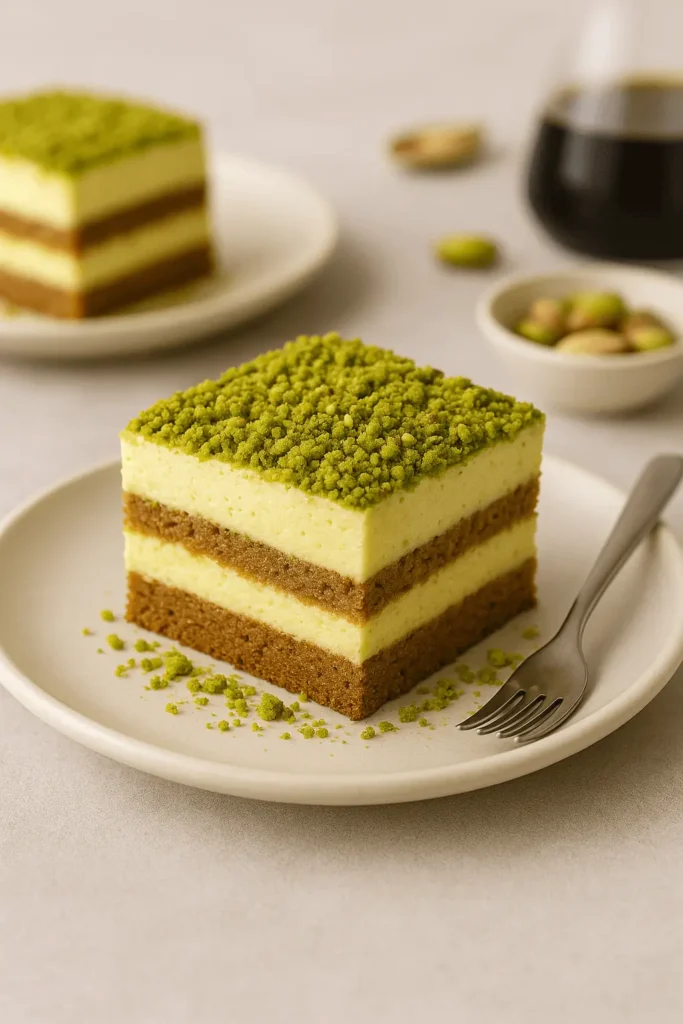
There’s nothing quite like setting a dessert on the table and hearing that little gasp of joy from your guests. This pistachio tiramisu delivers that moment every single time. Whether you’re plating it for a holiday gathering or just sneaking a spoonful on a weeknight, here are a few ways to serve it up in style.
Fun & Memorable Ways to Serve:
- Layered in a glass trifle bowl – Show off those pretty green and creamy layers. Perfect for birthdays or brunch.
- Mini mason jars – Personal-size servings are cute and practical for dinner parties, picnics, or potlucks.
- As a sliceable cake – Build it in a springform pan, chill until firm, then slice like a layer cake. Add pistachio dust or chocolate curls for flair.
- With coffee or tea – Serve alongside a warm drink for a relaxing dessert moment.
- Decorate to match the occasion – Crushed pistachios and edible flowers for spring; shaved chocolate and a dusting of cocoa for winter holidays.
Presentation adds the final touch, but the flavor does the talking – and this one never disappoints. Now, let’s make sure you know exactly how to store it so not a single bite goes to waste.
How to Store and Serve Pistachio Tiramisu Later
One of my favorite things about pistachio tiramisu? It gets even better the next day. The flavors settle in, and the texture firms up just right. Here’s how to keep your leftovers tasting just as amazing as day one.
Best Ways to Store:
- In the fridge – Cover the dish with plastic wrap or a tight lid and store for up to 4 days. It actually slices better once it’s fully chilled.
- For longer storage – Cut into individual portions, place parchment between slices, and store in an airtight container in the freezer for up to 1 month.
- Thawing – Place frozen pieces in the fridge overnight. By the next day, the texture will be smooth and ready to serve.
Reheating?
No need to reheat! This is a chilled dessert, so just let it sit at room temperature for 10–15 minutes if you want a slightly softer bite. Or enjoy it cold right out of the fridge – it’s just as delightful.
Leftovers are like a little gift for your future self. Keep them tucked away and enjoy when you need something sweet without lifting a finger.
More Tiramisu-Inspired Desserts to Try
If this pistachio tiramisu sparked your love for creamy layers and coffee-kissed flavors, here are a few more delicious treats you might enjoy:
- Tiramisu Brownies – Fudgy brownie base meets creamy tiramisu topping.
- Limoncello Tiramisu – A citrusy twist with bright, sunny flavor.
- Tiramisu Latte – A cozy drink inspired by your favorite dessert.
- Matcha Tiramisu – Earthy green tea layers with a creamy finish.
- Tiramisu Cups – Perfect for individual servings or party platters.
Easy Pistachio Tiramisu Recipe to Impress Guests
Equipment
- Hand or stand mixer
- Rubber spatula
- Two mixing bowls
- Shallow dish for dipping
- 9-inch square dish or trifle bowl
- Offset spatula (optional for spreading)
Ingredients
- 24 ladyfingers
- 1 cup brewed espresso cooled
- ¼ cup pistachio milk
- 16 oz mascarpone cheese
- 1 cup cold heavy cream
- 3 large pasteurized egg yolks
- ½ cup granulated sugar
- 1 tsp vanilla extract
- 2 Tbsp pistachio cream or spread
- ¾ cup shelled pistachios finely chopped
Optional Ingredients:
- Dark chocolate curls for garnish
- Pinch of ground cardamom or cinnamon for added warmth
Instructions
- Chill a mixing bowl and beaters for 10 minutes.
- In the chilled bowl, beat heavy cream to soft peaks; set aside.
- In another bowl, whisk yolks and sugar until pale; mix in mascarpone, vanilla, and pistachio cream.
- Gently fold in the whipped cream until smooth.
- Stir espresso and pistachio milk in a shallow bowl.
- Quickly dip ladyfingers and layer half in the bottom of your dish.
- Spread half the cream mixture over the ladyfingers; smooth evenly.
- Sprinkle with one-third of chopped pistachios.
- Repeat layers with remaining ladyfingers, cream, and pistachios.
- Cover and chill for at least 4 hours (overnight preferred). Slice and serve cold.
Notes
Key Takeaways
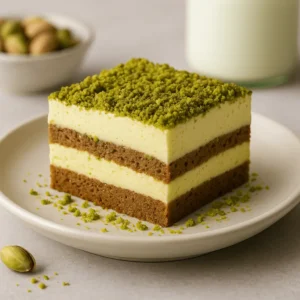
- This pistachio tiramisu comes together without baking and layers smooth, creamy textures with a gentle nutty flavor.
- Made with espresso-dipped ladyfingers and a creamy pistachio filling.
- Simple to make in advance – just let it rest in the fridge for a few hours or overnight for the best texture.
- Customizable with jar servings, cake-style presentation, or a vegan version.
- Great for gatherings, holidays, or anytime you want something special.
Next up, let’s answer a few questions you might have before you dive in.
Pistachio Tiramisu FAQ: Your Questions Answered
Is it okay to use regular milk in place of pistachio milk?
Yes, that works just fine! While you’ll lose a little of that signature nutty flavor, the texture stays smooth and creamy. To keep the pistachio vibe going, you can mix in about ¼ teaspoon of pistachio extract.
Do I have to use pasteurized egg yolks?
It’s the safest and easiest way to go, especially since this is a no-bake dessert. Pasteurized yolks give you the same silky richness without the worry, so they’re highly recommended.
Why does my mascarpone look a little grainy?
That usually means it was too cold or mixed too fast. Let it sit out for about 10 minutes before using, and blend it gently until just smooth – no need to overdo it.
Can I bring this pistachio tiramisu to a potluck?
Definitely! Just assemble it in a container with a secure lid, keep it chilled with an ice pack, and slice it once you’re ready to serve. It travels well and looks impressive when plated.
What’s the best way to make the green layer stand out more?
Stir 1 tablespoon of pistachio butter or a drop or two of natural green coloring into half the mascarpone mixture. It gives you a lovely layered look without affecting the taste.
Can I adjust the sweetness in this recipe?
Absolutely. You can reduce the sugar by about one-third and still get a delicious result. Just taste as you go to find the right balance – thanks to the mascarpone and cream, the texture stays just right.
Still with me? Great! Let’s wrap things up with one final thought before you head off to prep your first batch.
Conclusion
There’s something truly special about a dessert that’s simple to make yet feels like a treat every time you serve it. This pistachio tiramisu brings that little spark – layers of comfort, flavor, and just enough flair to impress without the fuss.
If you give it a try (and I really hope you do), I’d love to hear how it turned out! Leave a review and let others know how it went in your kitchen. Did you serve it for a celebration? Add your own twist? I’m all ears!
Thanks for spending time here – happy layering, and may your fridge always hold something sweet.