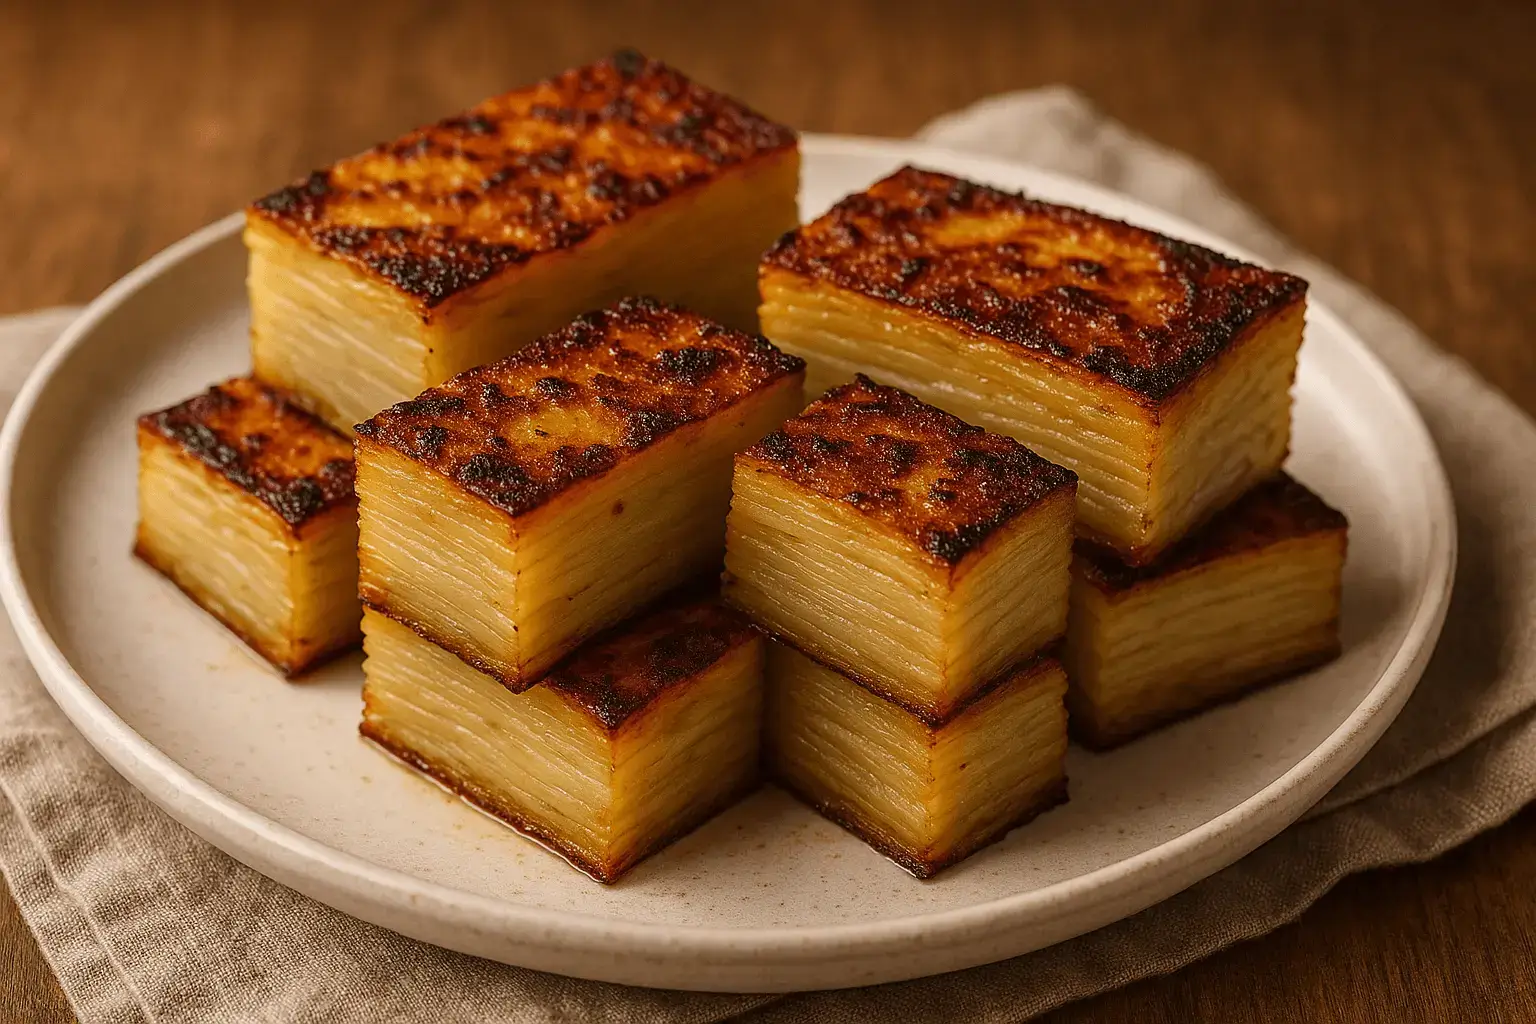
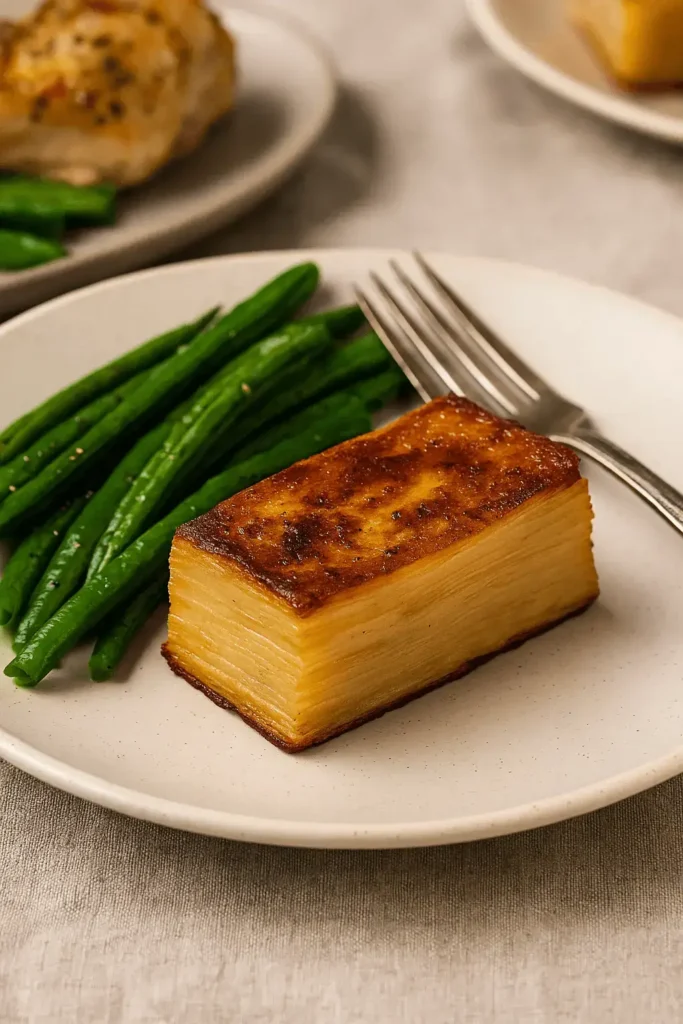
Let me tell you – potato pave is one of those recipes that makes you feel like you’ve done something really special without all the stress in the kitchen. You don’t need anything fancy, just some good potatoes, a loaf pan, and a little time. The result? Perfectly stacked, buttery layers with golden crispy tops that look straight out of a restaurant, but made with all the love from home.
This dish is a favorite around here when I want something a bit “extra” without making a big fuss. It’s great for holidays, dinner with friends, or even just because you want to turn a regular meal into something memorable.
In this post, I’ll walk you through every step of making potato pave – from prepping and layering to chilling and crisping – plus all my go-to tips, creative variations, and easy reheating ideas. Let’s dive in and bring some buttery joy to your table!
Why This Potato Pave Recipe Belongs on Your Table
This potato pave is one of those dishes that feels a little fancy but is simple enough for any home cook to master. You’ll love how the thin layers bake into soft, buttery slices with a crisp golden top that looks beautiful on any table.
- Family-friendly and versatile: Perfect for holidays or an easy weeknight dinner.
- Customizable flavors: Try fresh herbs, a little cheese, or even a sweet potato pave twist.
- Make-ahead ease: Chill and slice when you’re ready – so convenient when you have guests.
There’s something special about serving a side that makes everyone pause and say, “Wow, that looks delicious!” Let’s get you set up with everything you’ll need to bring it to life.
Simple Ingredients for the Best Potato Pave
Before we get into layering and baking, let’s go over what you’ll need for this cozy and elegant potato pave. These ingredients are simple and easy to find, but when they come together, the result is anything but ordinary.
Here’s what to gather:
Basic Ingredients
- Yukon Gold potatoes – 3 pounds (about 6–7 medium)
These are the stars of the show. Their creamy texture and golden hue make them perfect for slicing and layering. They hold up well and bring natural richness. - Unsalted butter – 8 tablespoons (1 stick), melted
This adds flavor and helps each layer cook evenly. Brushing it on the pan and between the slices makes everything golden and crisp. - Heavy cream – ½ cup
A little cream between the layers keeps the inside tender and gives that melt-in-your-mouth finish. - Fresh thyme – 1 tablespoon, leaves only
Adds a subtle, earthy flavor that pairs beautifully with potatoes. You can chop it finely or leave the leaves whole. - Garlic powder – 1 teaspoon
Brings in flavor without having to mince fresh garlic. It gently infuses every layer with that warm, savory depth. - Kosher salt – 1½ teaspoons
Important to season each slice so the entire potato pave recipe has flavor from top to bottom. - Freshly ground black pepper – ½ teaspoon
Adds a soft hint of spice and balances the cream and butter.
Optional Add-Ins
- Grated Gruyère – ½ cup
Want a richer bite? This cheese melts between layers for a nutty, cozy flavor. - Chopped chives – 2 tablespoons
Sprinkle these on top just before serving for a pop of green and freshness.
Pro Tip:
For a fun twist, swap half the Yukon Golds with sweet potatoes to make a sweet potato pave. Or mix in rosemary or smoked paprika for a Mediterranean or rustic flavor boost. This dish is wonderfully versatile – you can shape it to fit just about any menu.
Now that we’ve got our ingredients ready, let’s head into the kitchen and start building those buttery layers!
Step-by-Step: How to Make Potato Pave at Home
Now for the fun part – putting this potato pave together. Don’t worry, you don’t need to be a chef to pull this off. Just take it step by step, and you’ll be slicing into those crisp golden layers in no time.
Step-by-Step Instructions
1. Prepare the loaf pan
Line a 9×5-inch loaf pan with two long strips of parchment paper, crisscrossed, leaving plenty of overhang on all sides. This makes it easy to lift the finished pave out later. Brush the inside of the pan and parchment with a little melted butter.
2. Slice the potatoes
Using a mandoline or a sharp knife, cut the potatoes into very thin slices – about ¹⁄₁₆ inch thick. Keep the slices as uniform as possible so they bake at the same pace. They should feel delicate but still hold their shape.
3. Mix the seasoning
In a large mixing bowl, toss the potato slices with the melted butter, heavy cream, thyme, garlic powder, salt, and pepper. Every slice should be lightly coated – this is where the flavor builds.
4. Layer and press
Begin layering the seasoned slices in the prepared loaf pan, overlapping them slightly like shingles. After every few layers, gently press down with your hands or a spatula to flatten and compact. Keep going until you’ve used all the potatoes and the pan is filled evenly.
5. Cover and bake
Wrap the top tightly with foil. Place the loaf pan on a baking sheet to catch any drips and bake at 350°F (175°C) for 70 minutes. The potatoes should be tender all the way through – test with a knife or skewer. You’ll also notice a soft bubbling at the edges when it’s ready.
6. Chill and compress
Let the pave cool for 10–15 minutes. Then place a second loaf pan on top and weigh it down with cans or something heavy. Transfer to the fridge and chill for at least 4 hours – or overnight if you can. This step is what gives the pave its signature clean layers and shape.
7. Slice and roast to crisp
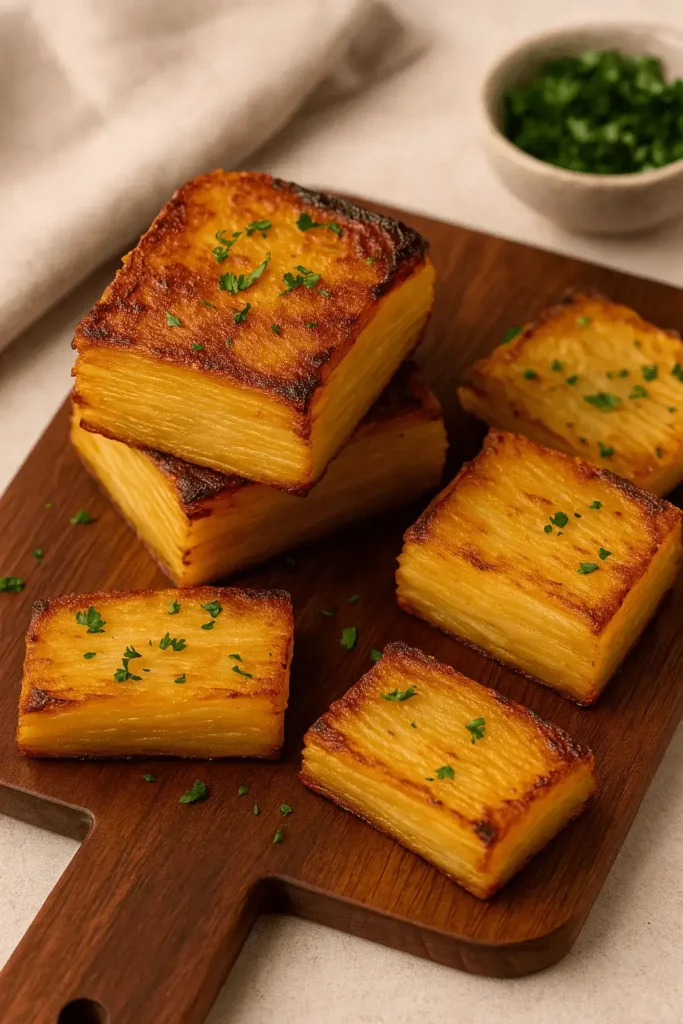
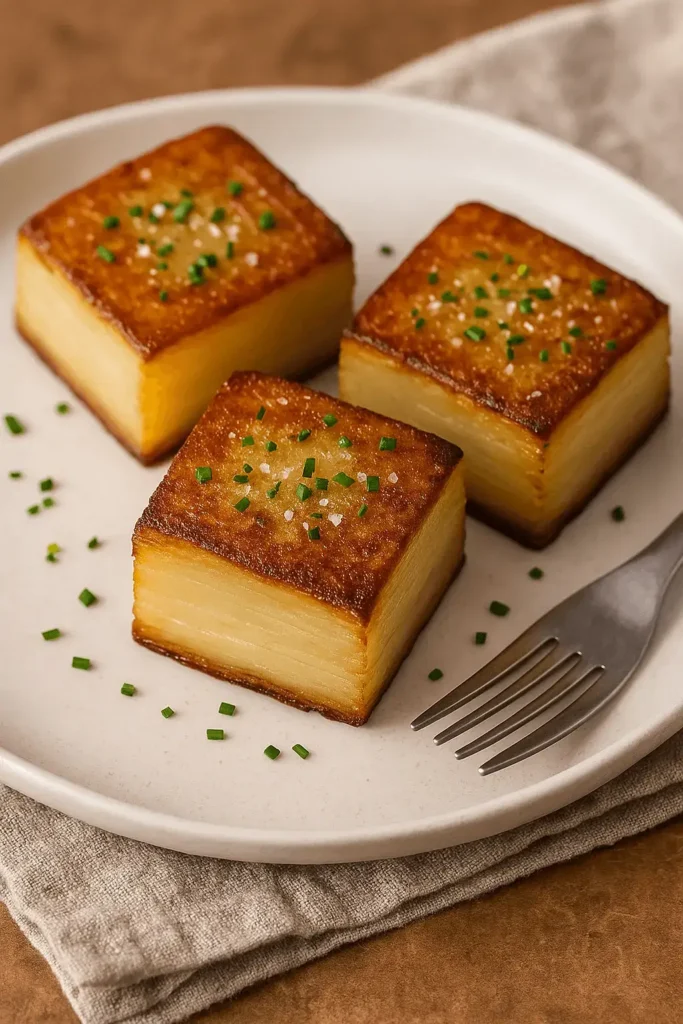
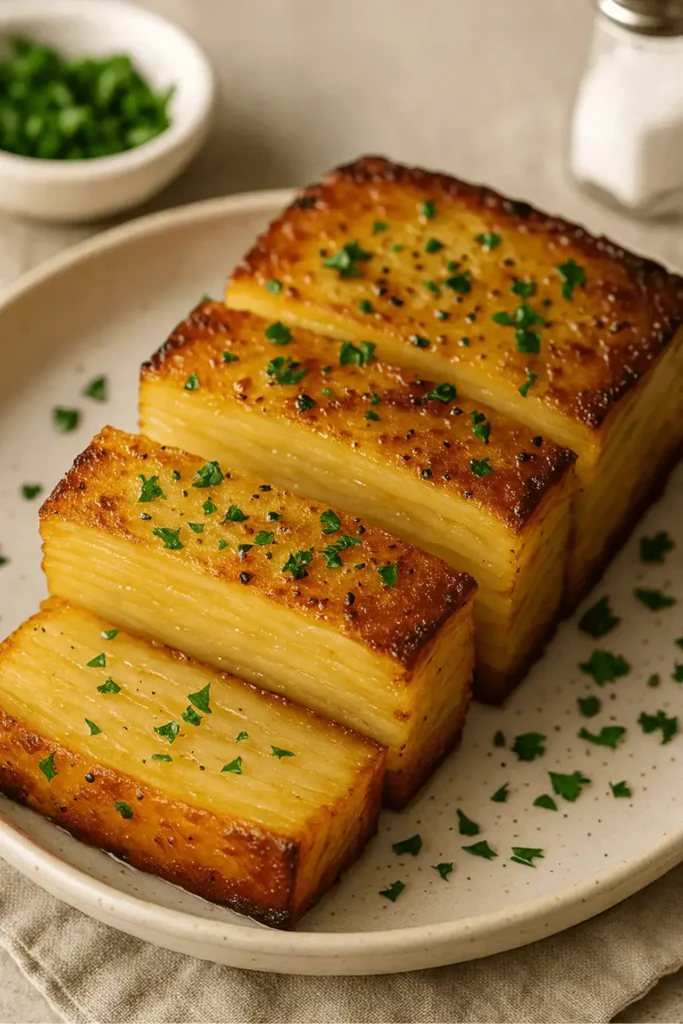
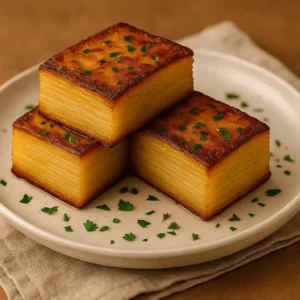
Once chilled, lift the pave out of the pan using the parchment. Trim off the edges, then slice into squares or rectangles – whatever size you like. Arrange them on a parchment-lined baking sheet, brush the tops with a little more butter, and roast at 425°F (220°C) for 15–18 minutes, or until the tops are crisp and deeply golden.
8. Serve warm and enjoy
You’ll hear the faint crunch as you cut into those golden tops, and the tender layers underneath will practically melt on the fork. It’s a beautiful mix of texture and flavor.
Making potatoes pave isn’t just about stacking slices – it’s about creating something special from simple ingredients, right in your own kitchen. Now that the baking’s done, let’s talk about ways to put those delicious squares on the table!
Potato Pave Tips and Easy Variations You’ll Love
Once you’ve got the basics down, there’s plenty of room to play with your potato pave. It starts out simple and classic, but with just a few tweaks, you can easily give it your own personal touch. Below are my best tips and favorite twists to help you get creative or troubleshoot along the way.
- Use a mandoline for perfect slices
The thinner and more even the slices, the better the layers will look and bake. If you’re using a knife, take your time and aim for consistency. - Press firmly while layering
Gently pressing the potato layers as you build ensures fewer air pockets and a tighter, more structured potato pave recipe after chilling. - Don’t skip the chilling step
Chilling helps the pave hold its shape when slicing. Overnight is best, but give it at least 4 hours for clean, neat cuts. - Try cheesy layers
Sprinkle a bit of Gruyère or sharp cheddar between a few layers for a melty surprise in every bite. - Play with herbs
Swap thyme with rosemary, oregano, or even a little sage, depending on the season or the rest of your meal. - Go sweet and savory
For a beautiful color contrast, layer in some sweet potatoes with your Yukons and call it a sweet potato pave. It’s a favorite around the holidays. - Make it mini for parties
Cut smaller cubes and serve as bite-sized appetizers with toothpicks and a drizzle of herb butter or a sprinkle of flaky salt.
Cooking is never one-size-fits-all, and that’s the beauty of a recipe like this – it invites your personality into the pan. Now, let’s talk about all the delicious ways to serve it.
Serving Ideas for Potato Pave That Impress Every Time
Potato pave is one of those sides that instantly makes the whole meal feel just a little more special. Whether it’s a quiet dinner or a full holiday spread, these golden, layered squares know how to shine.
These are a few of my favorite ways to serve it up at the table:
- With steak or roast chicken
These crispy-on-the-outside, tender-on-the-inside slices are a perfect companion for your favorite protein. - At brunch with eggs
Warm up a few slices and top them with poached or soft-boiled eggs for a cozy, hearty brunch plate. - As part of a vegetarian meal
Serve with sautéed mushrooms, roasted veggies, or a fresh salad for a satisfying meat-free option. - For holiday gatherings
They look elegant on a platter and reheat beautifully, making them a smart choice for your festive table. - As a dinner party appetizer
Cut into smaller squares, warm them up, and serve on a tray with cocktail picks – people go wild for them.
No matter how you serve it, pave potatoes always bring that “ooh, what’s this?” moment to the table. And the best part? You can make it ahead and still impress. Let’s talk about that next.
How to Store and Reheat Potato Pave the Right Way
The great thing about potato pave is that it stores and reheats like a dream. If you have leftovers (and that’s a big if), here’s how to keep them just as tasty the next day – or even weeks later.
- Refrigerator storage
Let the leftovers cool completely, then store them in an airtight container in the fridge for up to 4 days. - Freezing for later
Place cut squares on a parchment-lined tray and freeze until solid. Then transfer to a freezer-safe bag or container. You can freeze them for up to 2 months without any trouble. When you’re ready to eat, thaw overnight in the fridge. - Reheating in the oven
Pop slices in a preheated 400°F (205°C) oven for about 10–15 minutes. They’ll come out crispy on the outside and warm all the way through. - Reheating in the air fryer
Place a slice in the air fryer at 380°F (193°C) for about 5–6 minutes. It’s quick, and that crisp comes right back!
Warm, golden, and just as comforting as day one, leftover potatoes pave are a gift.
More Side Dishes to Try
If you loved making this potato pave, here are a few more cozy, crowd-pleasing sides from the kitchen that are just as fun to serve:
- Purple Sweet Potato Recipe – A colorful twist that brings something special to your table.
- Loaded Fries Recipe – Crispy, hearty, and piled high with toppings – always a favorite.
- Mashed Potato Bar – A fun and customizable idea for gatherings or family dinners.
- Dominican Potato Salad – Creamy, comforting, and full of bold, familiar flavors.
Potato Pave
Equipment
- Mandoline or sharp knife
- 9×5-inch loaf pan
- Parchment paper
- Large mixing bowl
- Foil
- Baking sheet
- Second loaf pan or weight for chilling
Ingredients
- 3 lb Yukon Gold potatoes thinly sliced
- 8 Tbsp unsalted butter melted
- ½ cup heavy cream
- 1 Tbsp fresh thyme leaves
- 1 tsp garlic powder
- 1½ tsp kosher salt
- ½ tsp freshly ground black pepper
Optional Add-Ins:
- ½ cup grated Gruyère cheese
- 2 Tbsp chopped chives for garnish
Instructions
- Line a loaf pan with parchment paper and brush with butter.
- Slice potatoes very thin and toss with butter, cream, and seasonings.
- Layer slices into the pan, pressing down every few layers.
- Cover with foil and bake at 350°F for 70 minutes.
- Cool briefly, then press with weight and chill for 4 hours or overnight.
- Unmold, trim, and cut into squares.
- Roast at 425°F for 15–18 minutes until tops are golden and crispy.
- Serve warm and enjoy those buttery, crispy layers.
Notes
Key Takeaways
- Thin, even potato slices are key for perfect layers
- Pressing and chilling help the pave hold its shape
- A final roast creates crisp tops and golden edges
- Simple ingredients, elegant presentation
- Easy to prep ahead and reheat when needed
- Works beautifully for weeknight dinners or holiday gatherings
Let’s finish things off with a few helpful FAQs before you get cooking!
Potato Pave FAQs: Your Top Questions Answered
Can I make potato pave without a mandoline?
Absolutely. A sharp chef’s knife and a steady hand will do the trick. Just try to keep the slices thin and even – aim for about the thickness of a coin. Consistency helps the potato pave cook evenly and look neat when sliced.
What type of potatoes should I use?
Yukon Golds are a favorite for this potato pave recipe because they have a creamy texture and hold their shape well. Russets can work too, but they tend to be more starchy and may need a little extra butter to stay tender.
How long can I chill the pressed loaf?
The loaf can rest in the fridge for up to a full day. In fact, the longer it rests, the better the layers set. It’s one of those dishes that’s even easier to slice and serve when made ahead.
Why do I need to press the potatoes with weight?
Pressing the layered potatoes removes air pockets and helps everything stay compact. It also allows the butter and cream to soak into every layer, giving your pave potatoes that smooth, structured finish.
Can I add cheese to the layers?
Yes! A little Gruyère, Parmesan, or cheddar between the layers can add wonderful flavor. Just don’t go overboard – too much cheese might make the slices slide apart instead of holding together.
Is potato pave gluten-free?
It is, as long as everything you use is confirmed to be gluten-free. This potatoes pavé recipe doesn’t include flour or breading, so it’s naturally a solid choice if you’re avoiding gluten – just double-check your seasonings and butter to be sure.
Still curious or ready to try it your own way? Let’s wrap things up with a few final thoughts before you get cooking!
Conclusion
There’s something so comforting about a dish that’s made with care, a little patience, and ingredients you probably already have in your kitchen. Potato pave might look like a fancy side, but once you’ve made it, you’ll see just how doable (and fun) it really is. Whether you serve it at a cozy family dinner or bring it out for the holidays, it’s one of those recipes that people remember.
If you gave this potato pave recipe a try, I’d truly love to hear how it turned out for you. Feel free to leave a review or share your own twist – I always enjoy seeing how other home cooks make it their own!