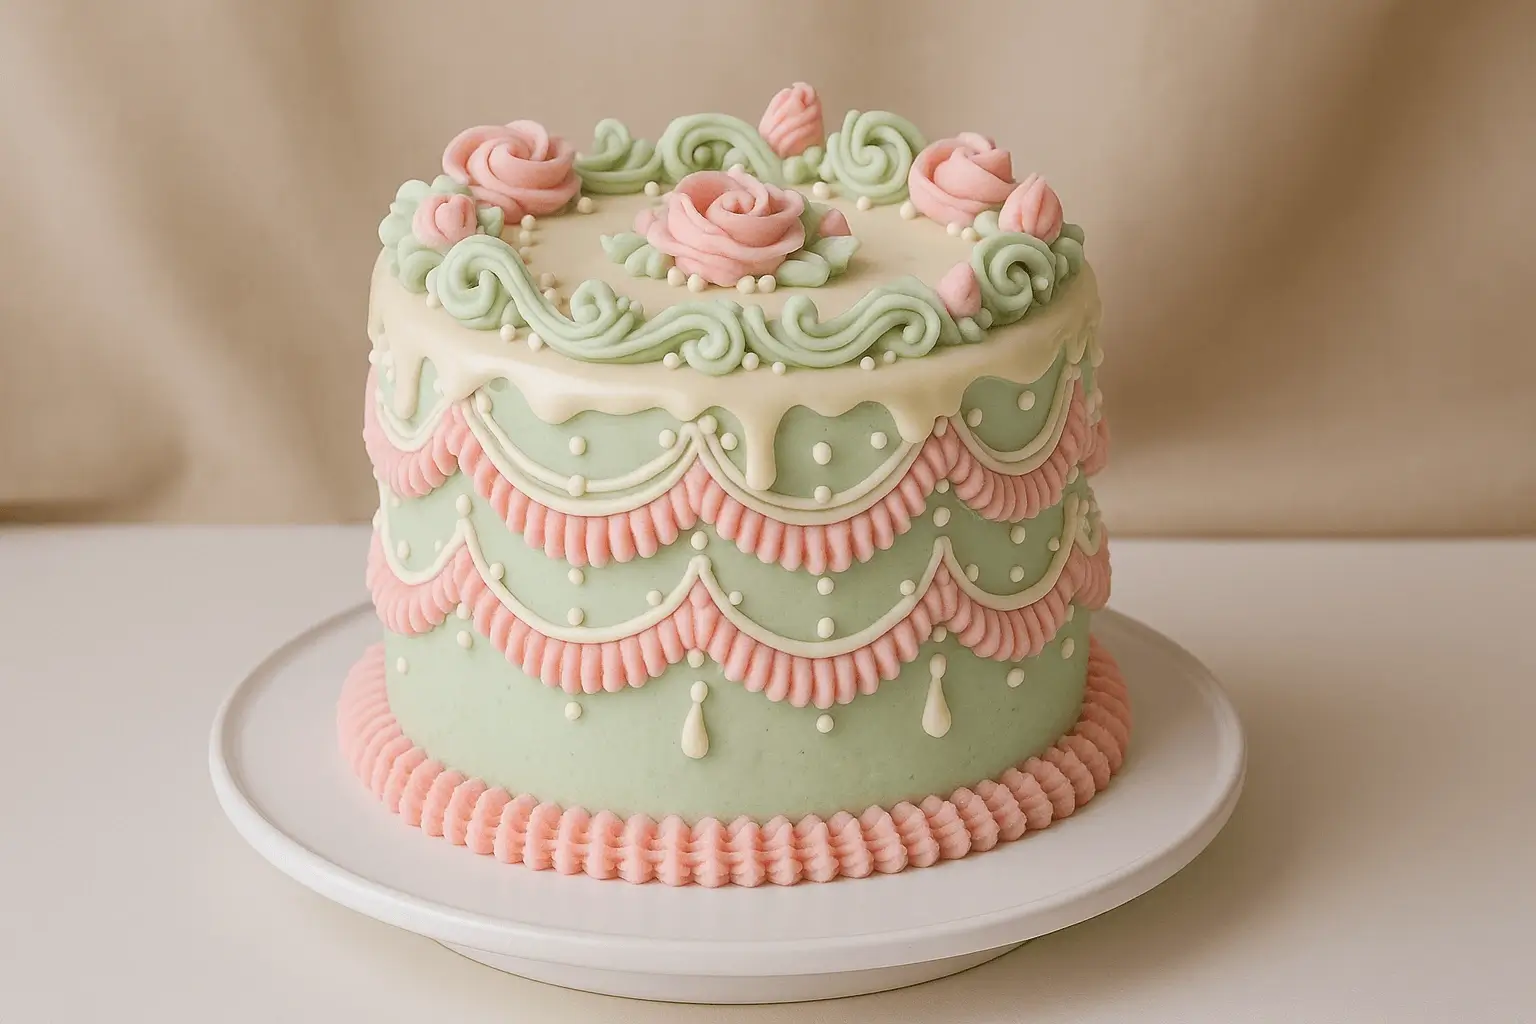
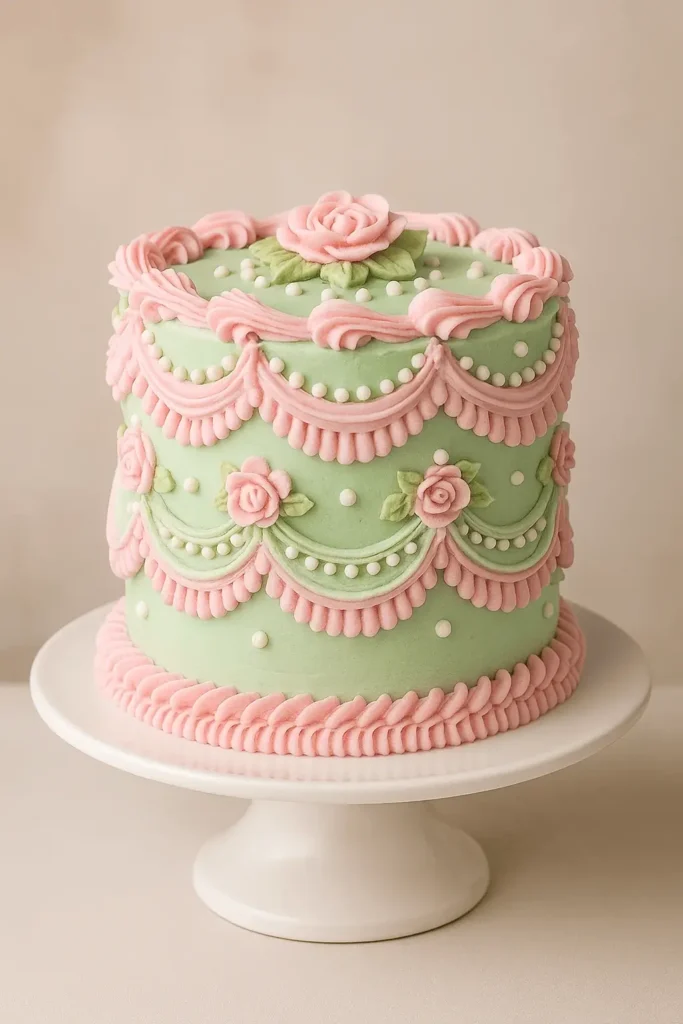
There’s just something about an old-fashioned, over-the-top cake that makes everyone stop and smile. You know the kind – delicate swirls of pastel frosting, pearly details, and a drizzle that looks like it belongs in a painting. That’s exactly what this rococo cake brings to the table.
If you’ve ever wanted to create a cake that’s both fun to make and stunning to serve, this one’s for you. It’s the perfect weekend baking project when you want to slow down, get a little creative, and make something that feels extra special.
Whether you’re planning a birthday, bridal shower, or just feel like adding a little sparkle to your table, I’ll walk you through each step – from baking the layers to adding all those fancy finishing touches. You’ll find helpful tips, simple ingredients, and a decorating process that’s easier than it looks.
Let’s roll up our sleeves and make a cake that’s just as joyful to create as it is to share!
Why You’ll Love This Rococo Cake
This rococo cake is the kind of dessert that turns baking into a joyful little adventure. It’s decorative, colorful, and full of personality – just like the gatherings it’s meant for. Whether you’re planning a Rococo wedding cake or simply love a beautiful centerpiece for a tea party, this recipe is designed to help you create something memorable without feeling overwhelmed.
- Visually stunning but approachable – Even if piping scrolls is new to you, the steps are easy to follow and fun to practice.
- Perfect for any celebration – Birthdays, showers, or just because – this cake fits right in.
- Customizable colors and styles – Match the Rococo cake aesthetic to your theme with soft pastels or bold tones.
- Made from everyday ingredients – No need for specialty tools or fancy ingredients – just a little time and creativity.
- Make-ahead friendly – Bake the layers early and decorate when you’re ready, so there’s no last-minute rush.
This is the kind of recipe that makes people say, “You made that?!” And the best part? You really did.
Let’s take a look at everything you’ll need to get started!
Rococo Cake Ingredients You’ll Need
Let’s gather everything you’ll need to create a rococo cake that’s both beautiful and delicious. Don’t worry – these are all everyday ingredients, but when they come together, they turn into something truly special. You’ll also find a few fun extras you can add in if you want to make it your own.
Basic Ingredients
- All-purpose flour (3 cups) – This is the foundation of your cake, giving it the structure to hold those beautiful layers.
- Baking powder (1 tablespoon) – Helps your cake rise evenly, so you get a nice, fluffy crumb.
- Fine sea salt (½ teaspoon) – A pinch of salt makes the sweet flavors pop without being overpowering.
- Unsalted butter (1 cup, softened) – Adds richness and that soft, melt-in-your-mouth texture we all love.
- Granulated sugar (2 cups) – Sweetens the batter and helps the top bake up with a light golden finish.
- Large eggs (4, room temperature) – Bind everything together and create a smooth, creamy batter.
- Sour cream (1 cup) – Keeps the crumb soft and tender while adding a little tang for depth.
- Vanilla extract (2 teaspoons) – Brings in that classic bakery-style flavor.
- Almond extract (½ teaspoon) – Adds a subtle, nutty aroma often found in elegant cakes (and perfect for a Rococo wedding cake).
- Whole milk (¾ cup) – Thins the batter just enough to make it pourable without making it runny.
Buttercream Frosting
- Unsalted butter (1½ cups, softened) – A creamy base that’s easy to color and pipe.
- Powdered sugar (5 cups, sifted) – Gives the frosting its sweetness and structure for decorating.
- Vanilla extract (1 teaspoon) – Balances out the sweetness with a smooth, comforting flavor.
- Heavy cream (3–4 tablespoons) – Helps get the frosting to just the right consistency.
- Gel food coloring (variety of shades) – Brings the rococo cake aesthetic to life with swirls, scrolls, and elegant touches.
Glaze & Decorative Touches
- White chocolate (4 ounces, finely chopped) – Melts into a smooth drip glaze that adds elegance and shine.
- Heavy cream (¼ cup) – Blends with the chocolate for a graceful, pourable consistency.
- Gold luster dust (optional) – Adds a subtle shimmer to highlight piped details.
- Edible pearls or dragées (as desired) – A final flourish that brings in that signature Rococo flair.
Optional Add-Ins
- Fruit jam (½ cup) – A quick way to add color and flavor between layers.
- Candied citrus peel – Tucked into the frosting for a bright, festive look.
Pro Tip: Want to explore different flavor profiles? Swap almond extract for a splash of orange blossom water for a Mediterranean twist, or go with rosewater and pistachios for a French-inspired vibe. These little changes can tie your rococo cake to different occasions or cultural themes.
Now that your ingredients are ready, let’s dive into the fun part – baking and decorating!
How to Make a Rococo Cake Step by Step
Baking this rococo cake is like working on a little masterpiece – one layer, swirl, and drip at a time. I’ll walk you through each step so nothing feels intimidating, and before you know it, you’ll have a cake that’s almost too pretty to slice (almost!).
1. Prep your pans and preheat
Start by setting your oven to 350°F (175°C). Grease three 8-inch round cake pans, line the bottoms with parchment paper, and dust lightly with flour. This helps the cakes release cleanly without sticking.
2. Mix the dry ingredients
In a medium bowl, whisk together the flour, baking powder, and salt until well combined. Set it aside so it’s ready to go when you need it.
3. Cream the butter and sugar
In a large mixing bowl, beat the butter with a hand or stand mixer until creamy and pale. Slowly add in the granulated sugar and continue mixing until the texture is light and fluffy – about 3 to 4 minutes. This step helps give the cake its tender crumb.
4. Add the eggs
Break the eggs in one at a time, mixing just until each is fully worked in. Don’t forget to pause and scrape down the bowl as you go so everything blends up nice and even.
5. Add flavor and moisture
Stir in the sour cream along with the vanilla and almond extracts. It’s okay if the batter looks a little uneven here – it’ll come together smoothly in the next step.
6. Alternate the flour and milk
With your mixer on low, add the dry mixture in three parts, alternating with the milk. Start and end with the flour. Mix just until everything is combined – overmixing can make the cake dense.
7. Divide and bake
Evenly divide the batter between your prepared pans (use a scale if you want to be precise). Smooth the tops and bake for 23–26 minutes, or until the tops are lightly golden and a toothpick poked in the center comes out clean.
8. Cool completely
Once out of the oven, let the cakes rest in their pans for about 10 minutes. Then carefully lift them out and place on a wire rack to finish cooling.
9. Make the buttercream
Grab a fresh mixing bowl and give the butter a good beat until it’s nice and creamy. Slowly add in the powdered sugar, then stir in the vanilla and cream, one tablespoon at a time, until it’s soft and spreadable. Divide the frosting and color it as desired to create your rococo cake aesthetic.
10. Assemble the cake
Start by setting the first cake layer right in the center of your cake stand or serving board. Spread a thin layer of frosting (or jam) on top, then repeat with the next layers. Once stacked, cover the entire cake in a thin layer of frosting (called a crumb coat) and chill it for about 15 minutes. Then add a second, smoother layer over the top.
11. Pipe the scrolls and details
Using piping bags fitted with small star or round tips, decorate with scrolls, scallops, and dots in various colors. Think soft, elegant curves like a Rococo wedding cake. Let your creativity shine!
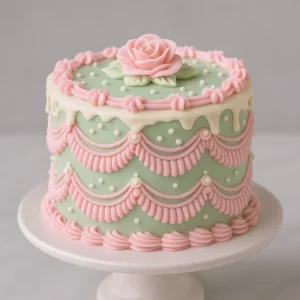
12. Add the white chocolate glaze
Gently heat the white chocolate and cream in short bursts in the microwave until smooth. Let it cool slightly, then spoon or pour it around the edges of the cake so it drips beautifully down the sides.
13. Final touches
Brush on a little luster dust and press on some edible pearls to finish the look. Chill the cake for at least 30 minutes before slicing to let everything set.
And there you go – a cake that looks like it belongs in a fairytale!
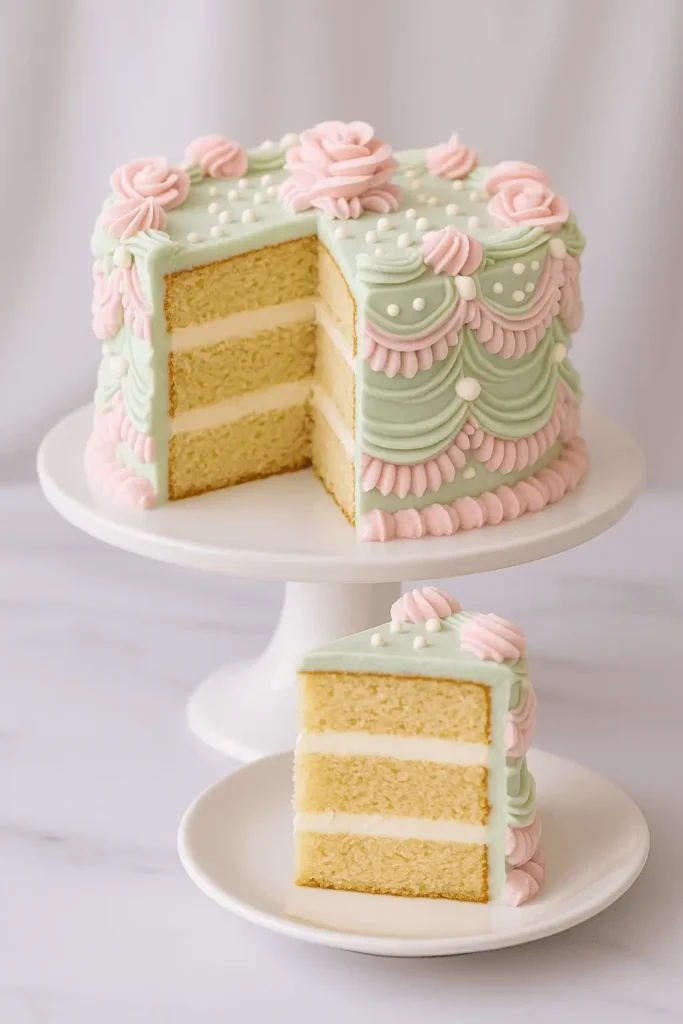
When you slice into it and see those soft layers and delicate decorations, you’ll know all that love and effort was worth it. Up next, I’ll share some little tips and creative twists to help you make this cake even more your own.
Rococo Cake Tips and Easy Variations
Making a rococo cake isn’t just about following steps – it’s about enjoying the process and adding your personal touch along the way. Whether it’s your first fancy cake or you’re looking to refine your decorating skills, these tried-and-true tips will help you get the most out of your time in the kitchen.
Helpful Tips for Success
- Bake in advance to stay relaxed
Whenever I’m making a decorated cake like this, I like to bake the layers the day before. Once they’re cooled and wrapped, it frees up time (and counter space!) so you can enjoy decorating without feeling rushed. - Room temperature is your friend
Butter, eggs, sour cream, and milk all mix better when they’re not cold. Let them sit out for about 30 minutes before you begin to help your batter come together smoothly. - Use gel food coloring for vibrant scrollwork
Gel colors create bold, pastel, or jewel-toned hues without thinning out the frosting – perfect for that signature Rococo cake aesthetic. - Pipe a few practice scrolls first
Before you start decorating the cake itself, take a minute to practice on a piece of parchment paper. It gives you a feel for the pressure and flow so you can pipe with confidence. - Crumb coat for a clean finish
A thin base layer of frosting (the crumb coat) helps trap any stray crumbs so your final layer stays smooth and picture-perfect. - Chill before adding the drip glaze
Make sure your frosted cake is nice and cool before drizzling on the white chocolate glaze. This helps the drips stop in just the right spots without running too far.
Easy Variations You’ll Love
- Swap the almond extract
Not everyone is a fan of almond flavor – try vanilla bean paste, lemon extract, or even orange blossom water to change the profile. - Make it a Rococo wedding cake
Tier the cake using dowels and add cascading piped scrolls in soft gold, ivory, or blush for an elegant centerpiece. - Try different fillings
Layer in raspberry jam, lemon curd, or even a layer of crushed berries mixed with frosting for a fruity surprise. - Change up the colors
Go pastel for spring, jewel tones for a dramatic fall cake, or create a blue-and-white porcelain look using just two colors. - Add texture with decorations
Use crushed meringue cookies, candied flowers, or even tiny fondant bows to bring in texture and dimension.
No matter how you tweak it, your rococo cake is going to reflect your creativity and care – and that’s what makes it extra special. Now, let’s talk about how to serve this beauty in ways that match all its flair!
Serving Ideas for Your Rococo Cake
Once your rococo cake is finished and looking like a dream, it’s time for the fun part – serving it! Whether it’s the centerpiece of your dessert table or a sweet surprise for someone you love, this cake deserves a little fanfare.
Creative Ideas to Serve and Present
- Show it off on a pedestal cake stand
A tall cake stand instantly elevates your cake – literally and visually. Choose one in a neutral or pastel shade to let the decorations shine. - Serve with tea, coffee, or lemonade
Pair slices with elegant teacups or chilled glasses for a charming garden-party feel. - Make it part of a dessert bar
Slice into smaller portions and place on doily-lined trays surrounded by coordinating treats – think petit fours or iced sugar cookies. - Add seasonal fruit on the side
Fresh berries or sliced peaches look lovely and complement the flavors without overpowering them. - Use as a birthday showstopper
Add tall, slim candles in matching colors and let the cake be the centerpiece of your celebration. - Perfect for a Rococo wedding cake table
Place it alongside vintage decor – like lace, gilded frames, or pearl accents – to tie into the theme.
No matter how you serve it, this cake is bound to spark conversation, compliments, and a few extra “just one more sliver” moments. And when the party winds down, let’s make sure those leftovers stay just as delightful.
How to Store and Reheat Rococo Cake
After all the piping and slicing, your rococo cake leftovers deserve just as much love as the first serving. Here’s how to keep every last crumb tasting great.
Best Practices for Storing
- Room temperature (short term):
If your kitchen is cool and the cake is fully frosted, it can sit at room temperature (covered with a cake dome or airtight container) for up to 1 day. - Refrigeration (up to 4 days):
Cover the cake or wrap individual slices tightly in plastic wrap. Chill for up to 4 days. Let slices come to room temperature for the best texture before serving again. - Freezing layers (before decorating):
Wrap baked, cooled cake layers in plastic and a layer of foil. Freeze for up to 2 months. Thaw overnight in the fridge while still wrapped to avoid condensation. - Freezing frosted slices (for later treats):
Flash-freeze individual slices on a tray until firm, then wrap and store in a freezer-safe container. Great for future sweet moments!
Reheating Tips
- Room temp revival:
A cold slice can be a bit firm. Let it sit out for 20–30 minutes to soften naturally – just enough time to put the kettle on or make a little cup of coffee. - Avoid the microwave:
While tempting, microwaving can melt frosting or make the cake dense. Letting it warm gently is the best way to enjoy it just like day one.
There’s something sweet about finding a slice of rococo cake waiting for you the next day. It’s like your own little reward for all that effort and love.
More Cakes You May Love
Looking for more beautiful bakes after this rococo cake? Here are a few other reader favorites you can try next:
- Chocolate Ganache Cake – Rich, glossy, and perfect for celebrations
- Coconut Cake – Light, fluffy, and full of tropical flavor
- Bento Cake – Cute, personal-sized cakes ideal for gifting
- Cotton Candy Cake – Fun, colorful, and full of nostalgic charm
- Matcha Cake Recipe (Vegan) – A soft, earthy dessert with a cozy feel
Rococo Cake
Equipment
- 3 × 8-inch round cake pans
- Mixing bowls (various sizes)
- Hand or stand mixer
- Rubber spatula
- Piping bags with small star and round tips
- Offset spatula
- Wire cooling rack
- Cake stand or serving platter
- Microwave-safe bowl (for glaze)
Ingredients
Cake Batter:
- 3 cups all-purpose flour
- 1 tablespoon baking powder
- ½ teaspoon fine sea salt
- 1 cup 2 sticks unsalted butter, softened
- 2 cups granulated sugar
- 4 large eggs room temperature
- 1 cup sour cream
- 2 teaspoons vanilla extract
- ½ teaspoon almond extract
- ¾ cup whole milk
Buttercream Frosting:
- 1½ cups unsalted butter softened
- 5 cups powdered sugar sifted
- 1 teaspoon vanilla extract
- 3 –4 tablespoons heavy cream
- Gel food coloring variety of shades
White Chocolate Glaze:
- 4 ounces white chocolate finely chopped
- ¼ cup heavy cream
Decorations:
- Gold luster dust optional
- Edible pearls or dragées
Optional Add-Ins:
- ½ cup fruit jam for filling between layers
- Candied citrus peel for garnish
Instructions
- Preheat oven to 350°F (175°C). Prepare and line three 8-inch cake pans.
- Whisk dry ingredients: flour, baking powder, salt.
- Cream butter and sugar until light and fluffy.
- Add eggs one at a time, mixing well after each.
- Mix in sour cream, vanilla, and almond extract.
- Alternate flour mixture and milk until batter is smooth.
- Divide and bake for 23–26 minutes. Cool completely.
- Prepare buttercream: Beat butter, then gradually add powdered sugar, vanilla, and cream until fluffy.
- Color the frosting as desired for piping.
- Assemble cake: Layer with buttercream or jam. Apply a crumb coat and chill.
- Frost and decorate with scrollwork, pearls, and pastel piping.
- Make glaze: Melt white chocolate with cream; drizzle around the top edge.
- Add gold dust (if using) and chill until set.
- Slice and serve with a warm knife for clean cuts.
Notes
Key Takeaways
- This rococo cake brings elegance and creativity to any celebration.
- Simple ingredients turn into a beautifully detailed centerpiece.
- The buttercream scrolls and chocolate glaze create eye-catching charm.
- You can bake the layers ahead to make decorating stress-free.
- Custom colors and fillings let you match any occasion or theme.
Now let’s finish up with a few helpful FAQs to make your baking journey even smoother.
Rococo Cake FAQs for Home Bakers
Can I make this rococo cake without a stand mixer?
You sure can. A hand mixer will do the job – just give the butter and sugar a little extra time to get nice and fluffy before adding the eggs.
How do I keep the colors in my buttercream from blending together?
Stick with gel food coloring (not liquid), and once you’ve piped your designs, chill the cake so everything stays clean and vibrant. This helps keep your Rococo cake aesthetic looking crisp and polished.
Can I turn this recipe into cupcakes?
Definitely! The batter works beautifully in cupcake form. Just scoop it into 24 liners and bake for about 18–20 minutes. Add scrolls or pearls on top to keep the rococo charm.
Is almond extract a must-have for this recipe?
Not at all. It adds a classic bakery-style flavor, but you can swap it with vanilla, lemon extract, or even a floral twist like orange blossom to suit your taste or occasion.
My white chocolate glaze is sliding all the way down the cake – what’s going wrong?
That usually means the cake’s still a bit warm or the glaze is too hot. Try chilling your frosted cake for 15–20 minutes, letting the glaze cool slightly, then drizzle again for a softer, slower drip.
Can I make a tiered Rococo wedding cake using this recipe?
Yes! You can bake and freeze the layers ahead of time (up to a month in advance). Assemble the tiers and decorate within a day of serving for the best look and texture.
Conclusion
There’s something really special about baking a cake that looks like it belongs on a celebration table – and knowing you made it yourself from start to finish. This rococo cake is more than just dessert; it’s a joyful little project, full of creativity, color, and that extra bit of love that makes every bite feel festive.
If you gave this recipe a try and it brought a smile to your table, I’d love to hear about it. Your thoughts, tips, or even a photo of your finished cake mean the world – and they help other home bakers feel confident enough to jump in too.