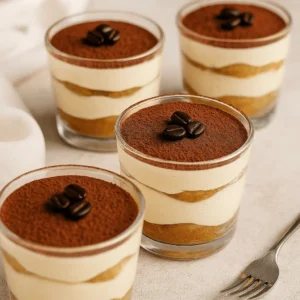
Let’s be honest – sometimes you just want a dessert that looks impressive but doesn’t make a mess or take hours to put together. That’s exactly why tiramisu cups are one of my favorite go-to treats. They have all the creamy, coffee-flavored charm of the classic dessert, but in cute little portions that are easy to serve and even easier to enjoy.
These are the kind of treats you can make ahead of time, tuck into the fridge, and pull out when you need something special – whether it’s a family dinner, a little get-together, or just a cozy moment on your own. No stress, no fuss – just a fun layering process that’s as satisfying to build as it is to eat.
In this post, I’ll walk you through every step: from choosing your ingredients to layering like a pro, plus helpful tips, serving ideas, and answers to the most common questions. Let’s make something you’ll be proud to serve (and sneak a spoonful of when no one’s looking).
Why You’ll Love Making Tiramisu Cups at Home
There’s something so inviting about tiramisu cups – they’re just the right mix of special and simple. You can prepare them ahead, tuck them in the fridge, and know dessert is ready when you are.
- Easy to make: No complicated steps or fancy tools required.
- Perfect portions: Everyone gets their own cup, no slicing needed.
- Customizable: Try adding chocolate chips or a sprinkle of cinnamon for extra flair.
- Ideal for any gathering: From holidays to casual evenings, these little treats fit right in.
- Inspired by favorites: If you enjoy Costco tiramisu cups, you’ll love this homemade version.
Once you taste the creamy layers and delicate coffee flavor, you’ll want to make them again and again. Let’s gather everything you need to get started!
Tiramisu Cups Ingredients You’ll Need
Let’s get you prepped and ready to build these delightful little layers. The beauty of tiramisu cups is that the ingredients are simple, easy to find, and come together like a dream. Here’s exactly what you’ll need – and why each part matters.
Basic Ingredients
- Mascarpone cheese – 1 cup (8 oz): This soft, Italian cheese gives the filling its smooth, creamy texture and subtle tang.
- Egg yolks (pasteurized) – 3, room temperature: They help create a thick, rich custard base when gently cooked with sugar.
- Granulated sugar – ½ cup: Sweetens the cream and balances the espresso beautifully.
- Heavy cream – ¾ cup, cold: Whipped into soft peaks, it lightens the mascarpone filling without overpowering it.
- Pure vanilla extract – 1 teaspoon: Adds warm, mellow flavor that complements the coffee notes.
- Brewed espresso – 1 cup, cooled: Used to soak the ladyfingers for that classic tiramisu flavor. Decaf works great, too!
- Instant espresso powder – 1 teaspoon: Intensifies the coffee flavor without adding extra liquid.
- Ladyfingers (savoiardi) – about 18 to 20 cookies: These crisp sponge biscuits soften just enough after a quick coffee dip, turning cake-like in the cups.
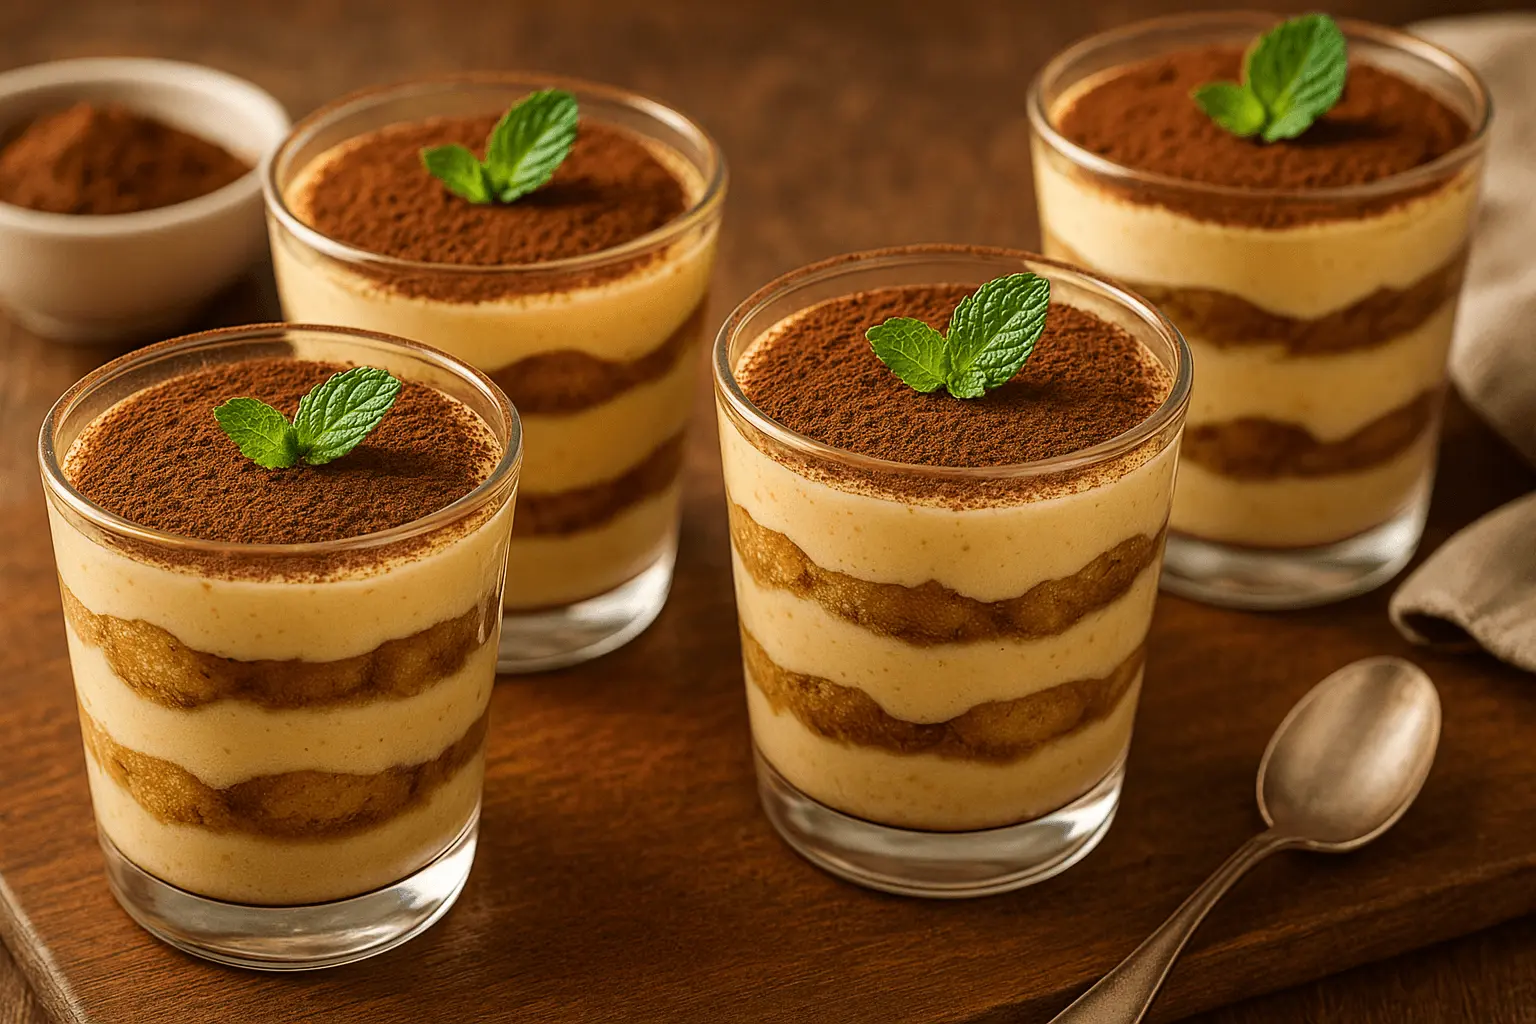
- Unsweetened cocoa powder – 2 tablespoons: A dusting on top gives that signature tiramisu finish.
Optional Add-Ins
- Chocolate shavings or curls: Sprinkle between layers or on top for extra richness.
- Cinnamon pinch: Mix with cocoa for a cozy, spiced twist.
- Mini chocolate chips: Fold into the cream for a touch of texture.
Pro Tip: Want to explore flavor variations? For a French-inspired twist, try soaking your ladyfingers in strong chicory coffee. Hosting a fall gathering? Add a tiny splash of maple extract to the cream for a cozy vibe.
Once your ingredients are gathered and ready to go, it’s time to bring them all together. Let’s head to the fun part – assembly!
How to Make Tiramisu Cups Step by Step
This is where the magic happens (the kitchen kind!). Making tiramisu cups is all about layering texture and flavor in the right order. Follow these steps, and you’ll have a dessert that looks fancy but feels wonderfully doable.
Step-by-Step Instructions
1. Prepare the yolk-sugar base.
In a heat-safe glass or metal bowl, whisk the egg yolks and sugar together until smooth and pale yellow. Place the bowl over a small pot of simmering water (making sure the bottom doesn’t touch the water) and whisk continuously for about 5 minutes, or until the mixture thickens slightly. Take it off the heat and set it aside to cool for about 10 minutes.
2. Stir in the mascarpone.
After the egg mixture has cooled slightly, gently fold in the mascarpone until it blends into a smooth, lump-free cream with a rich, glossy texture.
3. Whip the cream.
In a separate chilled bowl, whip the heavy cream and vanilla extract using a hand mixer or stand mixer until soft peaks form, meaning the tips curl over gently when you lift the beaters.
4. Combine the two.
Take about one-third of the whipped cream and gently stir it into the mascarpone mixture to loosen it up. Then, carefully fold in the rest of the whipped cream using a spatula, being gentle to keep the mixture airy and fluffy.
5. Mix your espresso soak.
Stir the instant espresso powder into the brewed (and cooled) espresso until dissolved. Pour into a shallow bowl that’s wide enough to dip the ladyfingers.
6. Soak and layer.
Break each ladyfinger in half or thirds, depending on the size of your serving cups. Dip them quickly – no more than 1 second per side – into the espresso mixture. Start layering your cups with soaked ladyfingers, then spoon in a layer of mascarpone cream. Repeat the layers once more, ending with the cream on top.
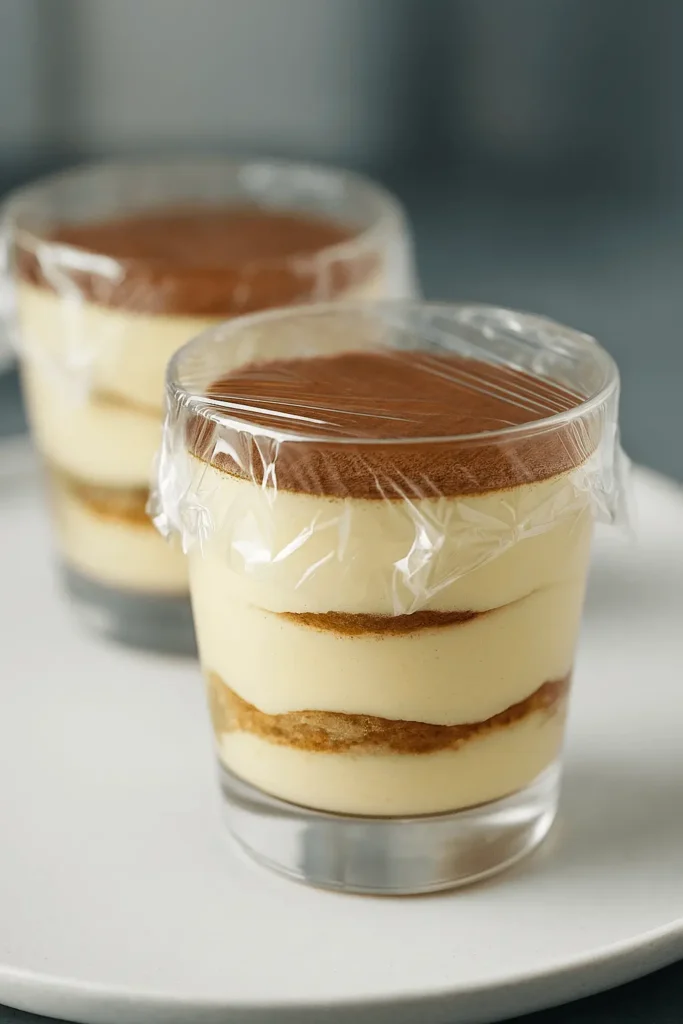
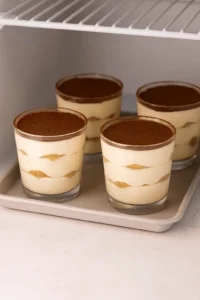
7. Chill to set.
Cover each cup with plastic wrap and refrigerate for at least 4 hours, or overnight if you can. The flavors deepen, and the texture becomes beautifully soft and balanced.
8. Finish with cocoa.
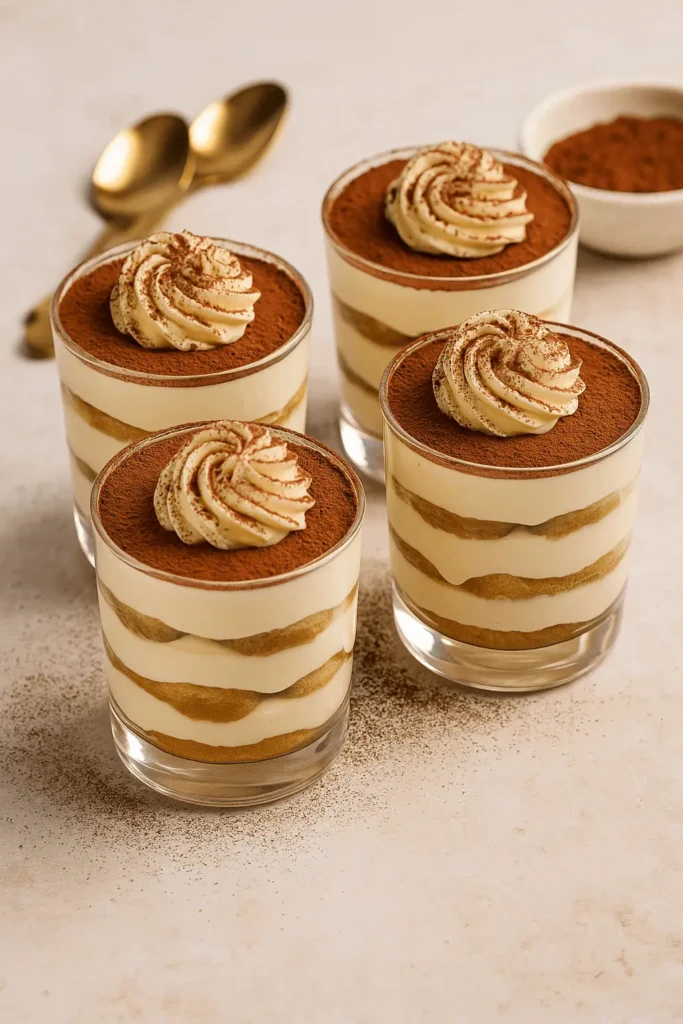
Right before serving, dust the tops with unsweetened cocoa powder using a fine-mesh sieve. If you’re feeling fancy, add some chocolate curls or a sprinkle of cinnamon.
That’s it! You’ve just made a batch of creamy, coffee-scented individual tiramisu cups that are every bit as delicious as they look.
Next up, let’s chat about some extra tips and flavor ideas in case you want to make these cups your own.
Tiramisu Cups Tips, Tricks, and Easy Variations
Once you’ve mastered the basic method for tiramisu cups, there’s so much room to add your personal touch or tweak things for different moods and gatherings. Think of this section as your kitchen toolbox – extra tips and fun variations to keep things interesting and foolproof.
Helpful Tips to Get It Just Right
- Don’t over-soak the ladyfingers: A quick dunk (about 1 second per side) is all you need. Any longer, and they’ll fall apart and make the layers too soft.
- Cool the espresso before dipping: Hot coffee will break down the cookies fast and can affect the cream layers.
- Let the mascarpone soften slightly: It blends more easily at room temperature, but still needs to be cool to maintain that lovely thick texture.
- Use cold cream and chilled beaters: This helps it whip up faster and hold its structure better.
- Make it ahead – but not too far ahead: These tiramisu dessert cups are best within 24–48 hours. After that, the texture may start to break down.
Creative Variations You Can Try
- Chocolate twist: Add mini chocolate chips or a layer of chocolate ganache between cream layers for a dessert with depth.
- Citrus vibe: Fold in a bit of orange or lemon zest into the cream for a bright and fresh flavor.
- Berry burst: Add a layer of fresh raspberries or strawberries between the cookies and cream for a fruity variation.
- Kid-friendly cookies: Swap ladyfingers for vanilla sandwich cookies or plain pound cake cubes if that’s what you have on hand.
- Serving jar swap: Use mason jars or small tumblers instead of cups – especially great for gifts or travel.
Once you’ve played around with a variation or two, it’s easy to make this recipe your signature. Let’s look at how to serve them up in style!
Serving Tiramisu Dessert Cups for Any Occasion
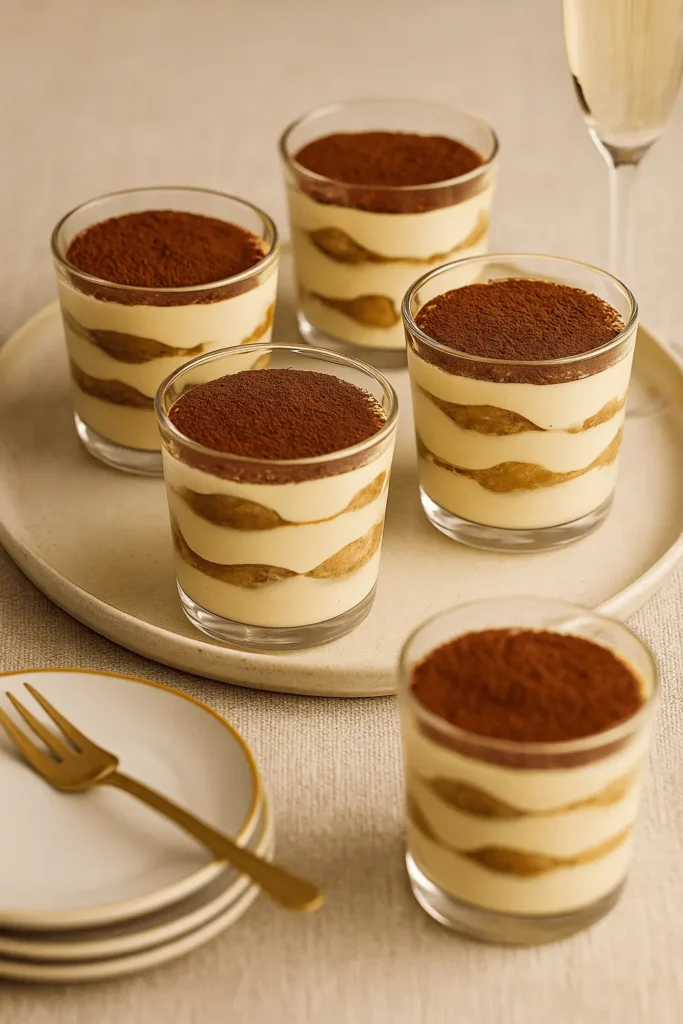
One of the best things about tiramisu cups is how beautifully they fit into any moment. Whether you’re going big with a celebration or just want a treat after dinner, these little desserts can be dressed up or down with ease.
Delicious Ways to Serve and Present
- Holiday dessert table: Arrange the cups on a tray with a dusting of powdered sugar or edible glitter for a festive touch.
- Dinner party favorite: Serve in clear glasses with a long spoon and a sprig of mint or a chocolate curl on top for that extra charm.
- Backyard BBQ bonus: Chill them in small mason jars and tuck them into a cooler – they’ll stay fresh and travel well.
- Birthday treat alternative: Pop a candle in the center of each cup for a fun twist on traditional cake.
- Brunch sweet spot: Pair with fresh fruit and coffee as a cozy, mid-morning pick-me-up.
When you bring these out, you’ll see eyes light up – and spoons dive in fast. Now let’s make sure you can save any extras (if there are any!) and enjoy them later.
How to Store and Keep Tiramisu Cups Fresh
Let’s talk about keeping these individual tiramisu cups just as lovely the next day. The good news? They store like a dream and taste even better after a few hours of rest in the fridge.
How to Store Them
- In the fridge: Cover each cup tightly with plastic wrap or a fitted lid. They’ll keep well for up to 3 days. Any longer, and the cookies may become too soft.
- In the freezer: You can freeze them for up to 1 month, but the texture of the cream may change slightly. To serve, thaw in the fridge overnight and dust with fresh cocoa before eating.
Serving Leftovers
- No need to reheat: Since this is a no-bake dessert, all you need to do is uncover and enjoy.
- Refresh the top layer: If the cocoa topping has faded, simply sift on a new layer before serving to make it look freshly made.
There’s something special about knowing you’ve got a ready-to-go dessert waiting in the fridge.
More Tiramisu-Inspired Desserts to Try
If you enjoyed these tiramisu cups, here are a few more cozy, creative twists you might love exploring next:
- Pistachio Tiramisu – A rich and nutty variation with layers of pistachio flavor
- Tiramisu Brownies – Fudgy brownies with a creamy tiramisu swirl on top
- Limoncello Tiramisu – A bright and citrusy take on the classic favorite
- Tiramisu Latte – Inspired by the dessert, this cozy drink is a treat in a cup
- Matcha Tiramisu – Earthy green tea meets creamy layers in this unique twist
Tiramisu Cups You’ll Absolutely Love
Equipment
- Hand mixer or stand mixer
- Heat-safe bowl
- Small saucepan (for double boiler setup)
- Mixing bowls
- Spatula
- Fine-mesh sieve
- 8 clear dessert cups or small jars (6 oz)
Ingredients
- 1 cup 8 oz mascarpone cheese
- 3 pasteurized egg yolks room temperature
- ½ cup granulated sugar
- ¾ cup cold heavy cream
- 1 tsp pure vanilla extract
- 1 cup strong brewed espresso cooled
- 1 tsp instant espresso powder
- 18 –20 ladyfinger cookies savoiardi
- 2 tbsp unsweetened cocoa powder
Optional:
- Chocolate shavings or curls
- Pinch of cinnamon mix with cocoa
- Mini chocolate chips fold into cream
Instructions
- Whisk yolks and sugar in a bowl over simmering water until thickened; cool for 10 minutes.
- Stir mascarpone into the yolk mixture until smooth.
- In a separate bowl, whip heavy cream with vanilla to soft peaks.
- Fold whipped cream gently into mascarpone mixture until light and fluffy.
- Combine brewed espresso and espresso powder in a shallow bowl.
- Dip ladyfingers briefly (1 second per side) into espresso.
- Layer soaked ladyfingers and cream alternately in dessert cups.
- Chill at least 4 hours or overnight.
- Dust with cocoa powder before serving. Add optional toppings if desired.
Notes
 Use pasteurized egg yolks for a safe, smooth custard base. Be sure to chill the cream before whipping for best results.
Key Takeaways
- Tiramisu cups are easy to make and perfect for serving individually.
- You can prepare them ahead of time – great for planning events.
- Simple ingredients come together for a smooth, coffee-flavored dessert.
- They work well for holidays, potlucks, or cozy evenings at home.
- Customizable with add-ins like chocolate, berries, or flavored coffee.
Ready to make your own batch? Let’s finish with some common questions to help you feel even more confident.
Tiramisu Cups FAQ: Common Questions Answered
Can I use soft ladyfingers instead of crisp savoiardi?
You sure can! Soft sponge-style ladyfingers soak up the espresso quickly, so just give them a very brief dip, about half a second per side. That way, they’ll stay sturdy enough to layer without getting too soggy.
What’s a good substitute for mascarpone cheese?
If mascarpone isn’t available, mix equal parts cream cheese and heavy cream until smooth. The texture stays creamy, and it gives your tiramisu cups a slightly tangier flavor that still works beautifully.
How do I make these without caffeine?
Easy fix – use a strong decaf coffee or espresso brewed extra concentrated. That way, you keep the bold flavor without the buzz, perfect for family-friendly or evening servings of your mini tiramisu cups.
Why chill the cups for at least four hours?
Letting the cups rest gives the layers time to settle. The ladyfingers absorb the espresso fully, and the flavors in your tiramisu dessert cups meld into that classic smooth and tender finish.
Can I make a double batch for a larger group?
Yes, and it’s a great idea for parties! Just scale up the ingredients, prep everything in bigger bowls, and portion into more cups (around 16–18). Make sure you have fridge space for chilling.
Are plastic cups okay for serving outdoors?
Absolutely. Clear plastic cups work really well – just choose ones that are sturdy enough to hold the layers. Store them in a cooler until serving, and your individual tiramisu cups will be picnic-ready.
Still have questions? Feel free to tweak and test – this is the kind of dessert that welcomes a personal touch!
Conclusion
There’s just something special about a dessert that feels both comforting and a little fancy – tiramisu cups are exactly that. Whether you’re sharing them with friends, setting them out for a celebration, or enjoying one quietly after dinner, they bring a little joy in every spoonful.
If you give this recipe a try, I’d truly love to hear how it went for you. Did you add your own twist? Make them for a special moment? Leave a quick review and let me know – your feedback means so much and helps others in the kitchen too.