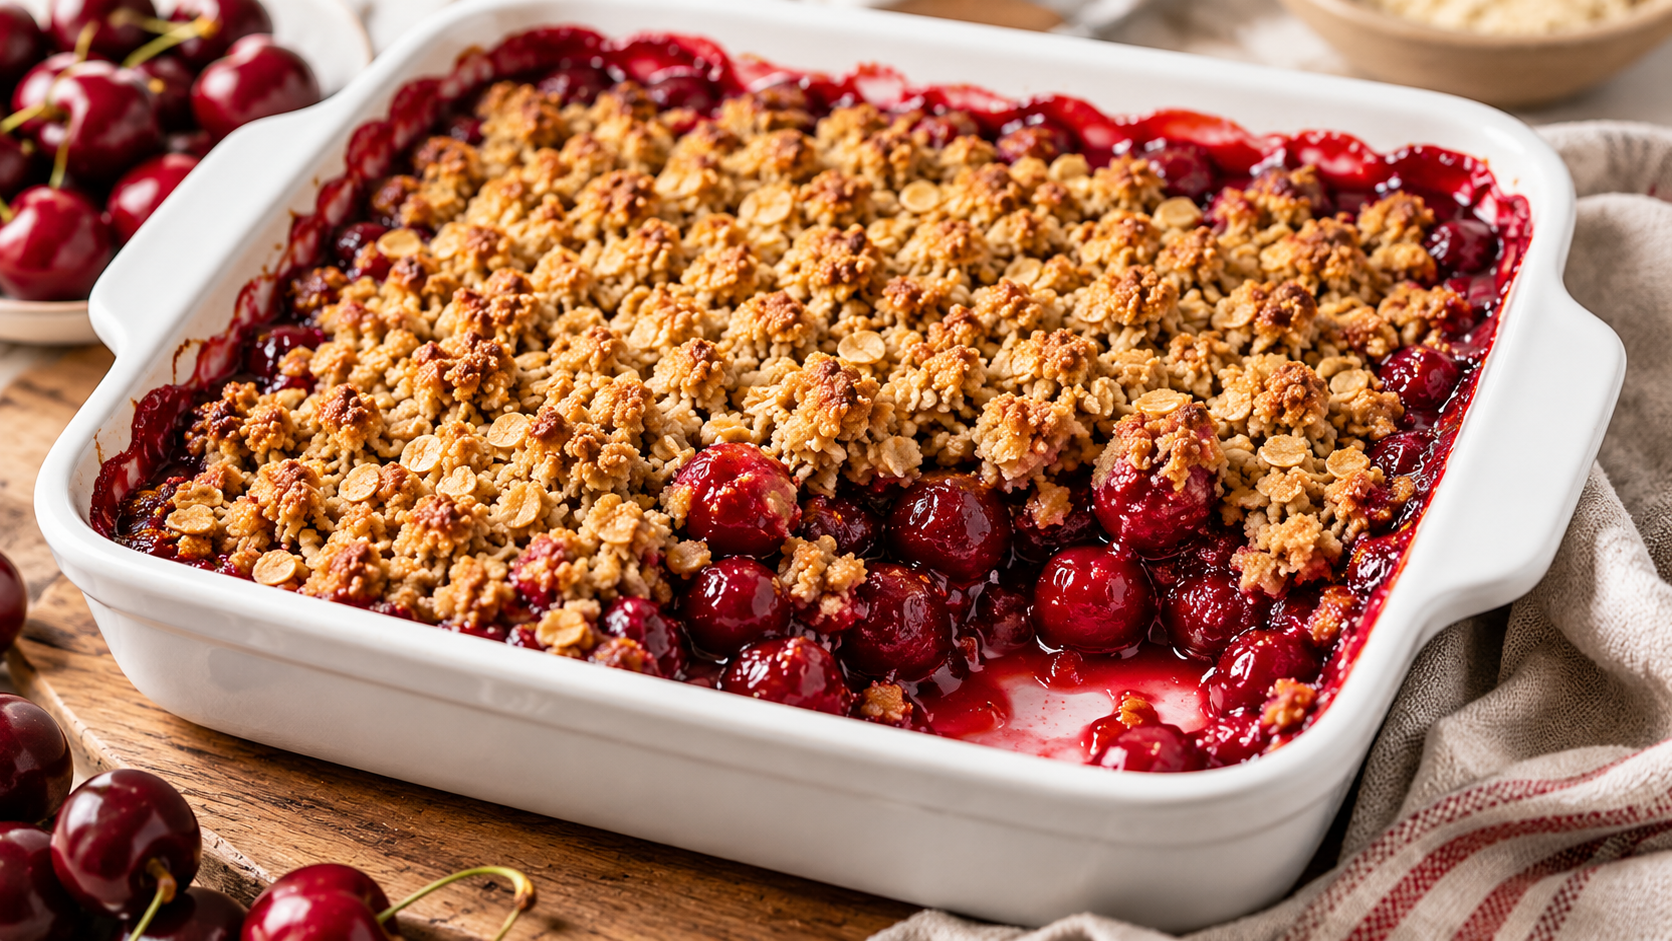
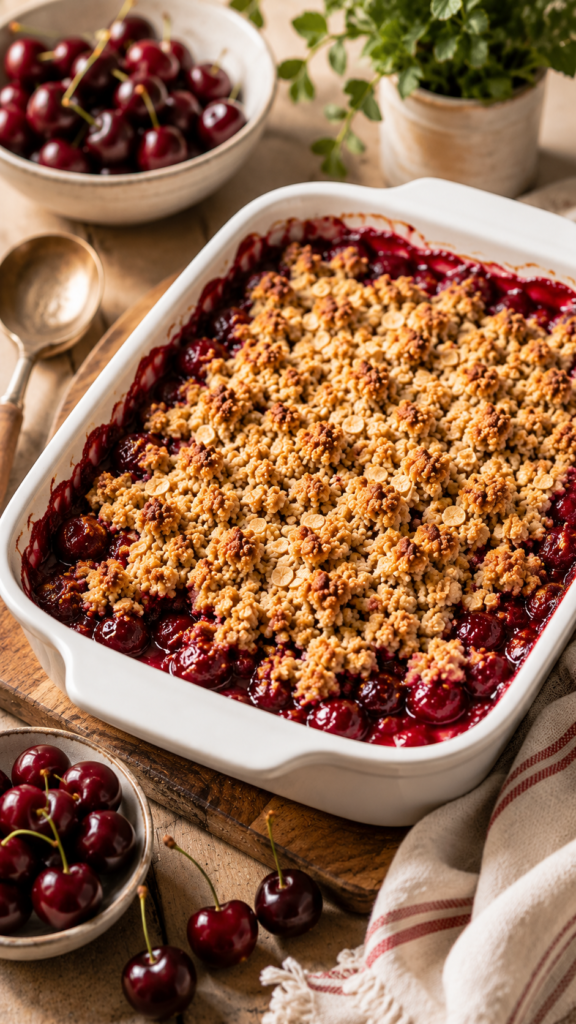
Cherry Crisp is a warm, juicy cherry baked dessert with a sweet-tart fruit filling and a buttery oat topping that turns golden and crisp in the oven. This easy cherry crisp is perfect when you want a simple summer dessert that feels homemade, cozy, and special without a complicated crust.
Cherry Crisp is the kind of dessert that makes your kitchen smell like summer in the best way. The challenge with any fruit crisp recipe is getting the filling thick and juicy without turning watery, while keeping the topping buttery, crumbly, and crisp. This homemade cherry crisp solves that with fresh cherries, a little cornstarch, bright lemon juice, and a simple oat topping that bakes into golden edges over bubbling fruit. In this guide, you’ll learn the ingredients, steps, tips, serving ideas, storage advice, and a full recipe recap so you can make the best cherry crisp with confidence.
Why You’ll Love Cherry Crisp
Cherry Crisp is one of those desserts that feels relaxed but still impressive. It gives you the comfort of a baked fruit dessert without the extra work of rolling dough or shaping a crust. You get juicy cherries, a jammy center, and a crisp oat topping in every spoonful.
- Easy to prepare: This cherry crisp recipe uses simple mixing, spreading, and baking. No special pastry skills needed.
- Great for summer cherries: It is a beautiful cherry summer dessert when fresh cherries are sweet, juicy, and easy to find.
- Comforting but not fussy: You get warm fruit, buttery crumbs, and cozy flavor with very little stress.
- Beginner-friendly: This easy cherry dessert is forgiving, especially because the topping is meant to look rustic.
- Perfect for gatherings: Serve it warm from the baking dish and let everyone scoop their own portion.
- Easy to customize: You can adjust sweetness, add a hint of almond extract, or mix in another fruit if you like.
- Works with fresh or frozen cherries: Fresh cherries give the brightest flavor, but frozen cherries can work when thawed and drained well.
- Delicious with simple toppings: A scoop of vanilla frozen dessert, whipped cream, or plain yogurt makes it extra lovely.
A great Cherry Crisp starts with the right balance of fruit, sweetness, thickener, and topping, so let’s gather what you need.
Ingredients Cherry Crisp
Cherry Crisp uses everyday baking ingredients, but each one has a clear job. The cherries bring juicy sweetness, the lemon keeps the flavor bright, and the oat topping creates that golden, crumbly finish that makes a crisp so satisfying.
- Fresh sweet cherries — 5 cups, pitted and halved: The star of the recipe. Fresh cherries create a juicy, bright, fresh cherry dessert with natural sweetness.
- Granulated sugar — ⅓ cup: Sweetens the filling and helps the cherries release their juices as they bake.
- Cornstarch — 2 tablespoons: Thickens the cherry juices so the filling becomes glossy and spoonable instead of watery.
- Fresh lemon juice — 1 tablespoon: Adds brightness and balances the sweet cherries.
- Vanilla extract — 1 teaspoon: Adds warm aroma and rounds out the fruit flavor.
- Almond extract — ¼ teaspoon, optional: Adds a bakery-style flavor that pairs beautifully with cherries. A little goes a long way.
- Fine salt — ¼ teaspoon, divided: Makes both the filling and topping taste fuller and less flat.
For the crisp topping:
- Old-fashioned rolled oats — 1 cup: Create hearty texture and a classic fruit crisp recipe topping.
- All-purpose flour — ¾ cup: Helps the topping form soft crumbs that bake into crisp, golden clusters.
- Light brown sugar — ½ cup, packed: Adds caramel-like sweetness and helps the topping brown.
- Ground cinnamon — ½ teaspoon: Gives the dessert a warm, cozy background flavor.
- Unsalted butter — ½ cup, melted: Brings richness and helps the topping bake into crisp, buttery crumbles.
Optional Add-Ins
- Orange zest — 1 teaspoon: Adds a fresh citrus aroma that makes the cherries taste even brighter.
- Chopped almonds — ⅓ cup: Adds a nutty crunch to the topping. Skip if you need a nut-free dessert.
- Blueberries — 1 cup: Replace 1 cup of cherries with blueberries for a mixed summer fruit dessert.
- Extra cinnamon — ¼ teaspoon: Use this if you love a warmer spice flavor.
Pro Tip: Pit the cherries before you begin mixing anything else. Cherry juice can stain cutting boards and towels, so use a board that is easy to clean and wear an apron if your cherries are extra juicy.
Once your Cherry Crisp ingredients are ready, the baking process is simple and wonderfully fragrant.
How to Make Cherry Crisp
Cherry Crisp comes together in three easy parts: mix the filling, make the crumbly topping, and bake until the fruit bubbles and the top turns golden. The most important thing is to watch for visual cues, not just the timer.
- Preheat the oven. Heat your oven to 350°F. Lightly grease an 8-inch or 9-inch square baking dish with butter or neutral cooking spray. This helps prevent sticky edges.
- Prepare the cherries. Pit and halve 5 cups fresh cherries. Add them to a large mixing bowl. Halving the cherries helps them soften evenly and makes the filling easier to scoop.
- Mix the cherry filling. Add ⅓ cup granulated sugar, 2 tablespoons cornstarch, 1 tablespoon lemon juice, 1 teaspoon vanilla extract, ¼ teaspoon optional almond extract, and ⅛ teaspoon salt to the cherries. Stir until the cherries look glossy and evenly coated. You should not see dry patches of cornstarch.
- Spread the filling. Pour the cherry mixture into the prepared baking dish. Spread it into an even layer so the Cherry Crisp bakes at the same pace from edge to center.
- Make the topping. In a separate bowl, stir together 1 cup rolled oats, ¾ cup flour, ½ cup brown sugar, ½ teaspoon cinnamon, and the remaining ⅛ teaspoon salt. Mix until the dry ingredients look evenly combined.
- Add the melted butter. Pour ½ cup melted unsalted butter over the oat mixture. Stir with a fork until the topping forms moist crumbs. Some pieces should look small and sandy, while others should clump together. Those larger clumps become crisp, buttery bites.
- Add the topping over the cherries. Sprinkle the oat topping evenly over the cherry filling. Do not press it down firmly. A loose topping bakes better because heat can move through it and create crisp edges.
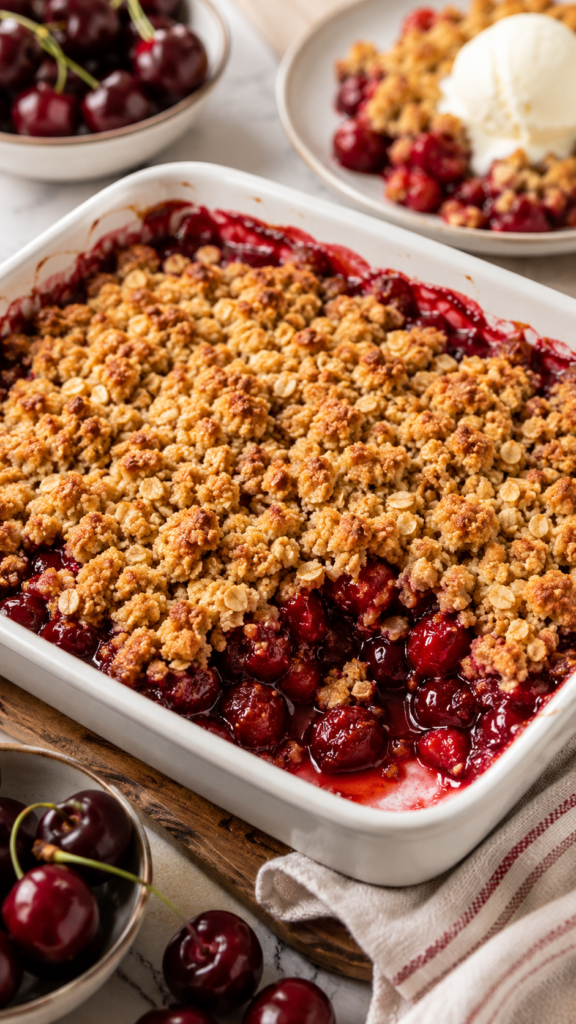
- Bake the crisp. Bake for 38 to 45 minutes, until the cherry filling is bubbling around the edges and in a few spots near the center. The topping should look golden brown and smell buttery.
- Check for doneness. The filling should look thick and glossy, not thin or watery. If the topping browns too quickly before the fruit bubbles, loosely cover the dish with foil and continue baking until the filling is bubbling.
- Let it rest. Cool the Cherry Crisp for 15 to 20 minutes before serving. This short rest lets the filling thicken, so each scoop has juicy cherries instead of loose liquid.
Now that you know the basic method, a few chef-style tips will help you make the best cherry crisp every time.
Chef Tips and Variations Cherry Crisp
Cherry Crisp is simple, but small details can make it even better. These tips help you avoid watery filling, soggy topping, and bland flavor while still leaving room to make the recipe your own.
- Use ripe but firm cherries: Very soft cherries can release too much juice. Look for cherries that are plump, shiny, and firm.
- Do not skip the cornstarch: It thickens the cherry juices as they bake. Without it, your homemade cherry crisp may taste good but scoop too loosely.
- Wait for bubbling in the center: Bubbling means the filling is hot enough for the cornstarch to activate and thicken.
- Let it cool before serving: The filling continues to set as it rests. Scooping too soon can make it seem thinner than it really is.
- Keep the topping loose: Pressing the topping down can make it dense. Sprinkle it gently for a crisp finish.
- Adjust sugar to your cherries: If your cherries are very sweet, use a little less sugar. If they are tart, add 1 to 2 extra tablespoons.
- Make it extra crisp: Add 2 tablespoons more oats to the topping for a heartier texture.
- Try a mixed fruit version: Replace 1 cup of cherries with blueberries, raspberries, or chopped peaches for a colorful summer fruit dessert.
- Make it nutty: Add chopped almonds to the topping for extra crunch, but only if nuts work for everyone you are serving.
- Prep ahead carefully: You can pit the cherries a day ahead and store them covered in the fridge. For best texture, mix and bake the crisp the day you plan to serve it.
With your Cherry Crisp baked and golden, the next fun part is deciding how to serve it.
Serving Suggestions Cherry Crisp
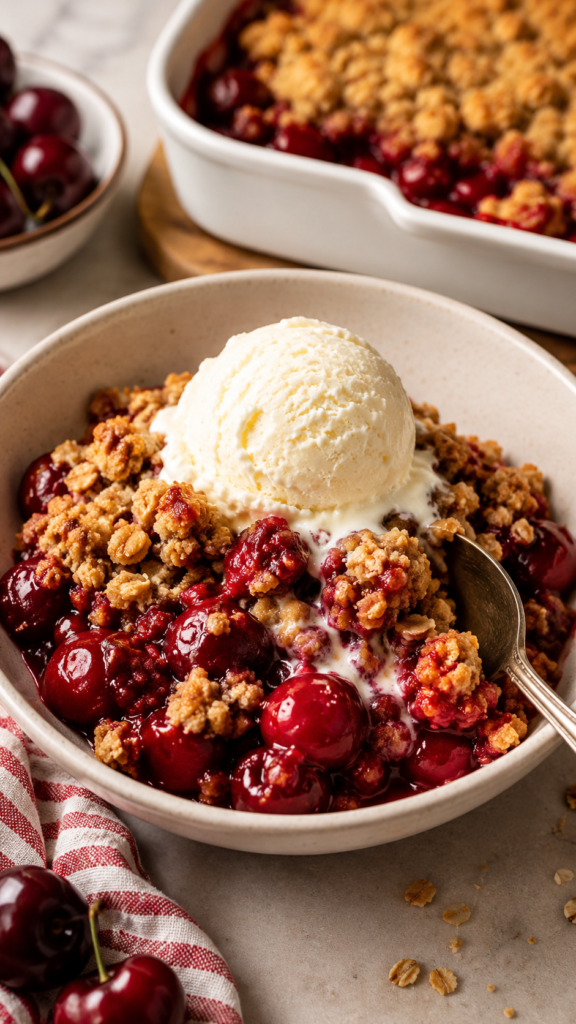
Cherry Crisp is best served warm, when the fruit is glossy and the oat topping still has a gentle crunch. It fits right into backyard dinners, casual summer meals, weekend baking, and cozy evenings when you want something sweet without making a layered dessert.
- Serve it warm and simple: Spoon it into bowls while it is still slightly warm so the cherry filling stays soft and fragrant.
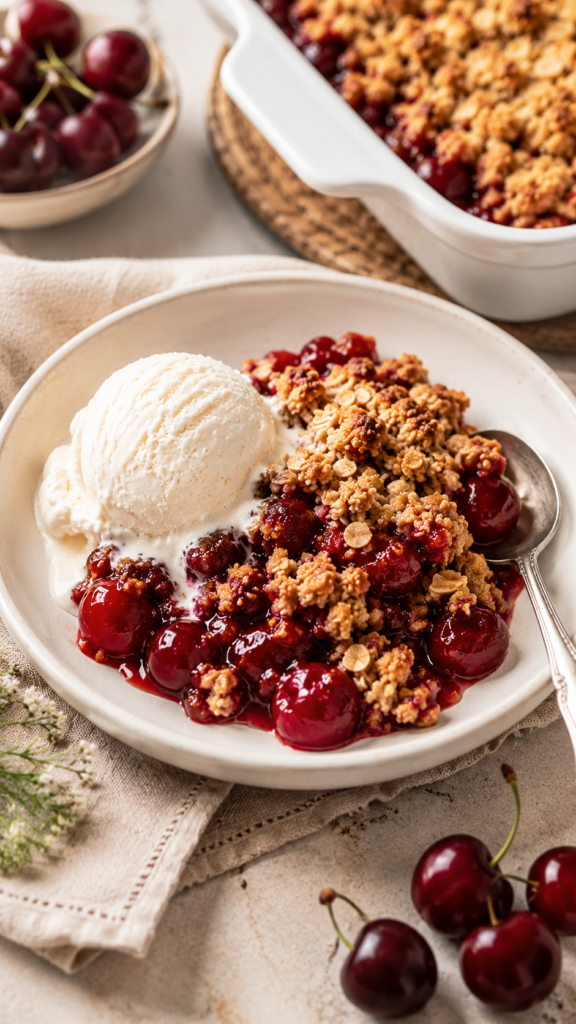
- Add a creamy topping: Vanilla frozen dessert, whipped cream, or a spoonful of plain yogurt balances the warm fruit and crisp topping.
- Make it a summer cherry dessert platter: Serve with fresh berries and sliced peaches for a bright, colorful finish.
- Serve family-style: Place the baking dish on a trivet and let everyone scoop their own portion.
- Add a little crunch: Sprinkle toasted oats or chopped almonds over each serving if you want extra texture.
- Pair with coffee or iced tea: The sweet-tart cherries work well with both warm and cool drinks.
- Use small dishes for guests: Spoon the crisp into ramekins or dessert cups for a neat presentation.
- Enjoy leftovers for brunch: A small scoop with plain yogurt makes a cozy next-day treat.
After serving Cherry Crisp, storing it the right way helps keep the filling safe and the topping as pleasant as possible.
Storing and Reheating
Cherry Crisp can still taste wonderful after storing, especially when you reheat it gently. The topping will soften a bit in the fridge, but the flavor stays rich, fruity, and comforting.
- Fridge storage: Let the crisp cool completely. Cover the baking dish tightly or transfer leftovers to an airtight container. Store in the refrigerator for up to 4 days.
- Freezing: You can freeze baked Cherry Crisp, but the topping may soften after thawing. For best results, cool completely, wrap tightly, and freeze for up to 2 months.
- Thawing: Thaw frozen crisp overnight in the refrigerator before reheating. This helps it warm more evenly.
- Oven reheating: Reheat in a 325°F oven until warmed through, about 15 to 20 minutes for a small portion or longer for a full dish. Loosely cover with foil if the topping gets too brown.
- Microwave reheating: Heat single portions in short bursts until warm. The topping will be softer, but the cherry filling will still taste delicious.
- Texture note: The topping is crispiest the day it is baked. Reheating in the oven helps bring back some crunch.
Once you know how to store it, Cherry Crisp becomes an easy dessert you can enjoy now and later.
Best Cherry Crisp Recipe with Juicy Cherries
Equipment
- 8-inch or 9-inch square baking dish
- Large mixing bowl
- Medium Mixing Bowl
- Measuring cups
- Measuring spoons
- Cherry pitter
- Knife
- Cutting board
- Fork or spatula
- Oven mitts
Ingredients
- 5 cups fresh sweet cherries pitted and halved
- ⅓ cup granulated sugar
- 2 tablespoons cornstarch
- 1 tablespoon fresh lemon juice
- 1 teaspoon vanilla extract
- ¼ teaspoon almond extract optional
- ¼ teaspoon fine salt divided
- 1 cup old-fashioned rolled oats
- ¾ cup all-purpose flour
- ½ cup packed light brown sugar
- ½ teaspoon ground cinnamon
- ½ cup unsalted butter melted
Optional:
- 1 teaspoon orange zest
- ⅓ cup chopped almonds
- 1 cup blueberries replacing 1 cup cherries
- ¼ teaspoon extra cinnamon
Instructions
- Preheat the oven to 350°F. Lightly grease an 8-inch or 9-inch square baking dish.
- Pit and halve the cherries, then place them in a large mixing bowl.
- Add granulated sugar, cornstarch, lemon juice, vanilla extract, optional almond extract, and ⅛ teaspoon salt. Stir until the cherries are glossy and evenly coated.
- Spread the cherry filling evenly in the prepared baking dish.
- In a separate bowl, stir together oats, flour, brown sugar, cinnamon, and the remaining ⅛ teaspoon salt.
- Pour in the melted butter and stir with a fork until moist crumbs form.
- Sprinkle the topping evenly over the cherry filling without pressing it down.
- Bake for 38 to 45 minutes, until the topping is golden brown and the filling bubbles around the edges and near the center.
- If the topping browns too quickly, loosely cover with foil and continue baking until the filling bubbles.
- Cool for 15 to 20 minutes before serving.
Notes
Key Takeaways
Cherry Crisp is a practical recipe to keep in your summer baking rotation. It is simple enough for a weeknight but special enough for guests, and it highlights cherries in a warm, juicy, spoonable dessert.
- Flavor: Sweet cherries, bright lemon, warm vanilla, and a buttery oat topping create a balanced dessert.
- Texture: The filling turns glossy and jammy while the topping bakes crisp and golden.
- Ease: This quick cherry dessert skips pie crust and uses a simple crumble-style topping.
- Best moment: It is ideal as a cherry baked dessert for summer meals, cookouts, and relaxed family dinners.
- Storage: Leftovers keep well in the fridge, though the topping is best on day one.
- Customization: Add berries, citrus zest, nuts, or extra oats to make it yours.
A few common questions can help you troubleshoot and personalize your Cherry Crisp even more.
FAQs Cherry Crisp
Can I use frozen cherries for Cherry Crisp?
Yes, you can use frozen cherries. Thaw them first and drain off extra liquid so the filling does not become too watery. After thawing, measure the cherries, then mix them with the sugar, cornstarch, lemon juice, vanilla, and salt.
Frozen cherries may bake a little softer than fresh cherries, but they still make a tasty easy cherry crisp. Watch for bubbling in the center before removing the dish from the oven.
Why is my cherry crisp watery?
A watery crisp usually means the filling did not bake long enough, the cherries released too much liquid, or there was not enough thickener. Make sure the filling bubbles at the edges and near the center before you take it out of the oven.
Also, let the Cherry Crisp rest for 15 to 20 minutes after baking. The filling thickens as it cools, so it may look loose if you scoop it immediately.
Can I make Cherry Crisp ahead of time?
You can pit the cherries ahead and store them covered in the refrigerator for one day. You can also mix the dry topping ingredients ahead and keep them covered at room temperature.
For the best texture, add the melted butter to the topping and assemble the crisp shortly before baking. This keeps the topping from soaking up fruit juices too early.
Can I double this cherry crisp recipe?
Yes. Double the ingredients and bake the crisp in a 9-by-13-inch baking dish. The baking time may increase by 5 to 10 minutes.
The Cherry Crisp is ready when the topping is golden and the cherry filling bubbles thickly around the edges and near the center.
How do I keep the topping crisp?
Use old-fashioned rolled oats, not instant oats, for the best texture. Also, avoid pressing the topping down into the fruit.
If you are reheating leftovers, use the oven instead of the microwave when possible. Oven heat helps dry and crisp the topping again.
What cherries are best for Cherry Crisp?
Sweet cherries are a great choice because they bake into a juicy, rich filling. Tart cherries can also work, but you may need to add a little more sugar to balance their sharp flavor.
Fresh cherries give this fresh cherry dessert the brightest taste, especially during summer cherry season.
With those questions answered, you are ready to bake a Cherry Crisp that is simple, juicy, and full of golden topping.
Conclusion
Cherry Crisp is everything a good summer dessert should be: easy, juicy, warm, and full of bright cherry flavor. It gives you the cozy feeling of a homemade dessert without complicated steps, and the buttery oat topping makes every scoop taste special.
Whether you serve it after a backyard meal, bring it to a casual gathering, or make it just because cherries looked too good to pass up, this Cherry Crisp is a simple summer dessert you can count on. Enjoy it warm, share it generously, and keep the recipe close for cherry season.