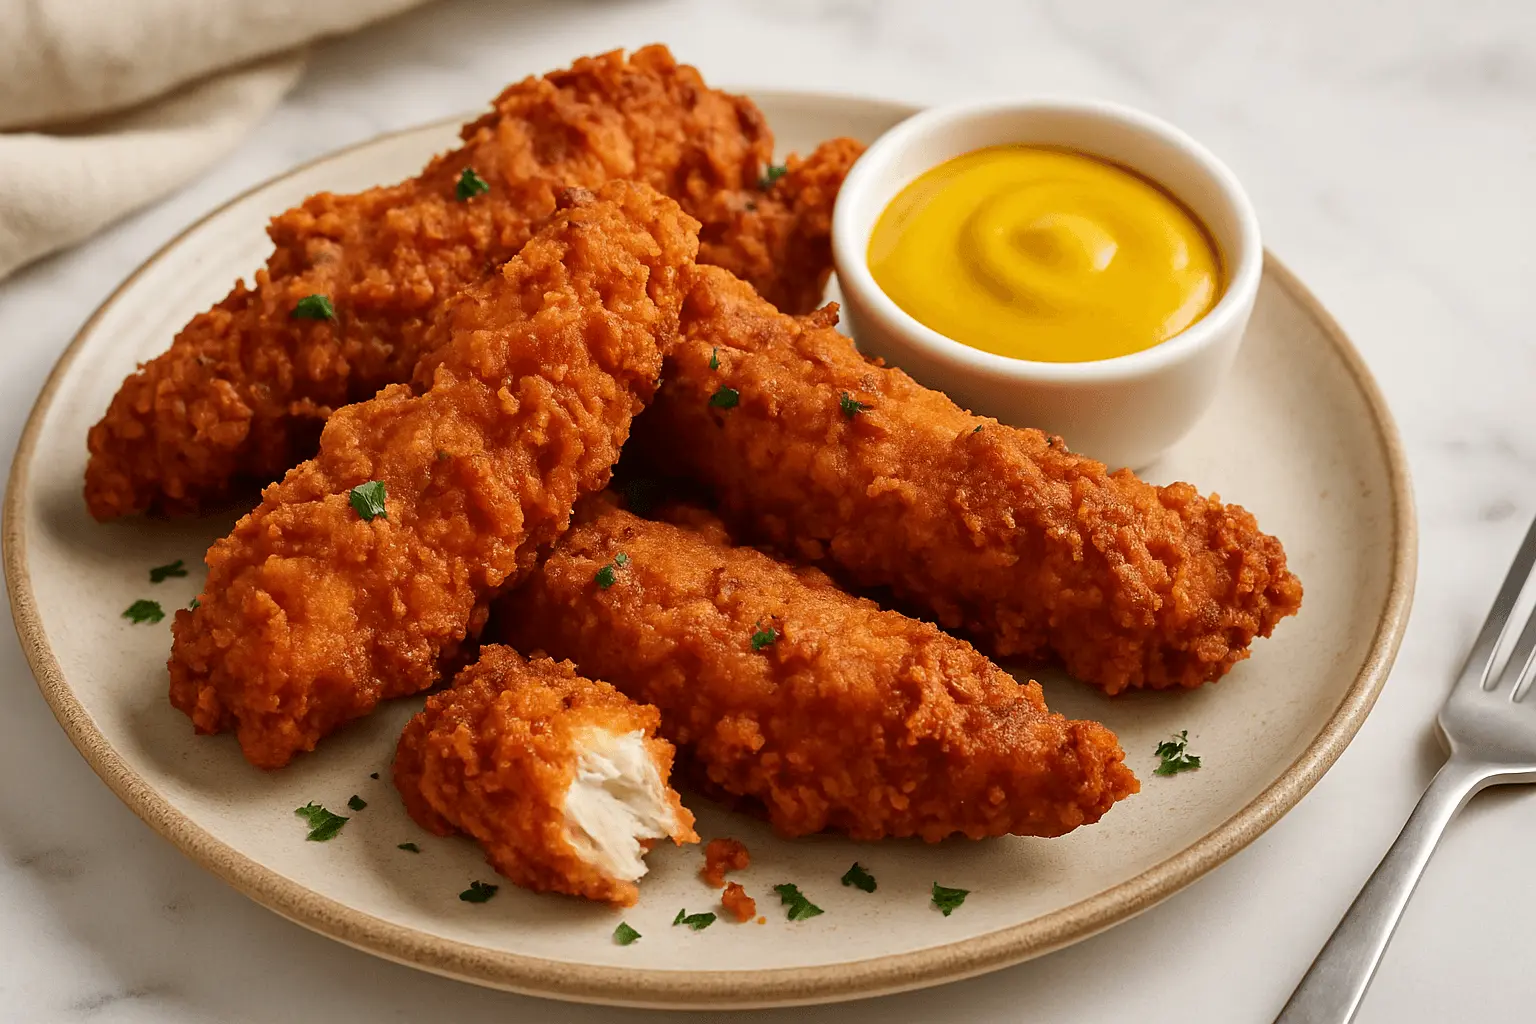
Let’s be honest – sometimes you just want something crispy, golden, and downright satisfying without a big fuss. You know the kind of dinner that gets everyone around the table fast? That’s exactly what this fried chicken tenders recipe delivers. It’s the kind of thing I make when I want something easy, fun, and seriously delicious that feels a little special even on a regular weeknight.
The best part? These tenders come together quickly with pantry staples and just the right amount of crunch. I’ll walk you through every step, from marinating to frying (or air frying!), so your batch turns out flavorful and crisp every single time. You’ll also get tips for storing leftovers, creative serving ideas, and some fun ways to make this recipe your own. Let’s get started – because you’re going to want these on your dinner table soon!
Why You’ll Love This Fried Chicken Tenders Recipe
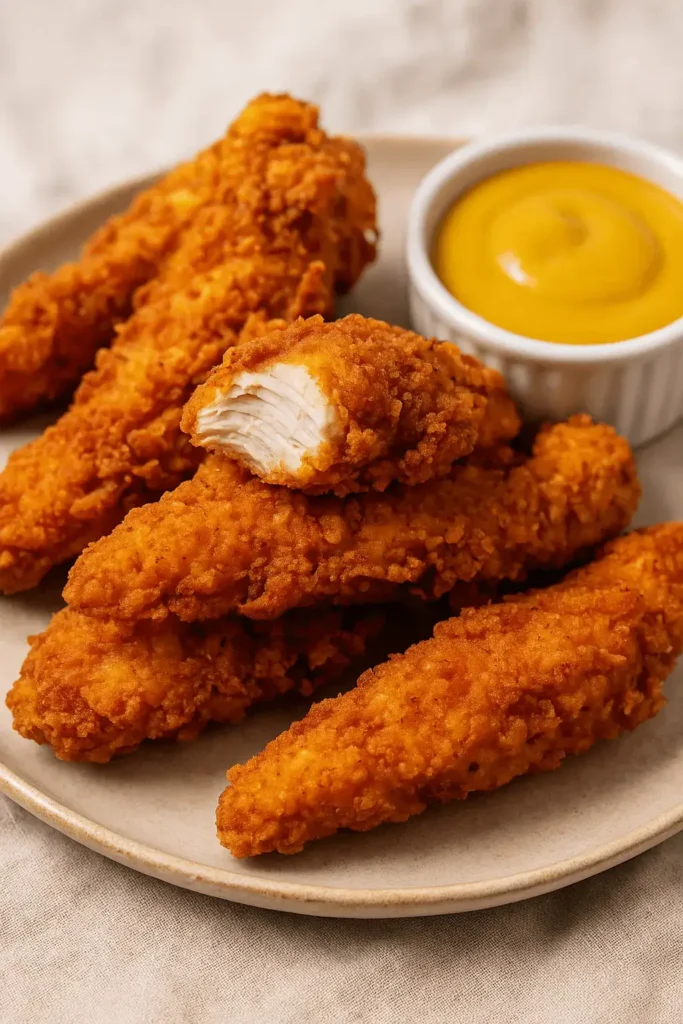
Oh, I can already tell this fried chicken tenders recipe is about to become a favorite in your kitchen. It’s one of those meals you can count on when you need something that feels a little special without any fuss. You’ll love how these tenders turn out perfectly crisp on the outside and tender inside every single time.
- Family-Friendly Anytime: Everyone at the table – kids and grown-ups – will be reaching for seconds.
- Quick to Make: With a simple coating and a short cook time, you’ll have a platter ready fast.
- Flexible Cooking: You can deep fry, air fry, or bake them depending on what works best.
- Easy to Customize: Toss in a pinch of spice or your favorite herbs to make them your own.
Once you’ve tasted that first crunchy bite, you’ll see exactly why these tenders are such a keeper. Let’s jump into what you’ll need to get started!
Ingredients for Crispy Fried Chicken Tenders
Before we roll up our sleeves, let’s gather everything you’ll need for this fried chicken tenders recipe. The beauty of it? Chances are, you’ve already got just about everything on hand. Each one plays a little role in building that crispy, flavorful bite we all love.
Here’s what you’ll need:
Basic Ingredients
- Chicken tenders – 1½ pounds
These cook up fast and stay juicy. You can also slice chicken breasts into strips if that’s what you’ve got. - Buttermilk – 1 cup
Adds depth of flavor and helps tenderize the chicken. A little soak goes a long way! - Large egg – 1
Helps the flour coating grip the chicken just right. - All-purpose flour – 1½ cups
The main base of that crispy coating – perfect for getting that golden crunch. - Cornstarch – ¼ cup
This is the secret to a light, crackly crust. It makes everything crisp up beautifully. - Garlic powder – 1 teaspoon
Brings in savory depth without overpowering the chicken. - Onion powder – 1 teaspoon
Adds warmth and a little balance to the garlic. - Smoked paprika – 1 teaspoon
Gives a subtle smokiness and color to the coating, just enough to notice. - Kosher salt – 1¼ teaspoons, divided
Seasons both the marinade and the coating for full-on flavor. - Black pepper – ½ teaspoon
Adds a little bite – nothing spicy, just a nice balance. - Neutral oil (like peanut or canola) – about 3 cups
You’ll need enough for frying. Go with an oil that can handle high heat without breaking down.
Optional Add-Ins
- Cayenne pepper – ¼ teaspoon
Want some heat? A pinch of this will bring it. - Dried oregano – ½ teaspoon
Great for a touch of herby flavor – especially if you’re leaning toward a Mediterranean twist.
Pro Tip:
Looking to mix things up? Try swapping the smoked paprika for curry powder for an Indian-inspired twist. Or use a dash of cumin and lime zest for a zesty Tex-Mex version. The base recipe is super flexible – just tweak the spices to fit your mood.
All set? Let’s jump into the fun part – making it all come together in the pan.
Step-by-Step: How to Make Crispy Fried Chicken Tenders at Home
Alright, let’s get to the good part – time to turn those ingredients into something delicious. This is where your kitchen starts to smell amazing, and you can practically hear that crispy coating forming as it fries. Follow these steps, and you’ll be serving up a plate of golden, crunchy perfection before you know it.
1. Marinate the Chicken
Grab a medium bowl and whisk together the buttermilk, egg, and ¼ teaspoon of salt until smooth. Toss in the chicken tenders and give them a good mix so every piece gets coated evenly. Cover and let them sit while you prep the coating – 15 minutes is enough, but if you’ve got more time, even better.
2. Mix the Coating
In a large shallow dish (I like to use a pie plate), stir together the flour, cornstarch, garlic powder, onion powder, smoked paprika, the rest of the salt, and black pepper. Make sure everything’s evenly combined so each tender gets the same love.
3. Heat the Oil
Pour about 1½ to 2 inches of oil into a deep skillet or Dutch oven. Turn the heat to medium-high and let it reach 350°F. If you don’t have a thermometer, test by dropping in a tiny pinch of flour – it should sizzle immediately.
4. Double-Dip for Extra Crunch
Take one tender out of the marinade, let the excess drip off, and press it into the flour mix. Then dip it back into the buttermilk briefly and press it again into the flour. That second dip really locks in the crunch. Set each coated tender on a wire rack as you go.
5. Fry in Batches
Once the oil’s hot and ready, carefully lower in a few tenders at a time – don’t crowd the pan! Fry them for about 3 to 4 minutes per side, or until the coating is deep golden brown and the chicken is cooked through (165°F internal temp is the goal).
6. Let Them Rest
Use tongs to transfer the cooked tenders to a clean wire rack placed over paper towels. This keeps them crisp while any excess oil drips away.
7. Repeat and Serve
Fry the remaining tenders in batches, letting the oil return to temperature between each round. Then serve ‘em up hot with your favorite dipping sauce, and watch how fast they disappear!
There’s something so satisfying about cooking these from scratch – it’s the kind of recipe that fills the kitchen with good smells and brings people running. Ready to make them your own? Let’s check out some fun chef tips and variations next.
Fried Chicken Tenders Tips, Tricks, and Easy Variations
If you’re like me, you love when a recipe not only works but gives you little ways to make it your own. This fried chicken tenders recipe is full of wiggle room – from technique tweaks to seasoning swaps. Let’s talk tricks that can help you make these tenders even better next time, plus a few variations if you’re feeling creative in the kitchen.
Helpful Tips for Success
- Use a wire rack for breading and cooling
Placing the coated tenders on a rack before frying helps the coating set and keeps them from getting soggy. After frying, that same rack keeps them crispy while draining excess oil. - Fry in batches
Don’t overcrowd the skillet – doing too much at once lowers the oil temp and affects how crisp your coating turns out. - Keep an eye on oil temperature
A kitchen thermometer really helps here. Staying around 350°F gives you golden, crunchy results without overcooking the inside. - Double-dipping is key
That second dip in the buttermilk and flour mixture gives you that thick, crave-worthy crust. Don’t skip it!
Fun & Tasty Variations
- Air fried chicken tenders: Spray the breaded tenders lightly with oil, then air fry at 400°F for 10–12 minutes, flipping halfway through.
- Oven fried chicken tenders: Preheat your oven to 425°F, place tenders on a wire rack over a baking sheet, spray lightly with oil, and bake for 18–20 minutes until crisp.
- Pan fried chicken tenders: Use about ½ inch of oil and fry over medium heat, turning every couple of minutes until evenly browned and fully cooked.
- Spice it up: Add a pinch of cayenne, chipotle powder, or even Cajun seasoning to the flour mix if your crew enjoys a bit more heat.
- Go herby: Toss in some dried oregano, thyme, or Italian seasoning to give the tenders a fresh flavor twist.
Tenders are one of those foods you can always make “just right” for your family. Now, once they’re crispy and hot, here are some tasty ways to serve them!
Serving Ideas for Fried Chicken Tenders Everyone Will Love
Alright, you’ve fried up a batch of golden, crunchy tenders – and now it’s time to dig in! These chicken strips are super versatile, so whether you’re setting the table for a weekday dinner or feeding a crowd on game night, there are tons of delicious ways to enjoy them.

Serve Them With:
- Classic sides: Think mac and cheese, potato wedges, coleslaw, or corn on the cob for a cozy, comforting meal.
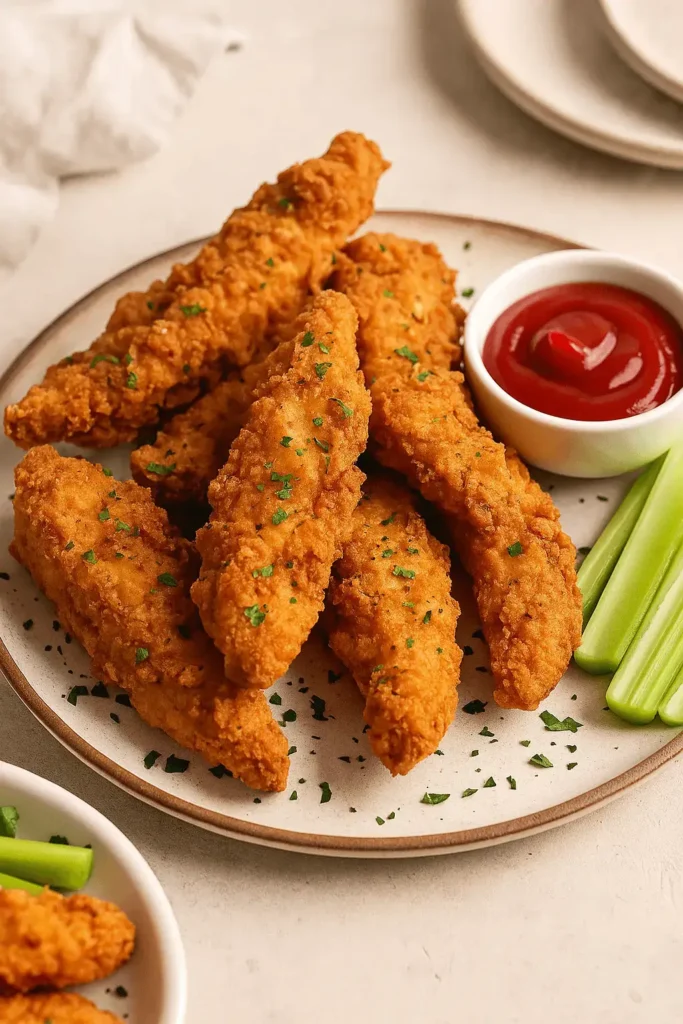
- Kid-approved plates: Add some fries, apple slices, and a little ketchup or honey mustard – done and done!
- Game-day spread: Serve them with a variety of dipping sauces like BBQ, ranch, or buffalo-style. Don’t forget the napkins!
- Wrap it up: Slice the tenders and roll them into tortillas with lettuce, tomato, and a drizzle of your favorite sauce.
- Top a salad: Craving something fresh? Chop the tenders and toss them onto a bed of greens with cherry tomatoes, shredded cheese, and a creamy dressing.
- Stack a sandwich: Layer tenders on a soft bun with pickles and mayo, or go full-out with slaw and spicy sauce for a diner-style sandwich at home.
Once you’ve found your favorite way to serve them, you might wonder what to do with any leftovers. Good news – these reheat beautifully!
How to Store and Reheat Fried Chicken Tenders the Right Way
No one likes soggy leftovers, and with the right approach, you don’t have to settle for them. Here’s how to keep those chicken tenders tasting just as crispy and delicious the next day (or even next week).
How to Store:
- In the fridge: Let the tenders cool completely before storing. Place them in an airtight container lined with a paper towel to help absorb any extra moisture. You can enjoy them straight from the fridge for up to 3 days.
- In the freezer: Lay the cooked tenders on a baking sheet in a single layer and freeze until solid. Then transfer them to a freezer-safe bag or container. They’ll keep for about 2 months.
How to Reheat:
- In the oven: Pop them in a 400°F oven on a wire rack and bake for about 10 minutes, just until they’re heated through and crispy again.
- In the air fryer: This is my favorite way! Set to 380°F and cook for 5–6 minutes, flipping halfway through.
- Avoid the microwave: It softens the coating and takes away the crunch you worked so hard to get. Trust me, the oven or air fryer is worth the extra minute or two.
And just like that, you’ve got crispy tenders all over again, with none of the soggy regret.
That golden, savory crunch doesn’t have to be a one-time thing. With the right tips and a few smart storage tricks, you’ll be pulling out delicious tenders anytime the craving hits.
More Chicken Recipes You’ll Want to Try
Looking for more easy and flavorful ways to enjoy chicken at home? Here are a few reader favorites you might love just as much as this fried chicken tenders recipe:
- Chicken Quesadilla Recipe – Crispy, cheesy, and perfect for weeknights.
- Chicken Meatloaf Recipe – A hearty twist on a comfort classic.
- Jalapeño Chicken Recipe – A little heat and a whole lot of flavor.
- Gluten-Free Chicken Pot Pie – Cozy and satisfying, made without gluten.
- Chicken Pita Recipe – Great for lunch or a quick dinner idea.
- Forgotten Chicken Recipe – Simple to prep and full of homestyle flavor.
- Marry Me Chicken Soup – Creamy, cozy, and made to share.

Crispy Fried Chicken Tenders Recipe You’ll Crave
Equipment
- Mixing bowls
- Whisk
- Shallow dish (for dredging)
- Wire rack + paper towels
- Deep skillet or Dutch oven
- Tongs
- Kitchen thermometer (recommended)
Ingredients
- 1½ lb chicken tenders
- 1 cup buttermilk
- 1 large egg
- 1½ cups all-purpose flour
- ¼ cup cornstarch
- 1 tsp garlic powder
- 1 tsp onion powder
- 1 tsp smoked paprika
- 1¼ tsp kosher salt divided
- ½ tsp black pepper
- About 3 cups neutral oil canola or peanut
Optional:
- ¼ tsp cayenne pepper for heat
- ½ tsp dried oregano for herby flavor
Instructions
- Marinate Chicken:
- Whisk buttermilk, egg, and ¼ tsp salt. Add chicken and soak for 15 minutes.
- Prepare Coating:
- Mix flour, cornstarch, garlic powder, onion powder, paprika, remaining salt, and pepper in a shallow bowl.
- Heat Oil:
- Pour oil into a deep skillet. Heat to 350°F.
- Dredge Chicken:
- Dip each tender in flour mix, back in buttermilk, then flour again. Set aside on a rack.
- Fry in Batches:
- Fry tenders 3–4 minutes per side until golden brown and fully cooked (165°F inside).
- Drain & Serve:
- Let cooked tenders rest on a rack to stay crispy. Serve hot with sauces or sides.
Notes
 Be sure the oil stays close to 350°F for the best results. Always cook chicken to an internal temperature of 165°F for safety and flavor.
Key Takeaways
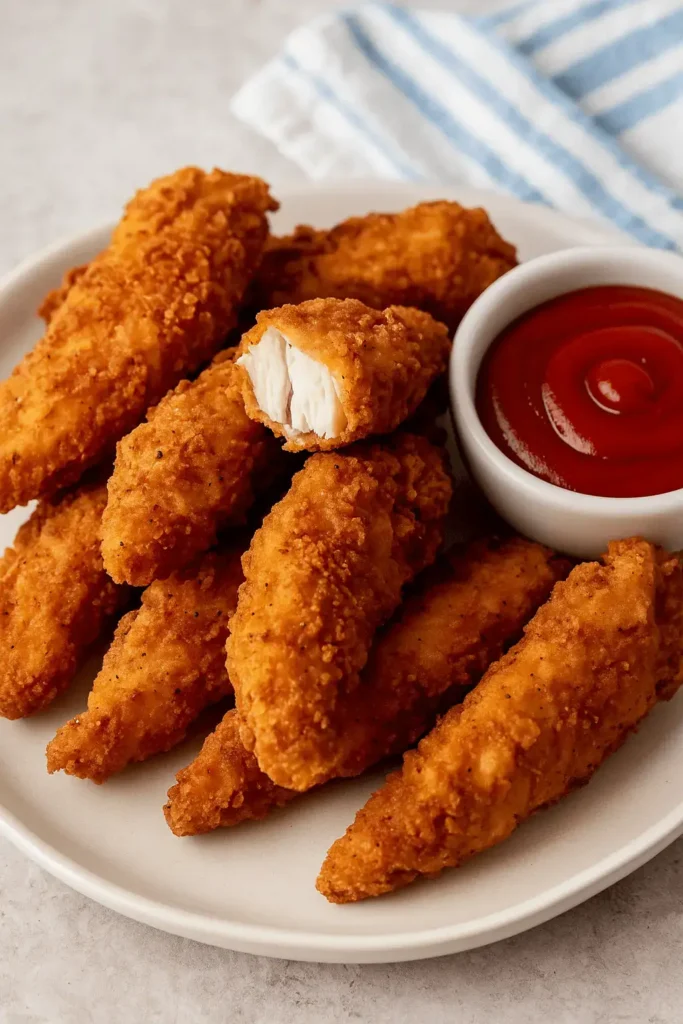
- Crispy coating and juicy center every time
- Comes together quickly with ingredients you likely already have
- Great results whether you fry, bake, or air fry
- Perfect for meals, snacks, or game day
- Stores and reheats well without losing crunch
- Customizable with spices and dipping sauces
These tenders check all the boxes for a fun, flavorful, and family-friendly favorite!
Fried Chicken Tenders Recipe FAQs: Everything You Need to Know
Can I use chicken breasts instead of tenders?
Yes, you can! Just slice boneless chicken breasts into even, 1-inch-wide strips so they cook through at the same time. Then follow the same steps as you would for tenders.
What’s the best oil for frying?
Stick with a neutral oil that has a high smoke point, like canola, peanut, or sunflower oil. These work great for getting that golden crust without affecting the flavor.
Why is cornstarch added to the flour?
Cornstarch helps create a lighter, crispier coating. It pairs with the flour to give your tenders that perfect crunch without feeling heavy.
What’s the trick to keeping the coating from sliding off?
Press the flour onto the chicken gently, and once coated, let the tenders rest for 5 minutes before frying. That little pause helps the coating stick, and keeping the oil steady at 350°F makes a big difference too.
Can I make these tenders ahead of time?
Absolutely! Fry them fully, let them cool, and store them in the freezer. When you’re ready, reheat them in the oven or air fryer to bring back the crispy texture – great for quick meals later in the week.
Is this recipe spicy?
Not at all – it’s mild and family-friendly. If you want to turn up the heat, feel free to add a dash of cayenne or a bit of hot sauce to the marinade for an extra kick.
Got more questions while cooking? Just circle back up to the instructions – we’re keeping things simple and tasty all the way through.
Conclusion
There’s just something special about cooking up a batch of crispy chicken tenders from scratch, especially when the whole table lights up after that first bite. Whether you made this fried chicken tenders recipe for a weeknight dinner or a weekend treat, I hope it brought a little extra joy (and crunch) to your kitchen.
If you gave this recipe a try and loved it as much as we do around here, I’d be so happy to hear what you thought. Leave a quick review and let me know how it turned out – or how you made it your own. Your feedback means the world and helps others find a recipe they’ll love too!